Light firing pin strike - CZ527

Topical Discussions include anything pertaining to Gunsmithing.

Moderators: JackF, Harold_V

User avatar
charlesb
Posts: 25
Joined: Wed Dec 09, 2009 10:16 pm
Location: Deep South Texas

Light firing pin strike - CZ527

Post by charlesb »

My CZ 527 Varmint Kevlar in .223 had a problem with light firing pin strike. - Sometimes there was a failure to fire, and I noticed that the primers were not dented very deeply by the firing pin.

It had more trouble with some brands of ammo than with others. With a few brands, there have been no misfires at all.

I checked the firing pin protrusion and it was .060" - Not that bad... So I suspected the firing pin spring.

I decided to make a .100" washer to go behind the spring, thus causing it to strike a little harder.

Taking a few measurements, I determined that the washer needed to be .348" in outer diameter, .240" in inner diameter, and .100" thick.

Image

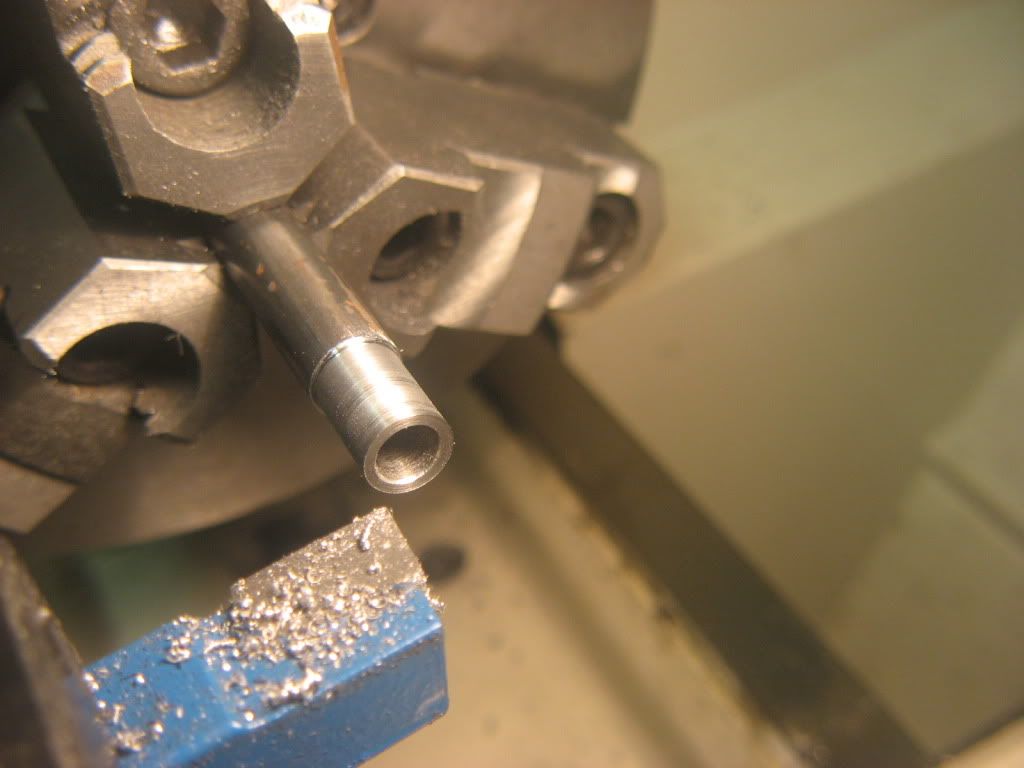
So I chucked up a bit of 3/8" diameter round stock in my lathe.

Image
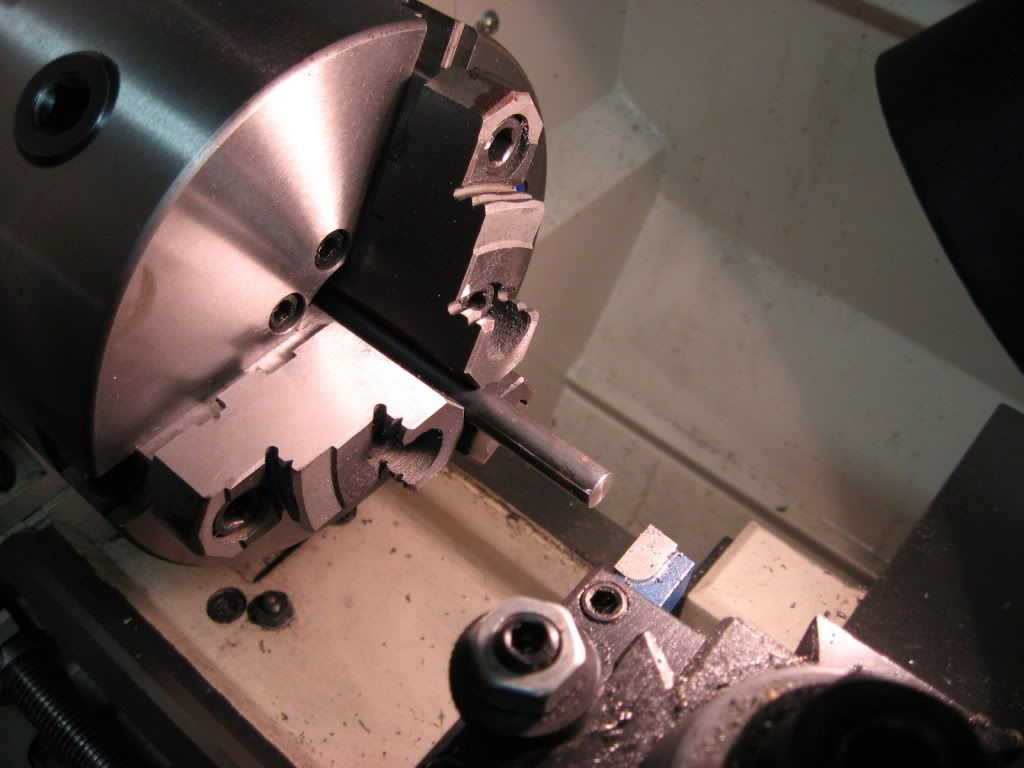
Click these images to see them full-sized

I center-drilled the round stock so it would drill true.

Image

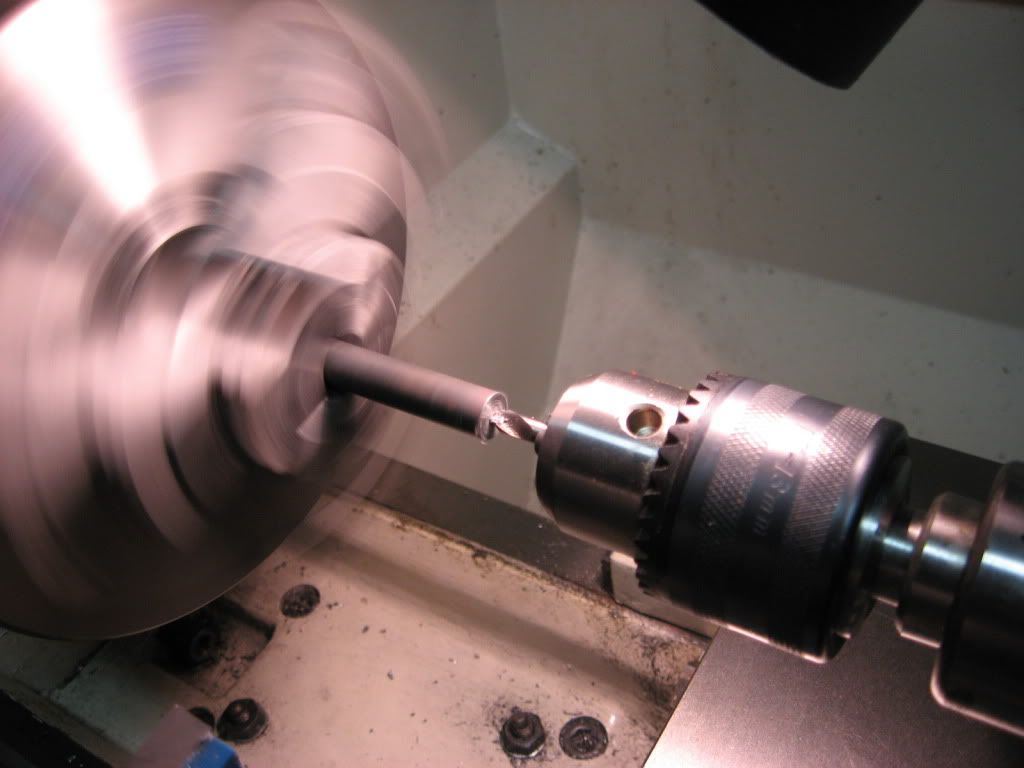
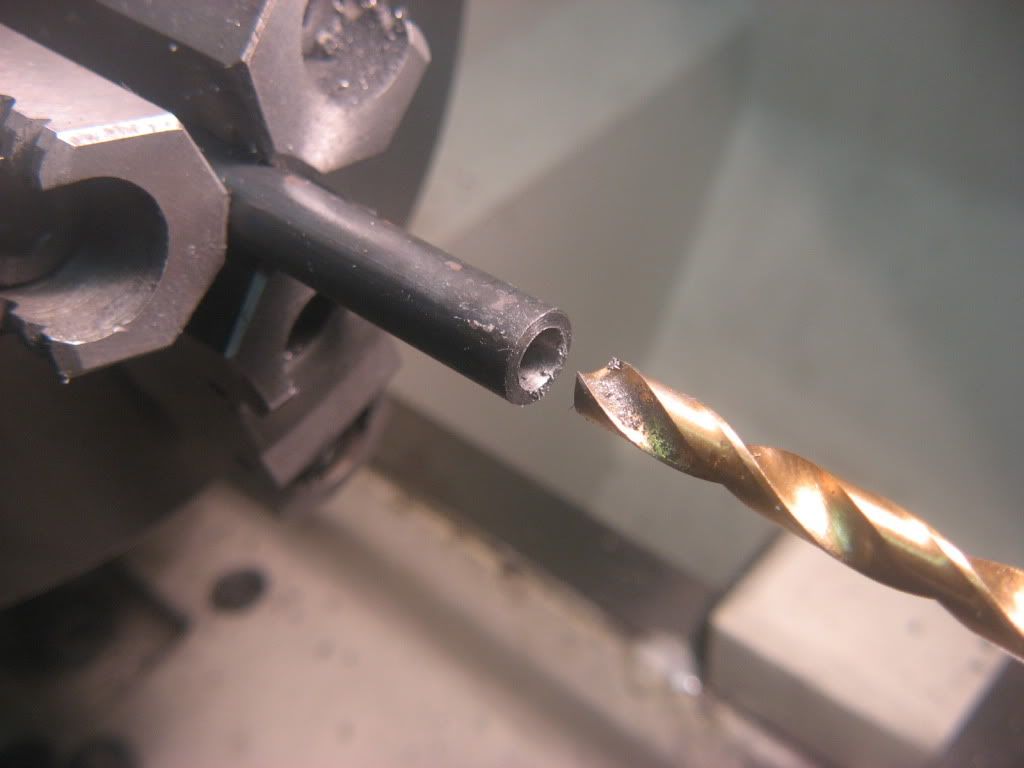
Using a "C" drill for .240" diameter, I drilled about 3/4" deep, in case I needed to make more than one washer.

Image

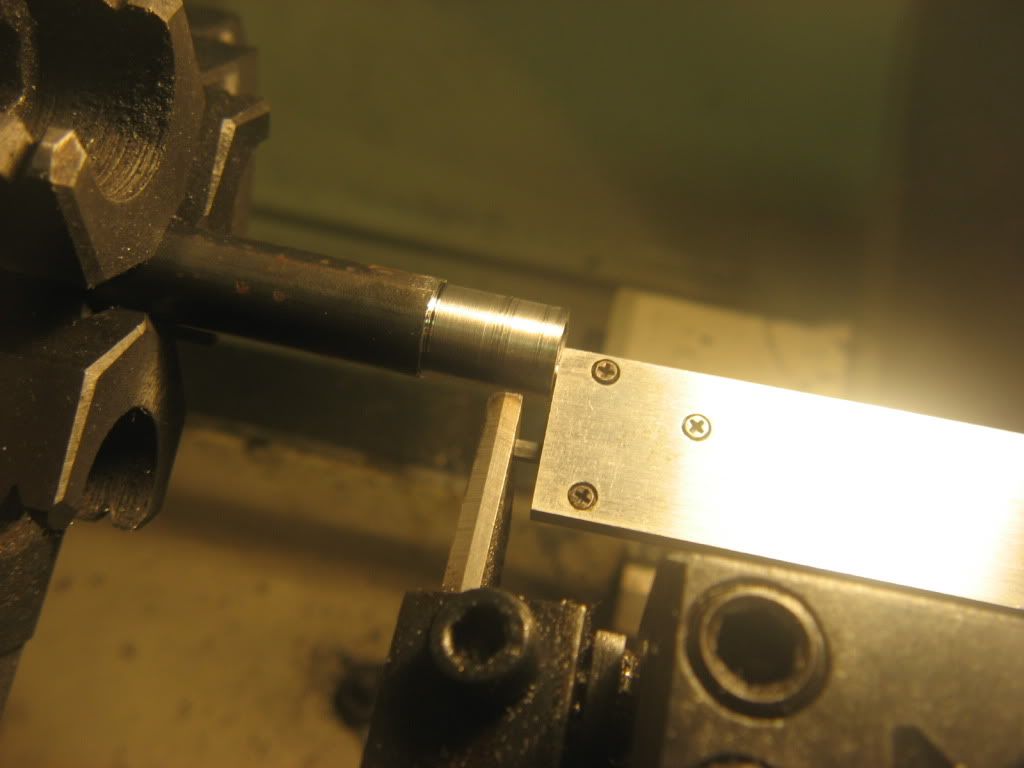
Then I turned down the outside diameter to .348", going as far back on the outside as the drill went on the inside.

Image

Next, I switched over to a cut-off tool, and used the bottom of my dial calipers to set the tool for a .100" slice.

Image

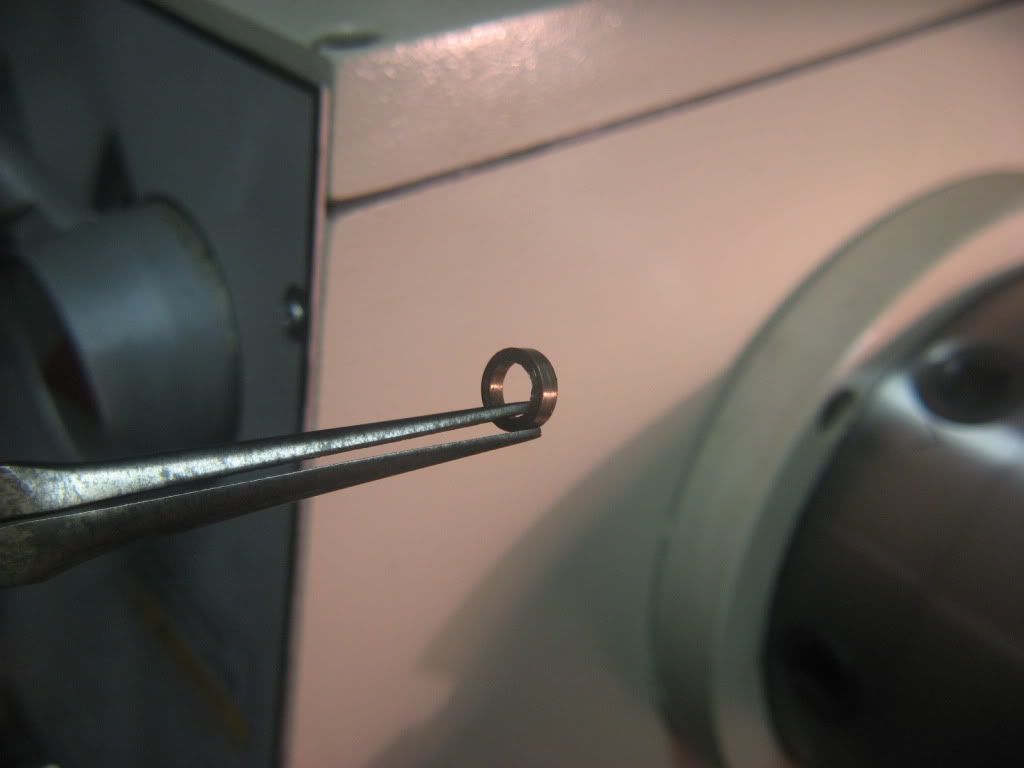
That left me with enough pre-drilled and turned stock left over for another thicker or thinner washer, if needed. It also was good insurance in case I managed to mess the first one up.

Image

So now I had a washer of the dimensions I wanted to try.

Image

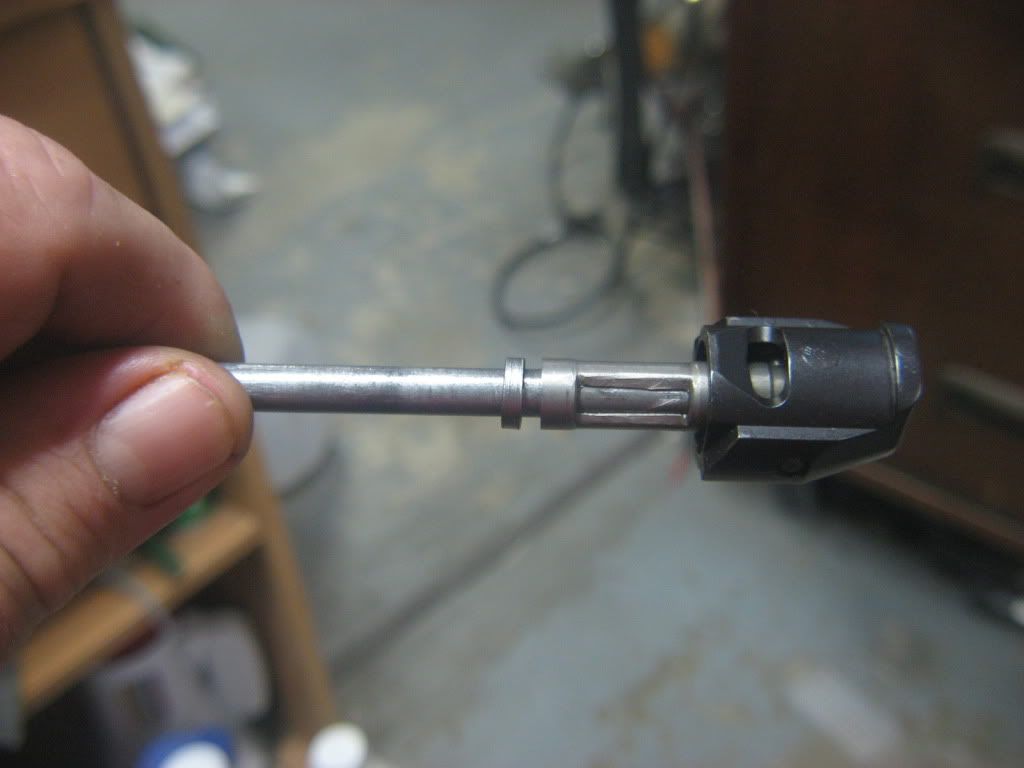
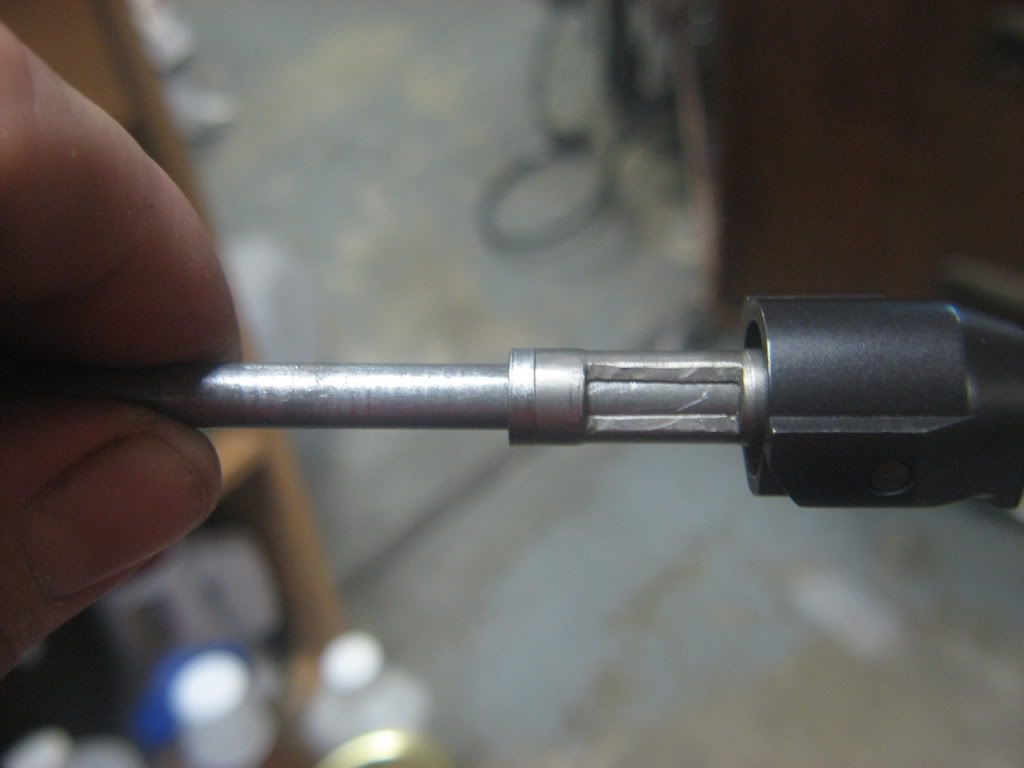
Here's the firing pin as it comes, without the washer.

Image

Having deburred the washer, here I am putting it on, where it will be behind the spring.

Image

Now it's in place.

Image

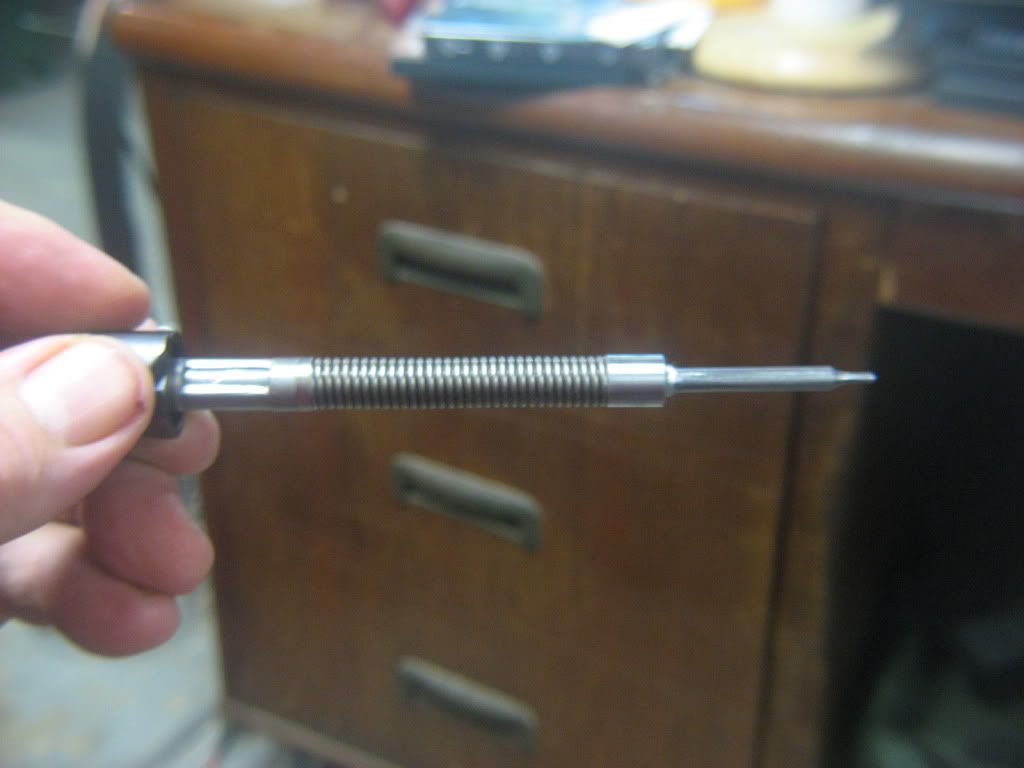
Here is the reassembled firing pin, with the new washer behind the spring.

Image

Now I need to test the rifle with the ammo it was having the most trouble with, to see if I can still get it to misfire.

It's been raining a lot at my location and the range won't be usable for several days, so I decided on a quick test... I went out in the yard and fired two rounds of the ammo I have had the most trouble with into the ground, just so I would have a couple of primers to examine.

Click the image to see it full-sized.

Image

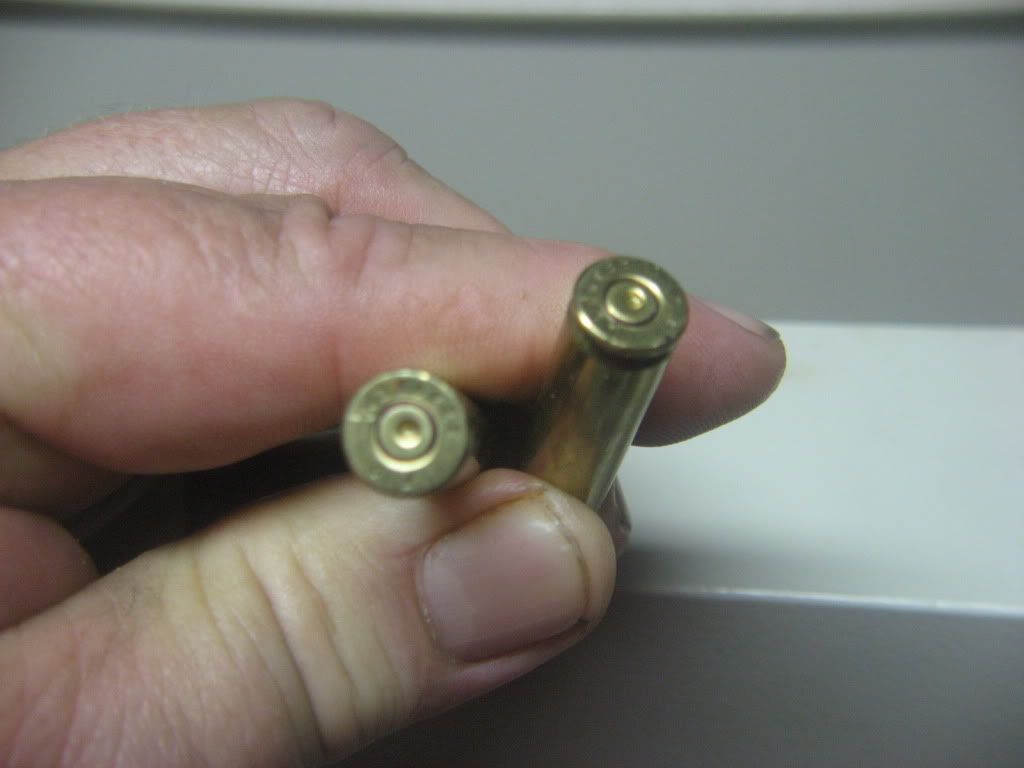
Both rounds fired just fine, but that's no substitute for running ten or twenty of them through there. - I'll wait until I'm at the range for that.

But it looks better to me. The firing pin strike is deeper and more well defined. I'll try to do a more extensive test at the first opportunity, and will report my findings here when I do.
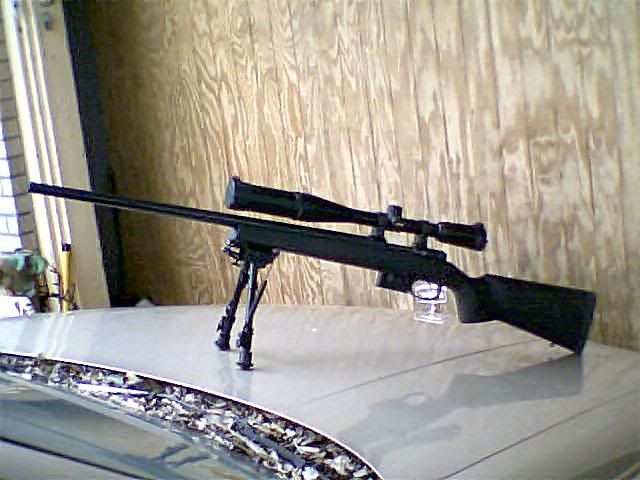
My rifle:

Image
Kind Regards, Charles Brabham

http://ballisticprecision.com
User avatar
Harold_V
Posts: 20251
Joined: Fri Dec 20, 2002 11:02 pm
Location: Onalaska, WA USA

Post by Harold_V »

The indents look real healthy!

Nice job on the modification.

Harold
User avatar
charlesb
Posts: 25
Joined: Wed Dec 09, 2009 10:16 pm
Location: Deep South Texas

Post by charlesb »

Thank you for the kind words, Harold!

I knew that a small percentage of CZ 527 owners have complained about this problem when I bought the rifle, and it looks like I'm one of the unlucky few!

Some have talked to the CZ folks and returned their rifles for a fix, and others have bought aftermarket springs, but I have also heard of owners putting a washer on the firing pin to compress the spring a little further, and I thought I'd try that.

While I was at it, I documented the procedure to make it easier for others to do the same thing. I included the dimensions in case somebody might want to have the part made up by a local machinist or gunsmith.

I like the little CZ mini-mauser varminter quite a bit, and look forward to seeing how it behaves on the range with the modification. I have a theory that more consistent, positive ignition may make the little gun even more accurate than it already is.

We had a little over 4 1/2 inches of rain here, so I'll probably have to wait at least a week before I can sit down at a bench and see what it will do. I did stop by one of the drainage canals here the other day though and did some plinking, using the trunk of my car as a rest. I fired five rounds of the ammunition that I had had the most trouble with. They all fired, and all of the primers showed a good indent.

I am optimistic that the modification may have fixed the problem, but I won't have bragging rights on the mod until I have put a good number of rounds through the gun with no misfires.
Kind Regards, Charles Brabham

http://ballisticprecision.com
deltaenterprizes
Posts: 42
Joined: Sat Jan 06, 2007 5:16 pm
Location: longvew,tx

Similar Problem with Remington 700

Post by deltaenterprizes »

I have been having a similar problem with a Remington 700 and a Turkish Mauser and I had thought of trying that fix.
How did you determine the thickness dimension?
User avatar
charlesb
Posts: 25
Joined: Wed Dec 09, 2009 10:16 pm
Location: Deep South Texas

Re: Similar Problem with Remington 700

Post by charlesb »

deltaenterprizes wrote:I have been having a similar problem with a Remington 700 and a Turkish Mauser and I had thought of trying that fix.
How did you determine the thickness dimension?
I looked at the compressed spring, upon removing the firing pin and guesstimated a dimension that would compress the spring further without the coils ending up touching each other.

I set things up so it would be easy to make a second washer ( thicker or thinner ) if my guesstimate was off, but my micrometer eyeball served me well this time so no second try was necessary.

What I tried to do was to mentally add up the open space between all the coils, and then divide that in half. - I just eyeballed it and came up with 1/10th of an inch.

The proper way I suppose would be to use a feeler gauge to measure the distance between the coils and call that "A". Then count the number of spaces between coils and call that "B"... Then multiply A x B for "C". Divide C by two and that's a good starting point for the spacer thickness. It will tighten things up without causing the coils to touch.

There needs to be some space between the coils on the CZ firing pin in order to put the firing pin and spring together again. This is probably true of the Mauser and maybe the Remington firing pin as well. I am not familiar with the Remington action. The spring retainer must be pushed past a certain point of compression, rotated 90 degrees and then released into the locked position on my little CZ.

If you absolutely, positively cannot get the spring retainer to go back on because the coils are touching so the spring can't compress any further, then the washer is too thick and needs to be reduced a little bit. - Or make another, thinner one.

On the Turkish Mauser, measure the firing pin protrusion. It should be at least .050 to .060" and I have read that sometimes they don't stick out enough. To measure it you have to remove the bolt, then rotate the cocking piece so that the bolt is uncocked and the firing pin sticks out of the bolt face.

The fix there, if I remember correctly is to carefully remove some material from the front of the cocking piece so that the pin can go further forward in the bolt. Take a look and see what limits the travel... That's the part that is reduced. You have to creep up on it, taking off a little bit at a time and trying it out until you get the result you are after.

Remingtons are great guns, but I've never worked on one so the internal workings of the Remington bolt is a mystery to me.
Kind Regards, Charles Brabham

http://ballisticprecision.com
barnes_gunworks
Posts: 62
Joined: Thu Feb 04, 2010 9:39 pm
Location: East Texas

Post by barnes_gunworks »

i got a warning to give you guys. if ya got a .223 do not shoot cheap surplus ammo though the gun. theres a differance between .223 and 5.56 nato, the nato round is slightly longer and higher pressure with a harder primer. as such it can cause a tight .223 chamber to over pressure on you......
www.chaski.com
User avatar
charlesb
Posts: 25
Joined: Wed Dec 09, 2009 10:16 pm
Location: Deep South Texas

Post by charlesb »

I run the cheap steel-cased stuff through my AR15, but the bolt rifle only gets fed the commercial brass-cased, boxer primed stuff. - The cheapest thing I shoot through it is the 100 round "value pack" of Federal brand ammo that my local Wal-Mart sells.

I don't do too much plinking with the bolt rifle though, as the AR15 is a natural for that. Most times the bolt gun is shooting the pricey stuff, or my most finicky reloads.
Kind Regards, Charles Brabham

http://ballisticprecision.com
barnes_gunworks
Posts: 62
Joined: Thu Feb 04, 2010 9:39 pm
Location: East Texas

Post by barnes_gunworks »

as long as its not the lake city federal ammo. thats milspec stuff and would most likly be the same as 5.56 nato. american eagle would be good though
www.chaski.com
Al_Messer
Posts: 2664
Joined: Sat Jan 04, 2003 7:12 pm
Location: Mid Tenn.

Post by Al_Messer »

Dumb question: The NRA Handloading book lists the length of the .223 Remington as being 1.760 inches in length. How much longer is the 5.56mm?
Al Messer

"One nation, under God"
barnes_gunworks
Posts: 62
Joined: Thu Feb 04, 2010 9:39 pm
Location: East Texas

Post by barnes_gunworks »

ummm its metric length is given as 5.56x45mm and the .223 is usually given as 5.56x43mm when converted to metric. i dont know if thats the actual length and my SAMMI book is at my shop about 3 hrs away, ill get a look into the book when i remember and give ya their stated length. (not sure if i got the acrynim right)
www.chaski.com
GeorgeGaskill

Post by GeorgeGaskill »

Actually it's SAAMI for Sporting Arms and Ammuniton Maunfacturers Institute.
barnes_gunworks
Posts: 62
Joined: Thu Feb 04, 2010 9:39 pm
Location: East Texas

Post by barnes_gunworks »

my brain got scrambled a bit from a wreck i was in bout 6 moths ago, sry for the inaccuracy ( wasnt 100% sure of the acrynim at the time of the post)
www.chaski.com
Post Reply