Making a "lantern chuck"

The Photo Album is a place for "Shop Shots" as well as pictures and descriptions of projects that we are working on. Show off your Shops, Machines, and your Projects!

Moderator: Harold_V

Post Reply
User avatar
mars-red
Posts: 84
Joined: Sat May 11, 2013 12:30 pm
Location: New Hampshire
Contact:

Making a "lantern chuck"

Post by mars-red »

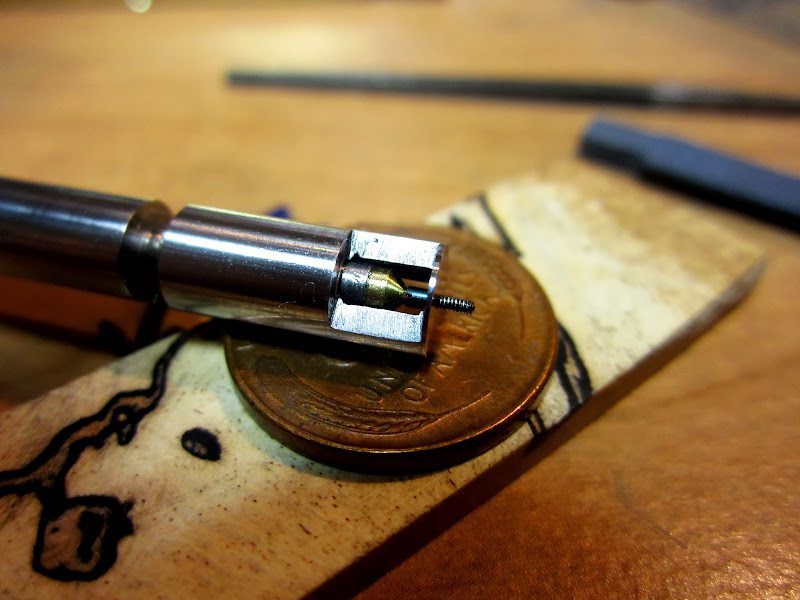
Here's what I've been doing in my spare time over the past few days. A recent acquaintance of mine expressed interest in trading an item to me in exchange for some sort of home made tool. He mentioned that a lantern chuck would be useful, so I set to work and tried out some ideas. A "lantern chuck" is a hand held chuck for holding really small screws so that the threaded ends can be worked on (typically that would be things like filing them down to size, rounding, and polishing). It's been pretty fun to make, and gave me an excuse to get out the milling attachment for the watchmaker's lathe, which I very much enjoy using.

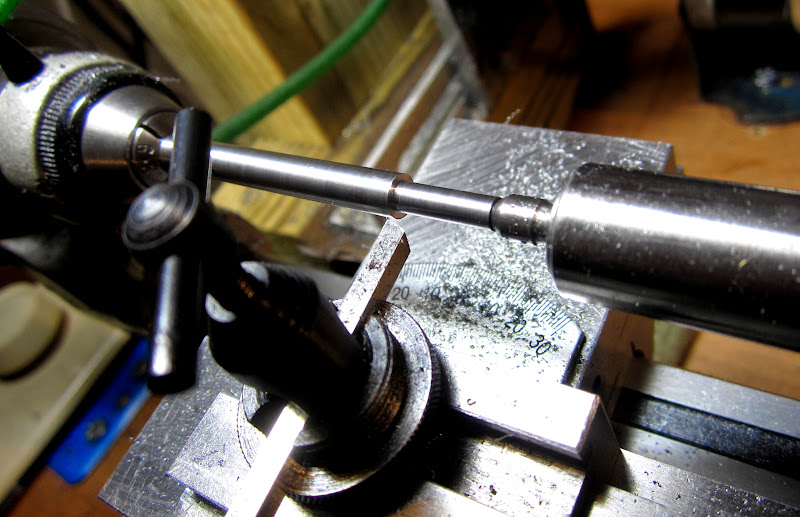
I started with some O1 drill rod for the body of the tool. Most stuff I turn on the watchmaker's lathe isn't long enough to need the tailstock for support, but this sure was:
Image

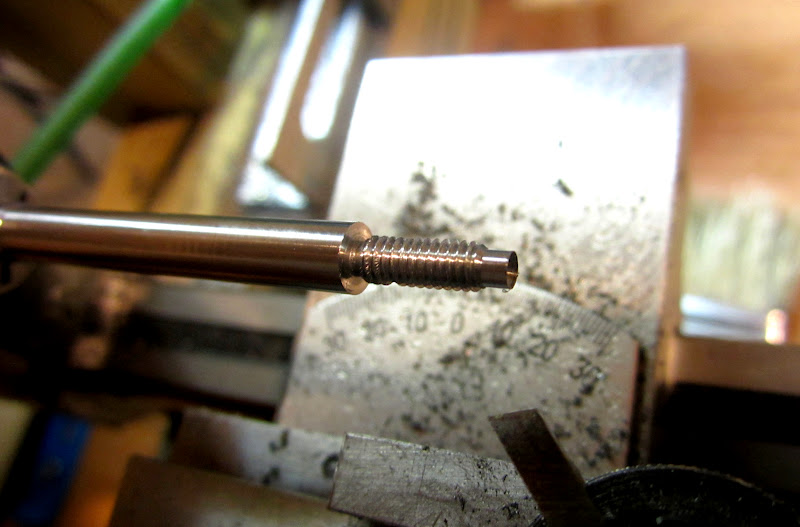
Ready for threading with M4x0.75 threads:
Image

The last few threads ended up with some galling, which I was pretty bummed about. Here it is after threading, and turning down the very end a little more. I'm leaving the center-drilled end to receive a tiny brass pusher piece.
Image

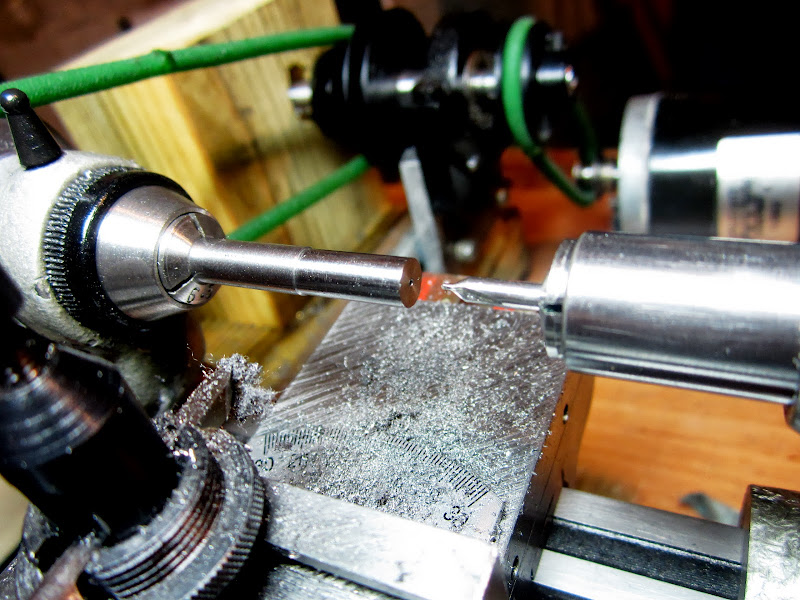
For the lantern, some more O1 was used and I started by taking a truing cut and then drilling the "business end" (where the threads of screw being worked on will stick through). For the first lantern, I'm using a hole 0.8mm in diameter:
Image

I didn't get a picture of the next operation, but I parted off the lantern and then reversed it in a collet to drill from the backside, stopping well before breaking through the other side.
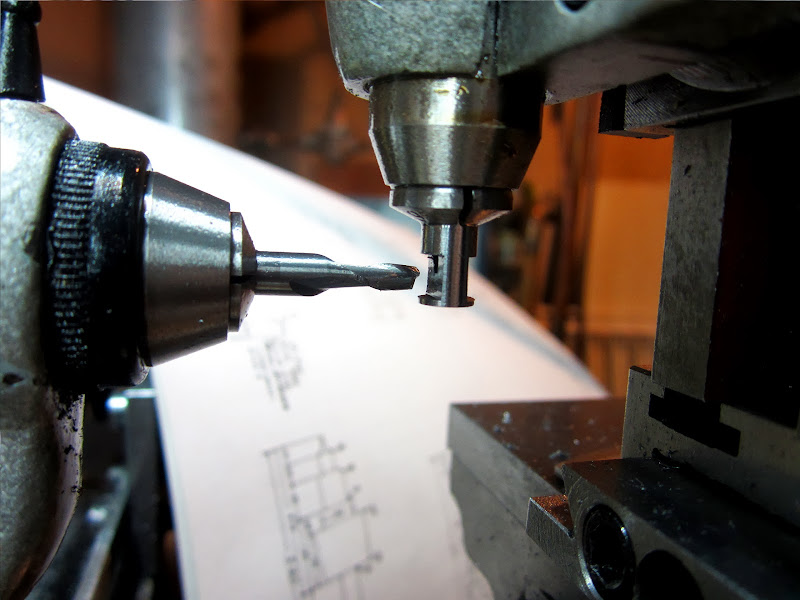
Now the fun part, milling out the sides of the lantern. You can see that I didn't drill far enough from the back side, but no big deal - I returned the lantern to the lathe and drilled a little deeper.
Image

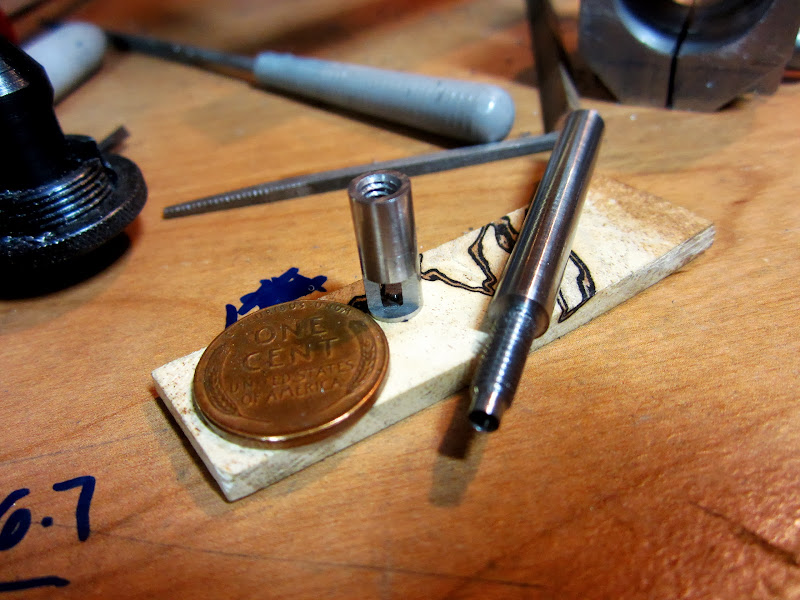
After cleaning up the opening through the lantern a bit with a tiny square file with a safety edge (visible in the background of the next couple of photos), I had something that was beginning to resemble a tool:
Image

Image

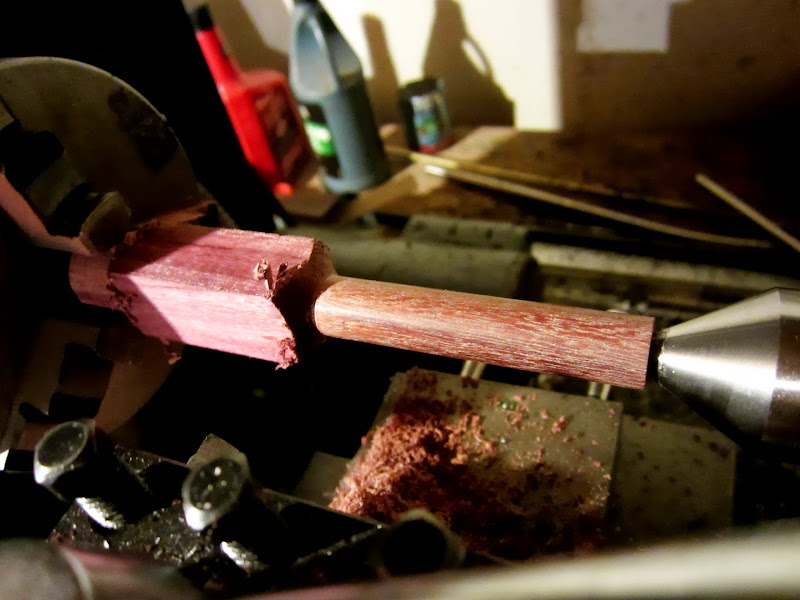
Now I needed to think about what to do for a handle. I pretty much avoid woodworking unless I'm feeling particularly adventurous. There was no way around it though, I needed to use some pretty hardwood that would contrast nicely with a brass ferrule. My oldest boy and I took a trip to Woodcraft and purple heart seemed to be the order of the day. This would be a tiny handle, so a pen blank was more than enough for this project. I had no idea purple heart was so cheap, the pen blank was less than $2. While we were there, my boy noticed the pen turning kits they had - his face lit right up and he said he wanted to make his own pen when he's older! :) Anyway, time to make a giant mess and try turning some wood for the first time ever:
Image

This is what I ended up with - I'll go ahead and call it a success!
Image

My next challenge was to find some brass for a ferrule. I thought I had some stock that would work but it was too small - I needed something in the neighborhood of 1/2". Some scrap that used to be the head of a small jeweler's hammer ended up being just the ticket. For that reason, there were some contours I couldn't quite turn down far enough in some areas so there are some imperfections. Nevertheless, I'm really happy with the way it turned out. I quickly filed a tapered square tang onto the end of the tool to be pressed into the handle. Before installing the handle, here's how things were looking:
Image

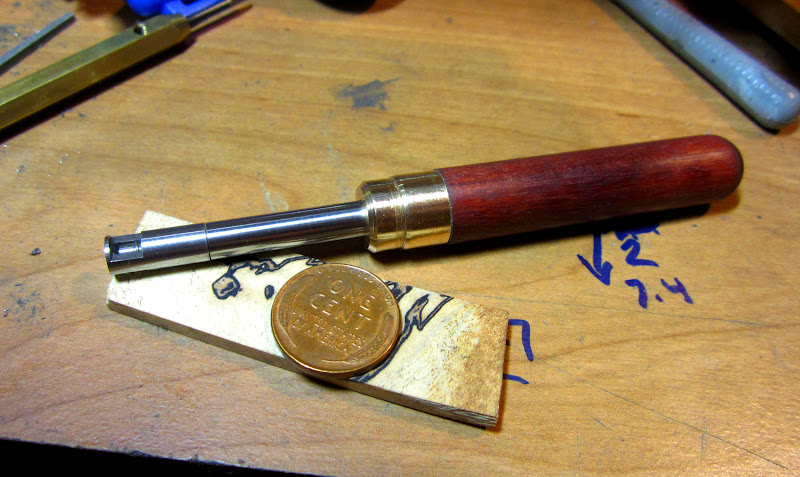
And here it is with the handle installed:
Image

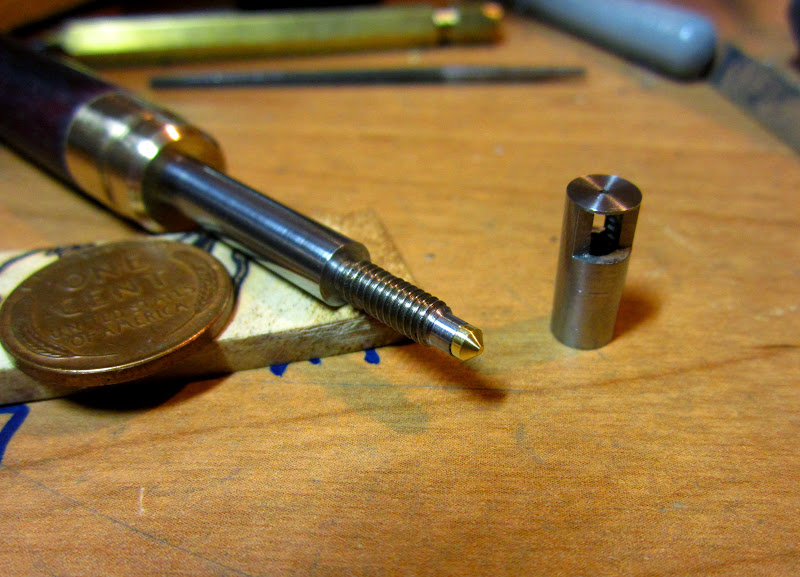
I now need to make a tiny point out of brass, to fit the pusher end of the tool (that will actually press against the head of the screw to hold it in place). I also need to make a couple more lanterns, and it looks like the 0.8mm one I already made will be the largest. The other 2 will be 0.4mm and 0.6mm.
User avatar
Harold_V
Posts: 20244
Joined: Fri Dec 20, 2002 11:02 pm
Location: Onalaska, WA USA

Re: Making a "lantern chuck"

Post by Harold_V »

Very nice!
I specialized in small work when I operated my commercial shop. It's a rare individual who can do it and not go insane!

Harold
Wise people talk because they have something to say. Fools talk because they have to say something.
hammermill
Posts: 2938
Joined: Sun Jun 27, 2010 10:43 pm
Location: pendleton or

Re: Making a "lantern chuck"

Post by hammermill »

thanks for posting the pic,s i learned something, no comment on insanity :mrgreen:
User avatar
mars-red
Posts: 84
Joined: Sat May 11, 2013 12:30 pm
Location: New Hampshire
Contact:

Re: Making a "lantern chuck"

Post by mars-red »

LOL thanks guys! If you get a kick out of tiny work, then I'll have to post up pics when I get around to making my next pocket watch balance staff. The diameter of the pivots is going to be about 0.008". That can be a really humbling experience.
User avatar
mars-red
Posts: 84
Joined: Sat May 11, 2013 12:30 pm
Location: New Hampshire
Contact:

Re: Making a "lantern chuck"

Post by mars-red »

I just finished making the little brass tip, and also heat treating the 0.8mm lantern... so I figured I'd show a picture of it in use.

Here is the brass tip, snapped into the end of the tool:
Image

And here is a little screw held securely in place:
Image
User avatar
RCW
Posts: 430
Joined: Thu May 19, 2011 12:54 pm
Location: Valle de Oro, TX [near Amarillo]

Re: Making a "lantern chuck"

Post by RCW »

Where did you get that oversize penny? :lol:
--Bob
User avatar
mars-red
Posts: 84
Joined: Sat May 11, 2013 12:30 pm
Location: New Hampshire
Contact:

Re: Making a "lantern chuck"

Post by mars-red »

RCW wrote:Where did you get that oversize penny? :lol:
Haha! Giantpennies.com, for all of your oversized penny needs. :)
Post Reply