Fairbanks Morse repairs
Posted: Sun Oct 31, 2010 10:39 am
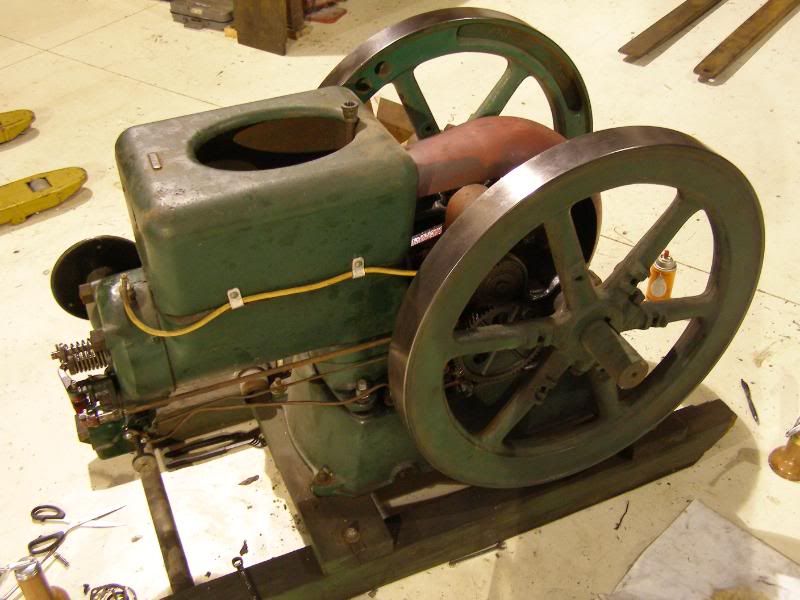
I drug my 1924 6hp Fairbanks Morse Z engine (900 lbs) off of the shelf to tinker with and decided to repair a few things.
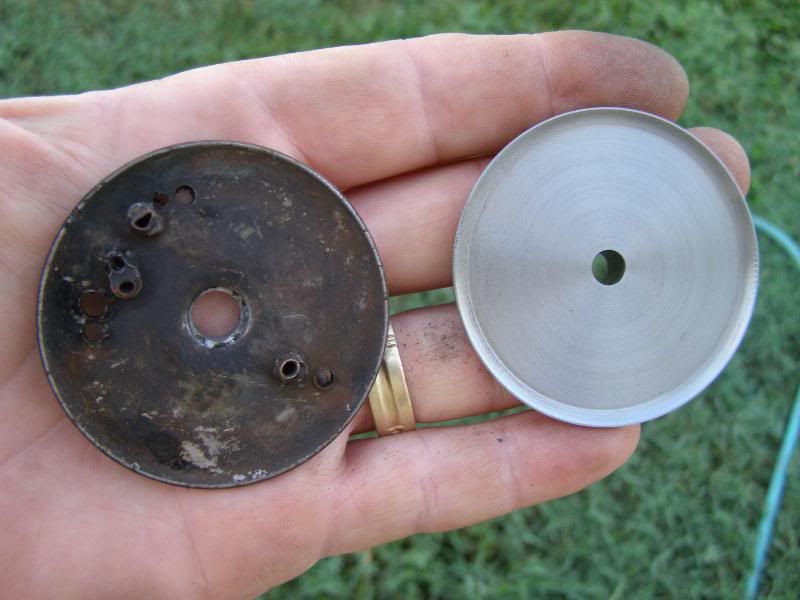
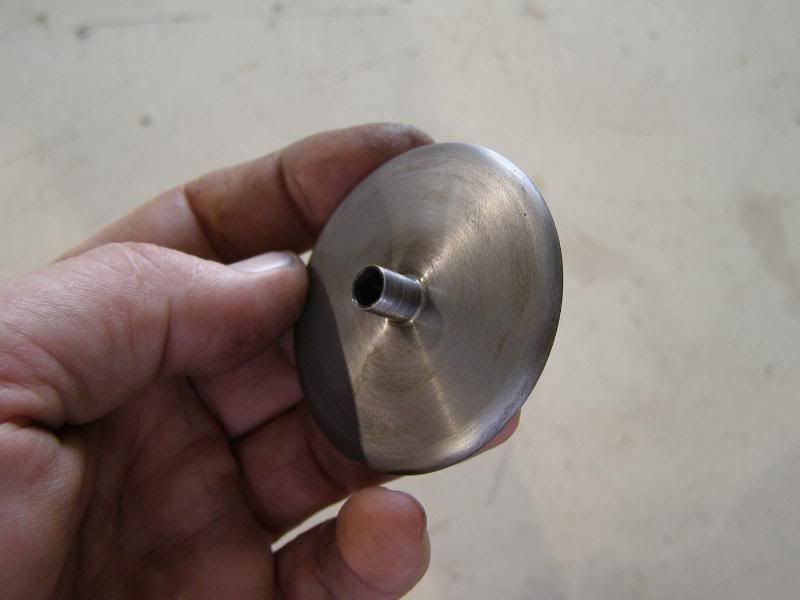
First problem was the air valve on the mixer, (carburetor) which was worn out, riddled full of excess holes, and had a few holes plugged and brazed up, so I made a new one.
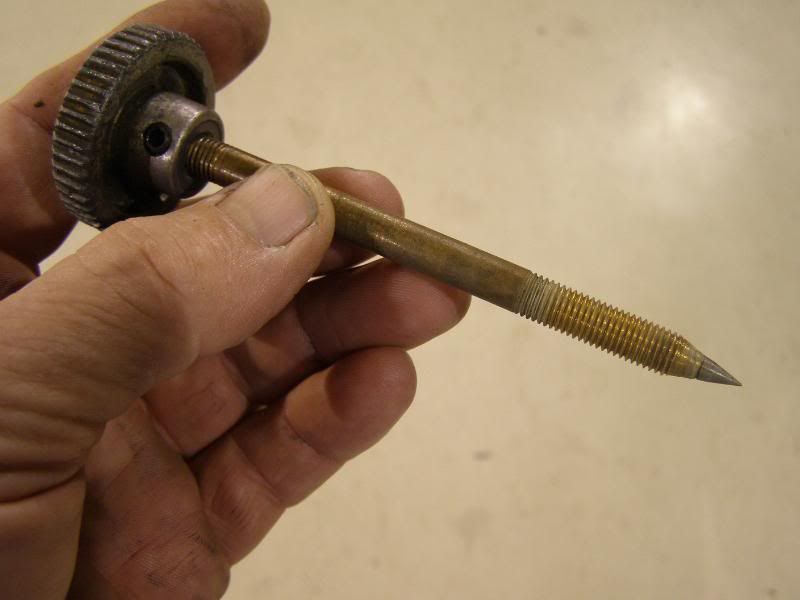
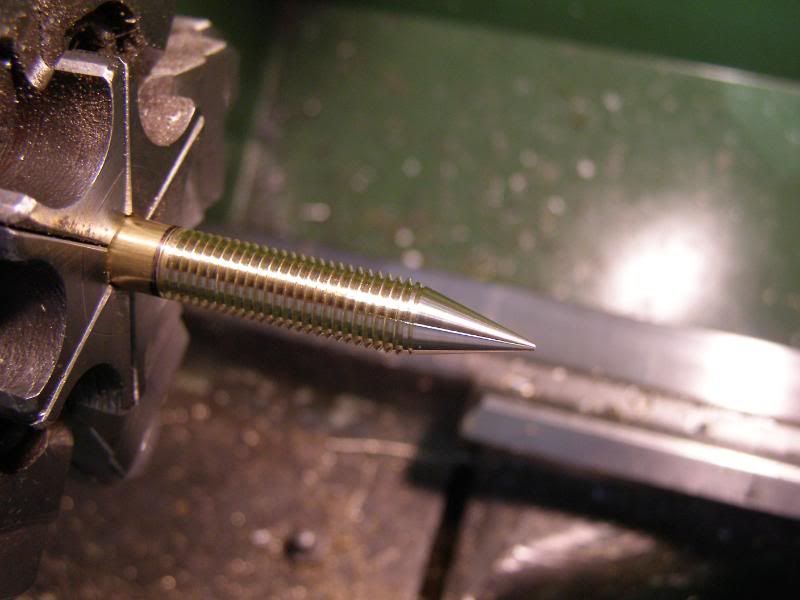
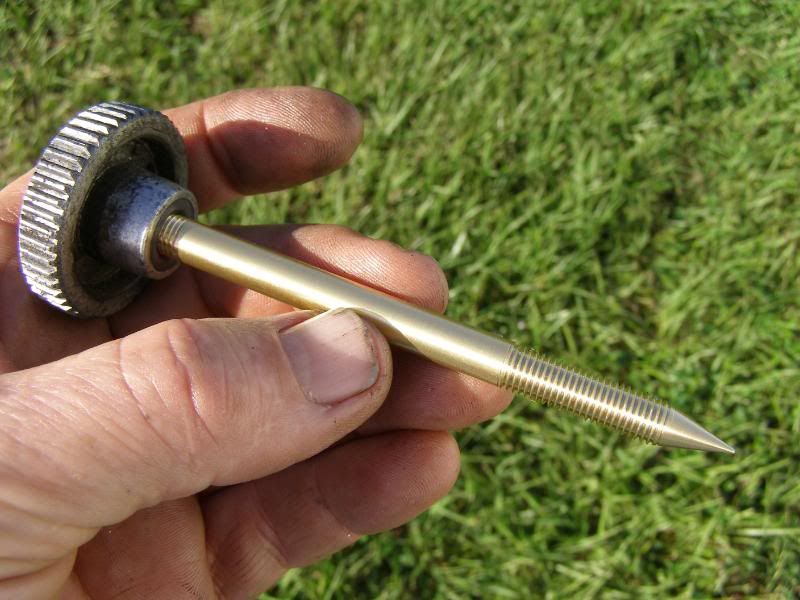
Next was the starting fuel needle valve which had been repaired by drilling the old tip, threading it, installing a steel screw, and re-tapering it. So I made a new one.
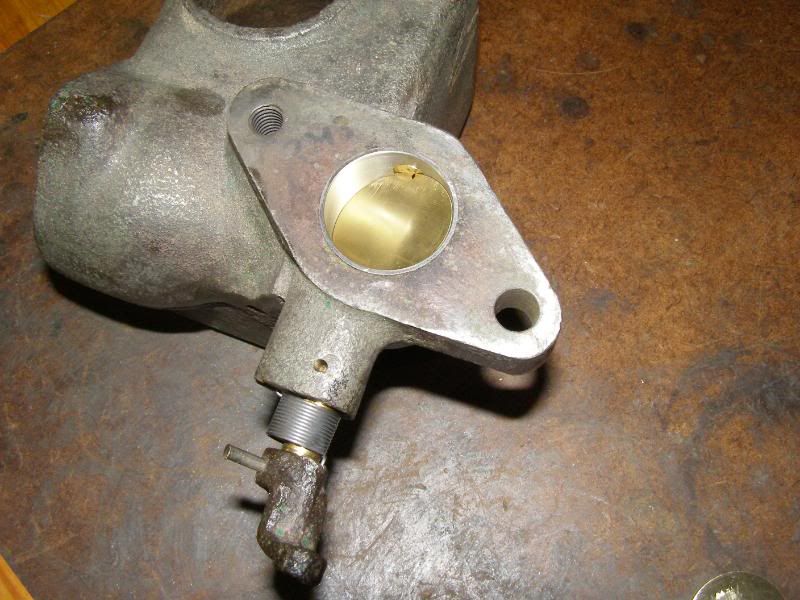
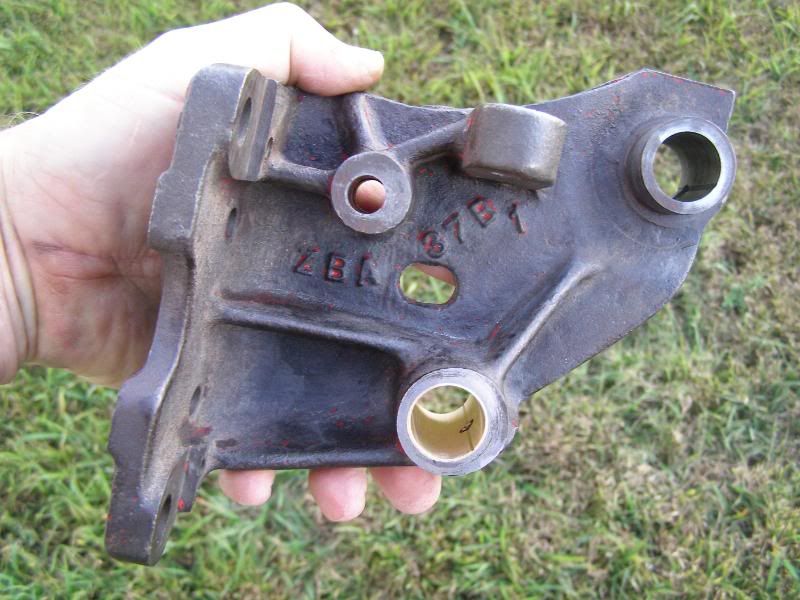
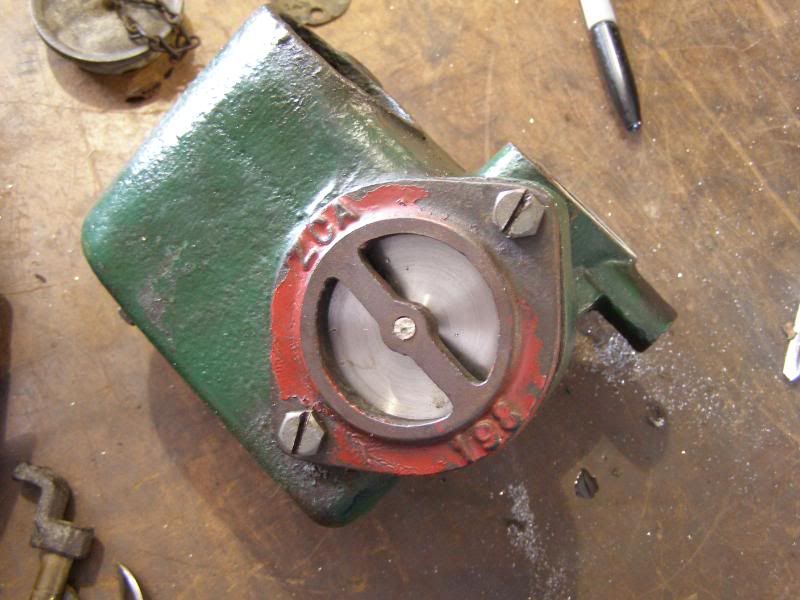
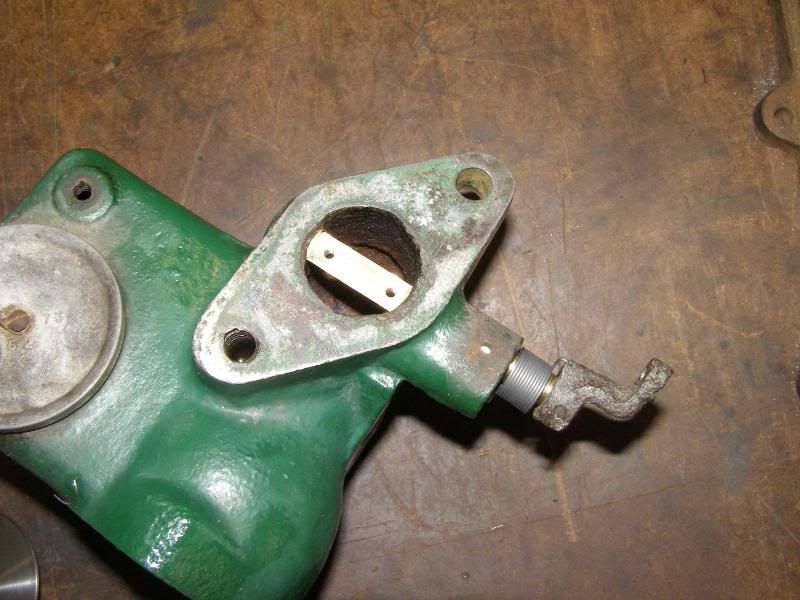
Next on the list was a sloppy throttle shaft and worn throttle plate.
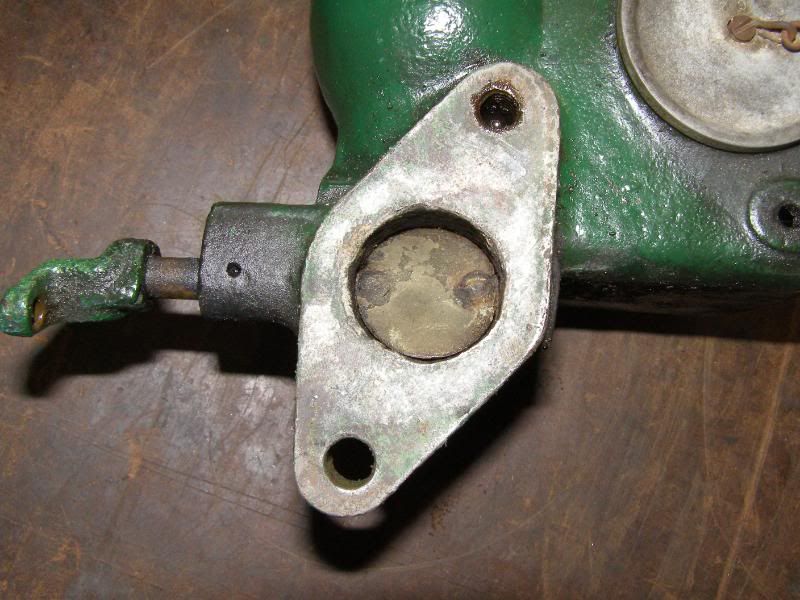
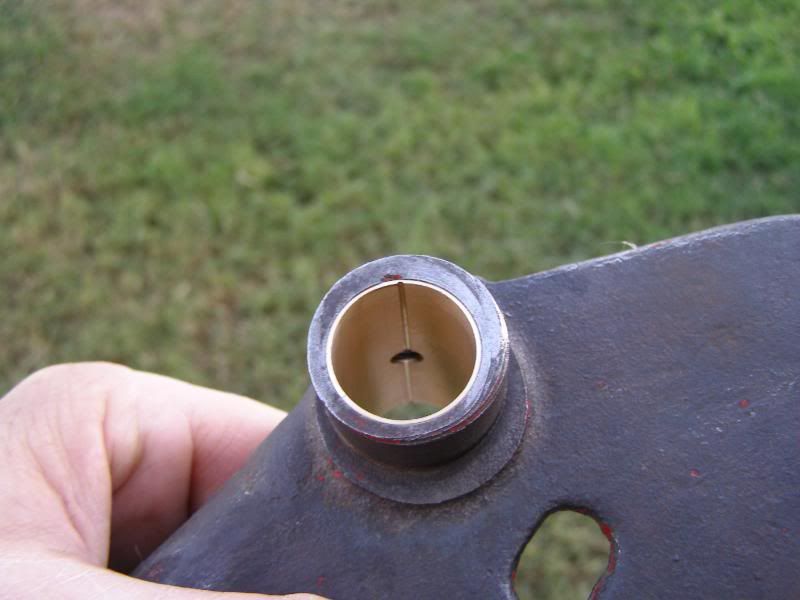
The throttle shaft bore was worn and misaligned as the casting most likely shifted in the last 86 years so I line honed the bore until it was straight and round, which took it from .375” to .385”.
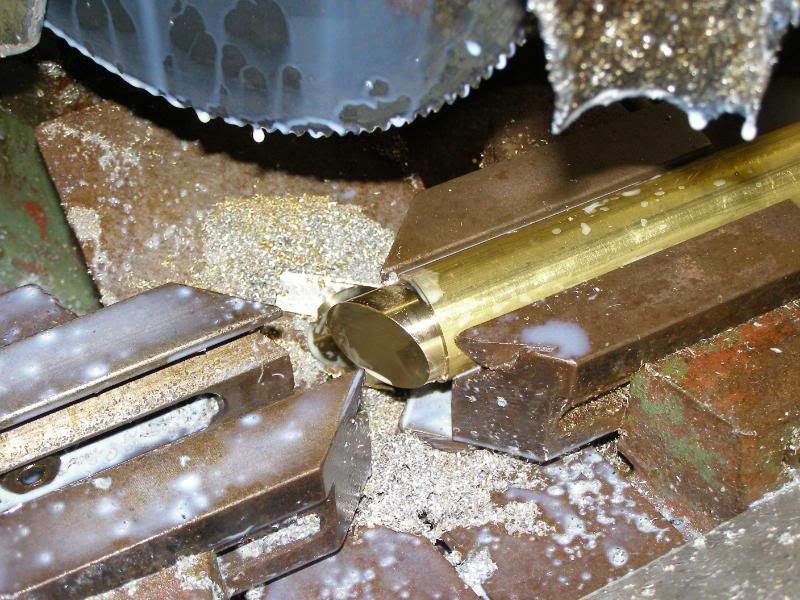
Next I took some 7/16 brass rod (original shaft is brass) and turned it down to .384” and a short area on the end to .375” to accommodate the throttle arm. Then milled the flat on it for the throttle plate and then drilled and tapped it for the throttle plate screws. It fits in the bore and rotates with silk smoothness.
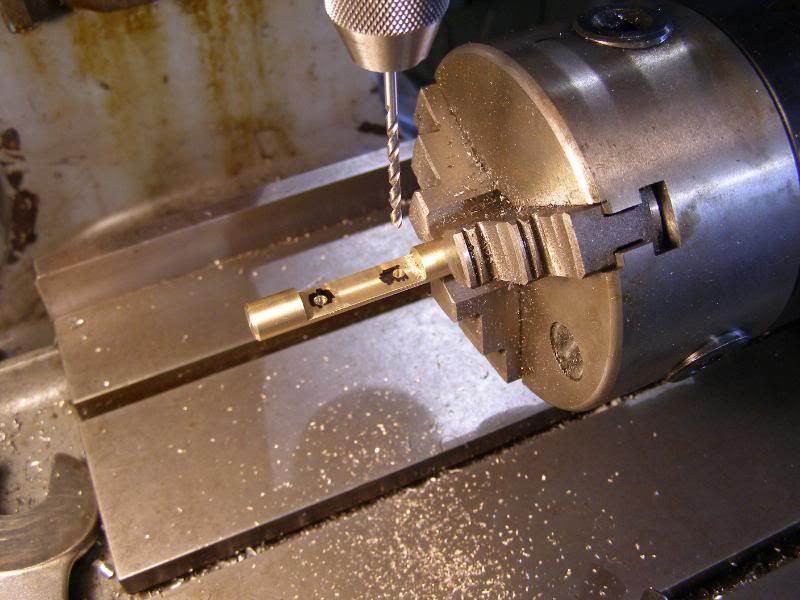
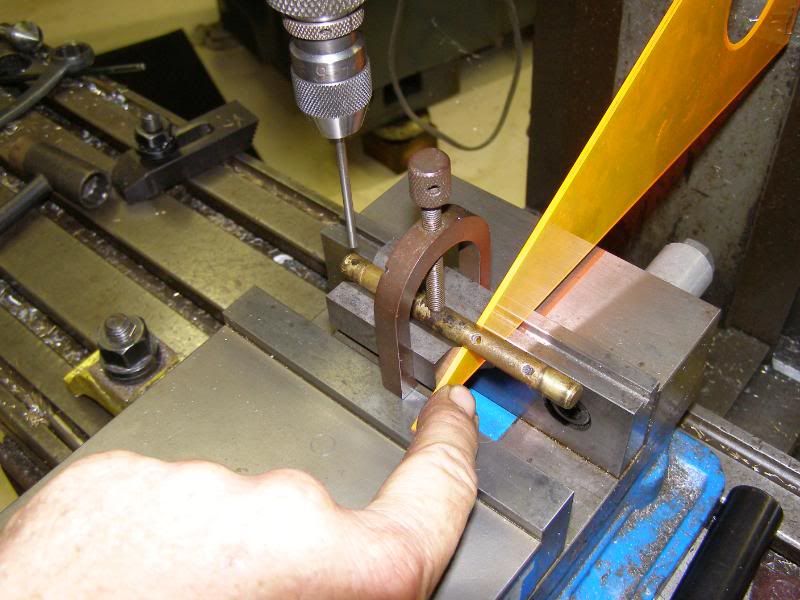
Next was to cross drill the new shaft for the pin that secures the arm to the shaft. The hole was apparently not fixture drilled, as it was not through the center of the shaft! This required some simple fixturing, as the arm needs to be indexed to the throttle plate and the hole located to where it lines up with the existing holes in the arm.
First I put the original shaft in a index head and found that the hole was indexed exactly 60° to the throttle plate, so at least I was not working with an arbitrary angle. I also found that the cross hole was perpendicular to the shaft, so that made it a bit easier as well. I set up the old shaft in a V-block in the vise and used a drill blank to locate the hole in relation to the spindle. Then I dug out my “high tech” drafting triangle and set it between the vise jaws and the flat for throttle plate, and it matched up perfectly. At the same time it located the edge of the flat with the side of the V-block. I put the new shaft in the V-block, used the “high tech” plastic triangle to index the shaft, and drilled the hole!
The pin fits, is perfectly aligned with the holes in the arm, and the whole deal rotates just as smooth as silk. Now I just need to get some brass sheet and make a new throttle plate.
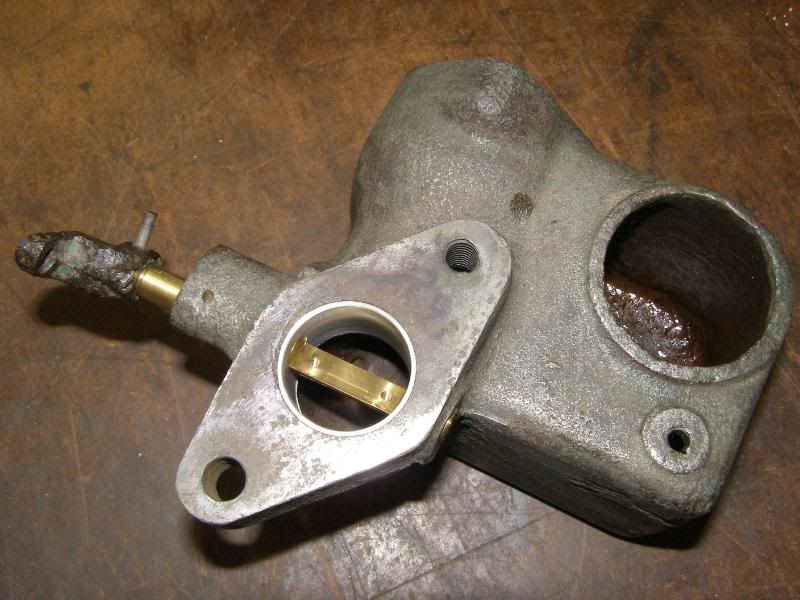
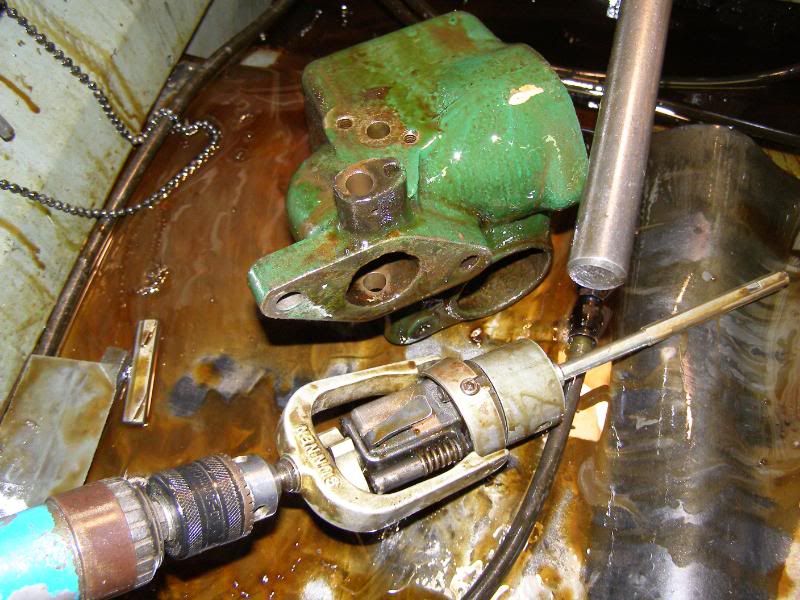
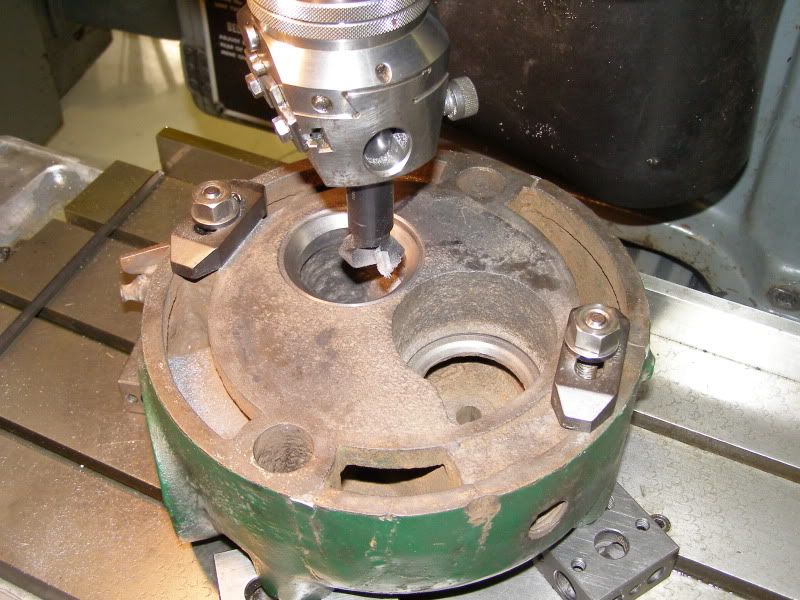
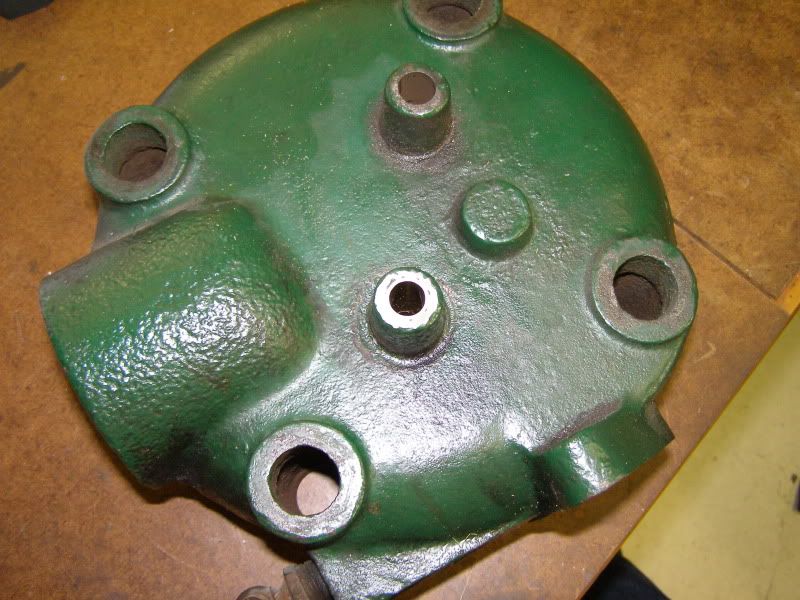
Next up is the cylinder head. Really badly worn valve guide bores, and to top that off a previous owner poked a reamer through them to oversize them. The intake valve bore wasn’t too bad, but the exhaust bore was a mess, as not only didn’t the bore clean up, but the reamer went in crooked as well, as it was apparently done with a hand drill. The valves are also a mess as they cut off the old stems and welded on larger dia stems, then turned them down a bit to fit the bores. The stems were no longer concentric with the heads as they must have chucked them up using a three jaw with about .007” runout!
Anyway, the exhaust guide bore was repaired by putting it back on location and sleeving it with bronze so that new stock valves can be used. I considered making the valves, but used a bit of sense and ordered them new, as they are available for $38.00 each.
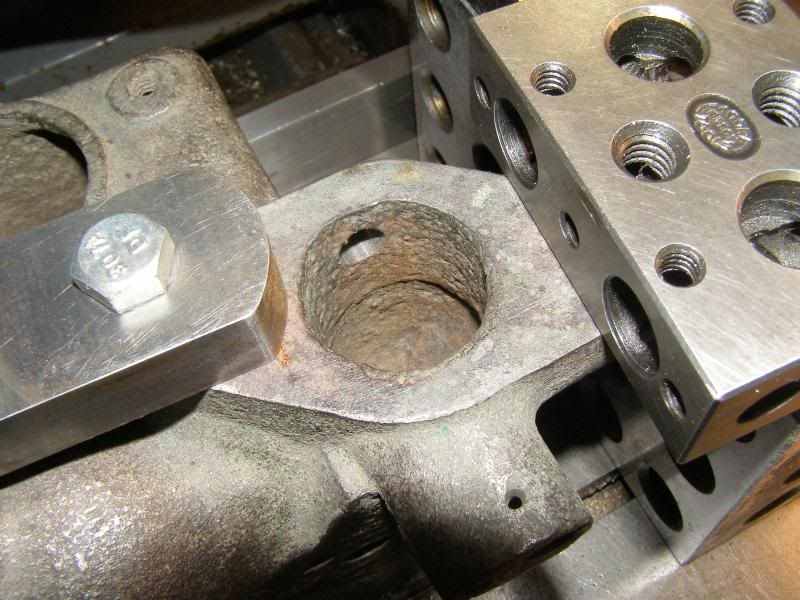
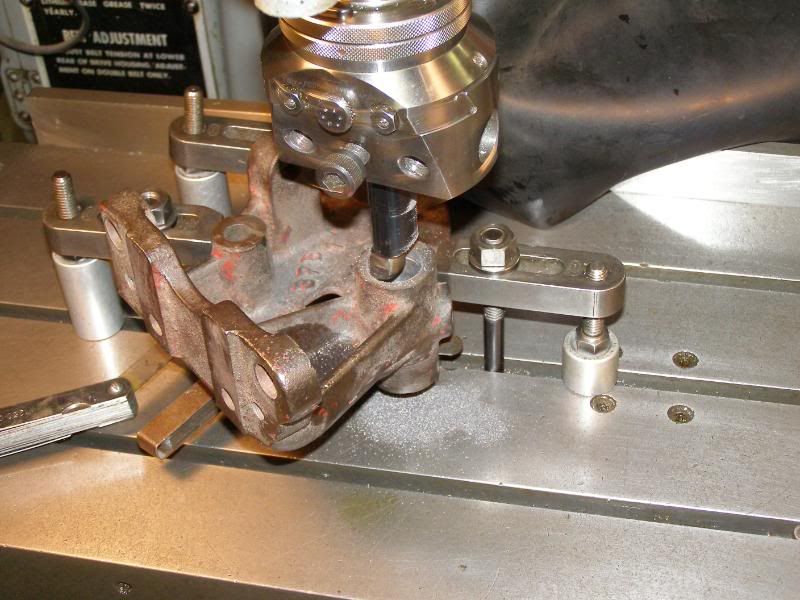
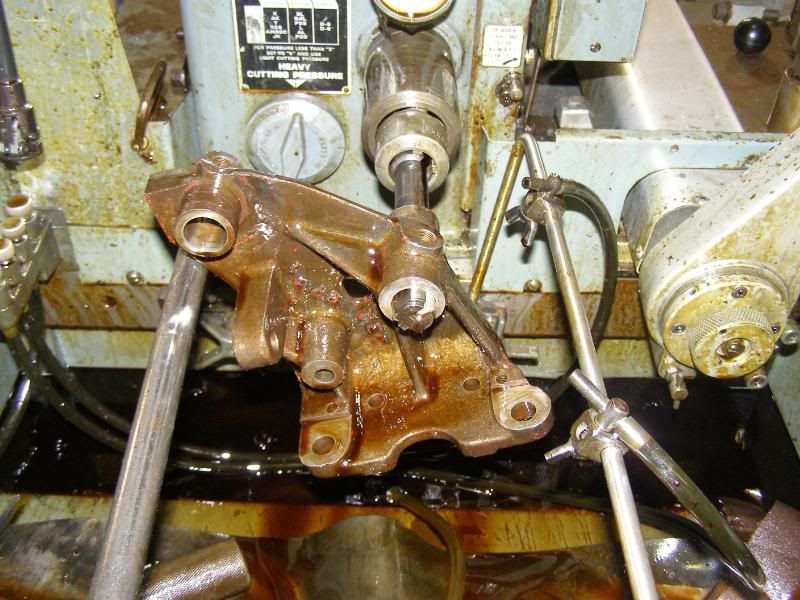
Here the guide has been repaired, and the seat rough machined. It will get touched with the seat grinder after the new valve is properly fitted.
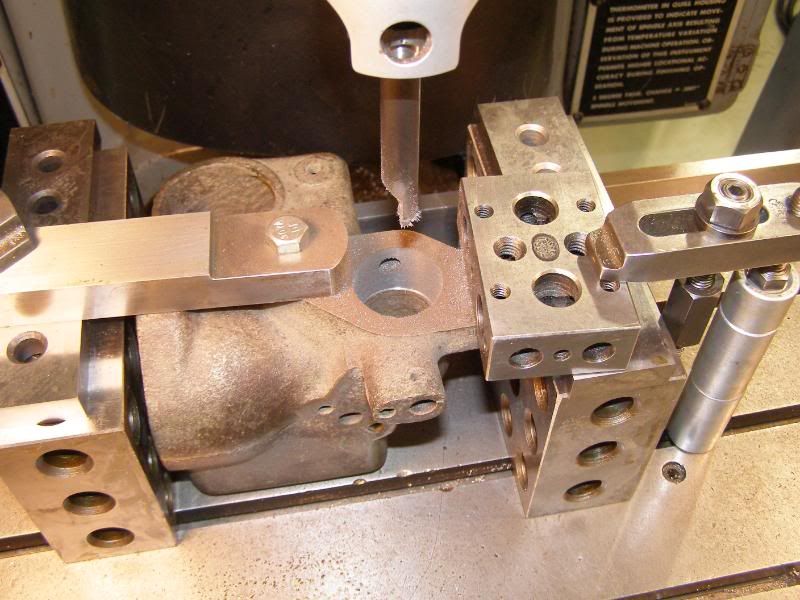
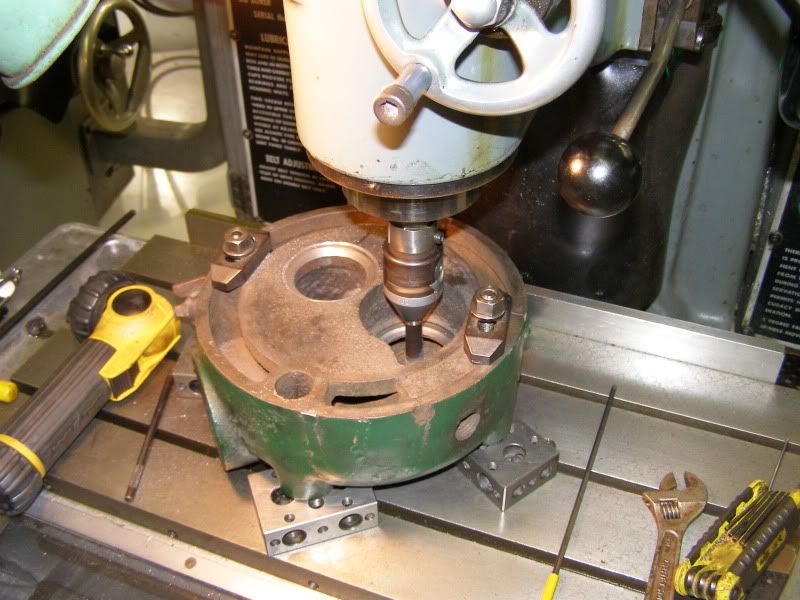
Now the intake guide bore will get the same treatment.
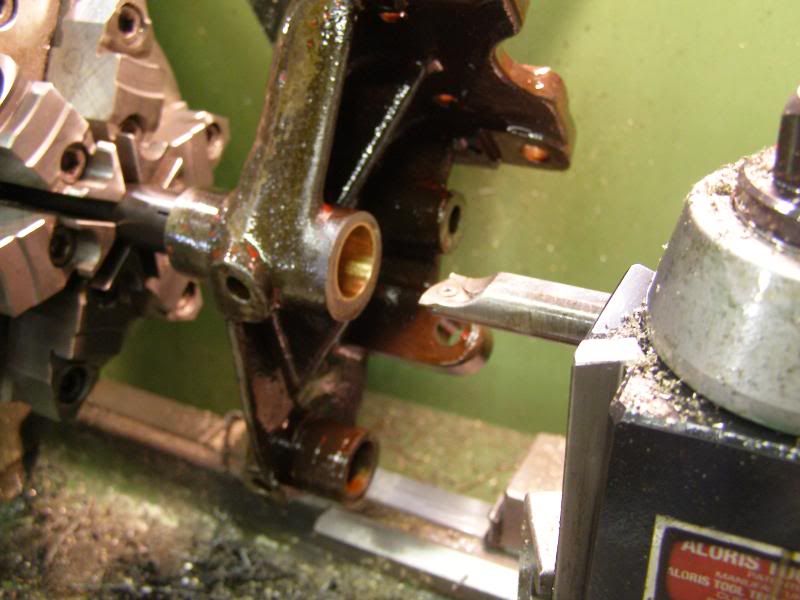
Running the boring bar through the guide bore to get it straight and round again and ready for a bronze sleeve.
Hopefully, this thing may actually run pretty well whan it's done! It's throttle governed rather than hit and miss, and runs on Kerosene. It has a small gas reservoir that is used to start it and warm it up prior to switchig to kerosene.
Unfortunately, I need to get back to my real job on Monday...
First problem was the air valve on the mixer, (carburetor) which was worn out, riddled full of excess holes, and had a few holes plugged and brazed up, so I made a new one.
Next was the starting fuel needle valve which had been repaired by drilling the old tip, threading it, installing a steel screw, and re-tapering it. So I made a new one.
Next on the list was a sloppy throttle shaft and worn throttle plate.
The throttle shaft bore was worn and misaligned as the casting most likely shifted in the last 86 years so I line honed the bore until it was straight and round, which took it from .375” to .385”.
Next I took some 7/16 brass rod (original shaft is brass) and turned it down to .384” and a short area on the end to .375” to accommodate the throttle arm. Then milled the flat on it for the throttle plate and then drilled and tapped it for the throttle plate screws. It fits in the bore and rotates with silk smoothness.
Next was to cross drill the new shaft for the pin that secures the arm to the shaft. The hole was apparently not fixture drilled, as it was not through the center of the shaft! This required some simple fixturing, as the arm needs to be indexed to the throttle plate and the hole located to where it lines up with the existing holes in the arm.
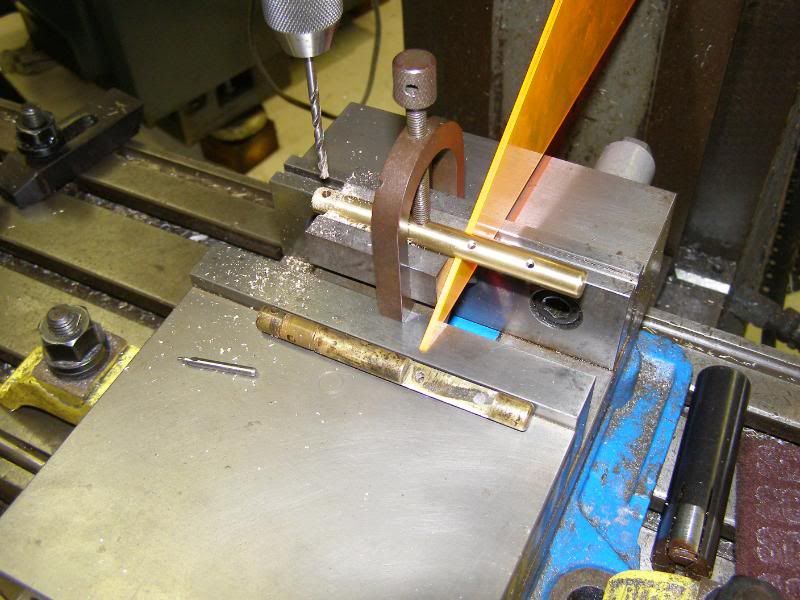
First I put the original shaft in a index head and found that the hole was indexed exactly 60° to the throttle plate, so at least I was not working with an arbitrary angle. I also found that the cross hole was perpendicular to the shaft, so that made it a bit easier as well. I set up the old shaft in a V-block in the vise and used a drill blank to locate the hole in relation to the spindle. Then I dug out my “high tech” drafting triangle and set it between the vise jaws and the flat for throttle plate, and it matched up perfectly. At the same time it located the edge of the flat with the side of the V-block. I put the new shaft in the V-block, used the “high tech” plastic triangle to index the shaft, and drilled the hole!
The pin fits, is perfectly aligned with the holes in the arm, and the whole deal rotates just as smooth as silk. Now I just need to get some brass sheet and make a new throttle plate.
Next up is the cylinder head. Really badly worn valve guide bores, and to top that off a previous owner poked a reamer through them to oversize them. The intake valve bore wasn’t too bad, but the exhaust bore was a mess, as not only didn’t the bore clean up, but the reamer went in crooked as well, as it was apparently done with a hand drill. The valves are also a mess as they cut off the old stems and welded on larger dia stems, then turned them down a bit to fit the bores. The stems were no longer concentric with the heads as they must have chucked them up using a three jaw with about .007” runout!
Anyway, the exhaust guide bore was repaired by putting it back on location and sleeving it with bronze so that new stock valves can be used. I considered making the valves, but used a bit of sense and ordered them new, as they are available for $38.00 each.
Here the guide has been repaired, and the seat rough machined. It will get touched with the seat grinder after the new valve is properly fitted.
Now the intake guide bore will get the same treatment.
Running the boring bar through the guide bore to get it straight and round again and ready for a bronze sleeve.
Hopefully, this thing may actually run pretty well whan it's done! It's throttle governed rather than hit and miss, and runs on Kerosene. It has a small gas reservoir that is used to start it and warm it up prior to switchig to kerosene.
Unfortunately, I need to get back to my real job on Monday...