Hi Dick,
Thanks for the tip on the handrails and Odd Duck Foundry.
How do you attach the handrails? Do you drill a small pilot hole and do a press fit or do you thread the end and secure with a nut?
Do you also scratch build your ladders and steps?
What material do you use on them? Brass? Steel?
Are they soldered or do you use some sort of fasteners to hold them together?
Sorry for all the questions... I'm new to the hobby and was wonder how this is done.
Thanks so much.
Russ Fox
Lehigh New England "bobber" caboose drawing?
Moderator: Harold_V

Re: Lehigh New England "bobber" caboose drawing?
Russ- I firmly believe that forums such as this are for the purpose of asking and answering questions. If other disagree,we learn from their suggestions. I am not an old head in this hobby.
I did three things for myself. I took an adult education welding class and two follow-up sessions. I bought a cheapo grinder and cutting wheels from Harbor Freight. After I learned about welding technique, I purchased a Hobart gas shielded mig welder.
The car itself has a 3/4" plywood floor. The insides are 1/2" plywood. I cut individual wood strips for exterior sheathing, gluing them in place and using a Porter Cable pin gun to hold them in place (suggested by another builder on this board). Everything is measured to get exterior dimensions correct.
The frame is 1" "C" channel steel, and the coupler pockets are 2" x 1" steel tubing, drilled out and welded in place. The grab irons are 3/16" rod bent over a jig form, so each is nearly identical to the others. I bought a die to thread for 10-24 nuts. I bend everything and make certain it lays flat, then spend hours cutting threads and removing metal splinters from my fingertips . I thread nuts onto the grab iron, mark where the holes will be drilled, drill 'em and insert. In also coat the threads with carpenters glue, re-insert and screw on the inside nut. Oh, I paint the grab irons prior to all this. Yes, they get nicked, but the touch up is fairly simple.
The roof is done one of two ways. I have cut individual strips and glued them in place with inside roof supports, like the prototypes. In the case of the cupola caboose you see here, I took 1/4" plywood and scored it on my table saw. This makes it more pliant and saves a considerable amount of time. Either way works well, so go with what you're comfortable. My wife, God bless her, had some muslin fabric which she stretched out and ironed flat for me. With her assistance, I coated the roof surfaces with carpenter's glue and stretch the fabric onto them. I used a straight edge of a plastic ruler to press the muslin into the glue. I left some fabric to overlap the roof edges. With gooey fingers, I folded the extra fabric under the roof ends, and used spring clamps wrapped in Saran wrap to hold the fabric until it dried. After two days of drying, I give the fabric two coats of paint to waterproof the surface (or at least make it water resistant). I have still to cut and place the roof catwalks.
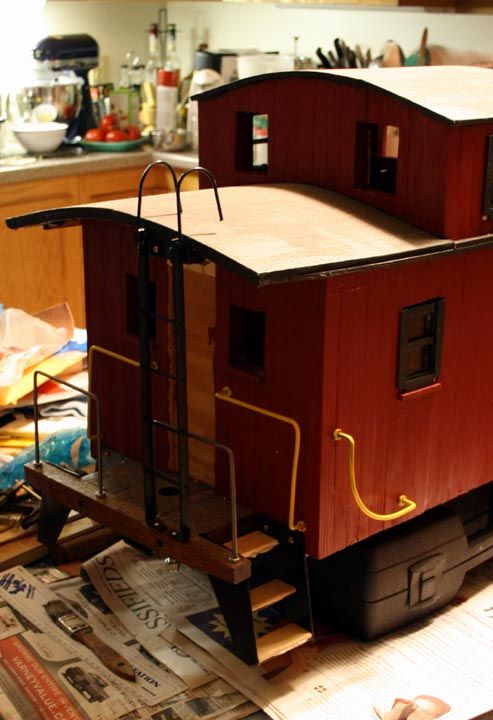
The ladders are 1/2" x 1/8" steel, drilled on a cheapo drill press, and fitting with 1/8th rod. I welded the rod tips and ground down the rough spots. They get a cleaning, sprayed with primer and then paint.
The steps were fun. I examined line drawings, photos, and a bunch of material to figure what I wanted. The L&NE bobbers began life with steps made of steel rod and wooden boards bolted to them. This was later replaced with sheet metal sides and rods between the sides with wooden boards bolted to the rods. I decided to cut 16 gauge sheet metal and tacked sheet metal steps in place. I've yet to cut them, but I am going to cut and stain wooded boards for steps. I will used an adhesive like Gorilla Glue or Liquid Nails to glue those in place. My reasoning for taking liberty with the steps is two fold; 1) The steps transitioned over time; 2) In a derailment, the steps need to be strong enough to withstand impact with the road bed. I don't mind wear and signs of use on my cars. They're railroad cars, and should get grime, spray, soot, oil, and nicks in the paint, but I want to minimize the damage they might sustain in a wreck.
I went on pretty long with this process, but I hope it explains how I am building these cars. When Peter gets the pedestals and journals cast, I think the cars will have some terrific character. I have a few additional ideas to make them a little "sexier" and enjoyable. The cupola is removable on the one car. The roof will open on the second.
I want them to be something another railroader will see and want to run with his own equipment. Both cars will be for sale, since my plans to purchase track and take my wife on a cruise recently became a new septic field! When you figure you can finally get ends to meet, somebody moves the ends.
Any other questions, please ask. The best part of large scale railroading is sharing it with others.
I did three things for myself. I took an adult education welding class and two follow-up sessions. I bought a cheapo grinder and cutting wheels from Harbor Freight. After I learned about welding technique, I purchased a Hobart gas shielded mig welder.
The car itself has a 3/4" plywood floor. The insides are 1/2" plywood. I cut individual wood strips for exterior sheathing, gluing them in place and using a Porter Cable pin gun to hold them in place (suggested by another builder on this board). Everything is measured to get exterior dimensions correct.
The frame is 1" "C" channel steel, and the coupler pockets are 2" x 1" steel tubing, drilled out and welded in place. The grab irons are 3/16" rod bent over a jig form, so each is nearly identical to the others. I bought a die to thread for 10-24 nuts. I bend everything and make certain it lays flat, then spend hours cutting threads and removing metal splinters from my fingertips
The roof is done one of two ways. I have cut individual strips and glued them in place with inside roof supports, like the prototypes. In the case of the cupola caboose you see here, I took 1/4" plywood and scored it on my table saw. This makes it more pliant and saves a considerable amount of time. Either way works well, so go with what you're comfortable. My wife, God bless her, had some muslin fabric which she stretched out and ironed flat for me. With her assistance, I coated the roof surfaces with carpenter's glue and stretch the fabric onto them. I used a straight edge of a plastic ruler to press the muslin into the glue. I left some fabric to overlap the roof edges. With gooey fingers, I folded the extra fabric under the roof ends, and used spring clamps wrapped in Saran wrap to hold the fabric until it dried. After two days of drying, I give the fabric two coats of paint to waterproof the surface (or at least make it water resistant). I have still to cut and place the roof catwalks.
The ladders are 1/2" x 1/8" steel, drilled on a cheapo drill press, and fitting with 1/8th rod. I welded the rod tips and ground down the rough spots. They get a cleaning, sprayed with primer and then paint.
The steps were fun. I examined line drawings, photos, and a bunch of material to figure what I wanted. The L&NE bobbers began life with steps made of steel rod and wooden boards bolted to them. This was later replaced with sheet metal sides and rods between the sides with wooden boards bolted to the rods. I decided to cut 16 gauge sheet metal and tacked sheet metal steps in place. I've yet to cut them, but I am going to cut and stain wooded boards for steps. I will used an adhesive like Gorilla Glue or Liquid Nails to glue those in place. My reasoning for taking liberty with the steps is two fold; 1) The steps transitioned over time; 2) In a derailment, the steps need to be strong enough to withstand impact with the road bed. I don't mind wear and signs of use on my cars. They're railroad cars, and should get grime, spray, soot, oil, and nicks in the paint, but I want to minimize the damage they might sustain in a wreck.
I went on pretty long with this process, but I hope it explains how I am building these cars. When Peter gets the pedestals and journals cast, I think the cars will have some terrific character. I have a few additional ideas to make them a little "sexier" and enjoyable. The cupola is removable on the one car. The roof will open on the second.
I want them to be something another railroader will see and want to run with his own equipment. Both cars will be for sale, since my plans to purchase track and take my wife on a cruise recently became a new septic field! When you figure you can finally get ends to meet, somebody moves the ends.
Any other questions, please ask. The best part of large scale railroading is sharing it with others.
"Always stopping my train, and risking my ankles, with American made, New Balance sneakers."
Re: Lehigh New England "bobber" caboose drawing?
Hi Dick,
Thanks for all the information. This explains a lot of the questions that I had.
I bought a steam engine last year and a bobber caboose was included that originally started as a plastic toy box.
Well... the caboose had been in a wreck by the previous owner. When I aquired the caboose I thought I could use many of the parts. But it is looking more like starting from scratch. Then I saw what you had built. This is what I would like mine to look like. I sent the bearing boxes to Tom Bee who machined them out for roller bearings and made two wheel sets. I also got two couplers from him. And that is where I am at. I basically need to build a frame and go up from there with everything new.
Thanks for sharing.
Russ
Re: Lehigh New England "bobber" caboose drawing?
My pleasure, Russ. I doubt you'll have anything to complain about with Tom Bee. Nearly everyone speaks well of his products. Let me add, apart from Odd Duck, I have nothing but praise for Duncan Herring, of Herring Engineering, and John Stephenson, of Stephenson Machine Shop. Both advertise on DLS, and both companies are more interested in your satisfaction than anything else.
With regard to the caboose construction, if I can offer any other assistance, don't hesitate to ask. Car construction is a fantastic tutorial and a fun experience.
Oh, I know where you can buy one or two bobber cabooses, once they're completed, too!
With regard to the caboose construction, if I can offer any other assistance, don't hesitate to ask. Car construction is a fantastic tutorial and a fun experience.
Oh, I know where you can buy one or two bobber cabooses, once they're completed, too!
"Always stopping my train, and risking my ankles, with American made, New Balance sneakers."
Re: Lehigh New England "bobber" caboose drawing?
Caboose #2, the unit without a cupola, will get some work this weekend, as we are having a blizzard.
click here
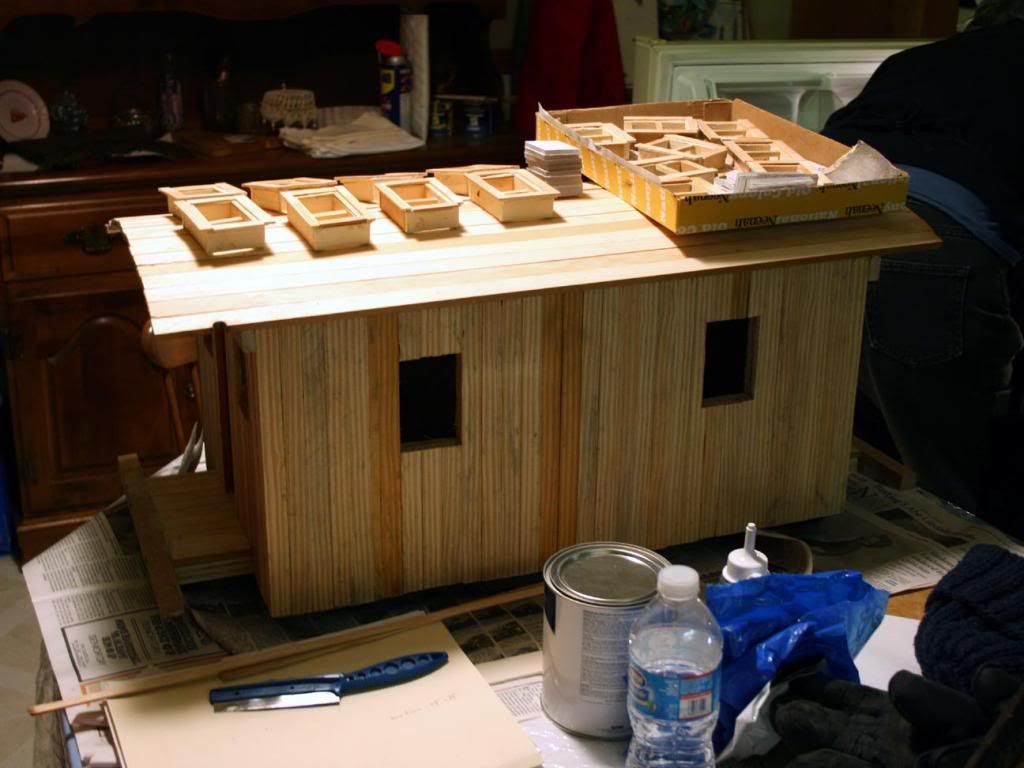
I have not gone as far with this caboose as with the other due to frigid weather and only recently getting heat installed in my shop.
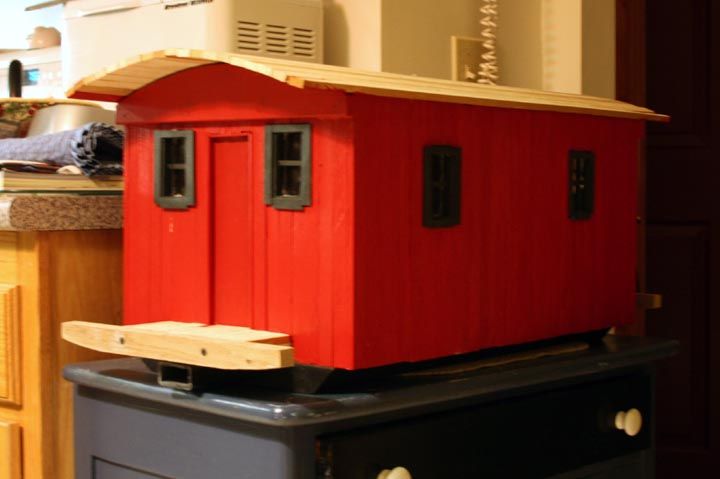
Similar construction, with strip wood for individual planking and the roof. This roof lifts of, something like a chest, so the inside could be modeled or used as a tool box. On the other caboose, only the cupola lifts off.
click here
The opposite side. Note the collection of windows on the roof. I had planned to use the aluminum cast windows, but finishing the inside flat areas was not worth the time. Each window has a rectangle of 1/4" lucite plexiglass to be inserted with Gorilla Glue. Once the car body is painted, I'll insert the finished window frames, again, using Gorilla Glue.
click here
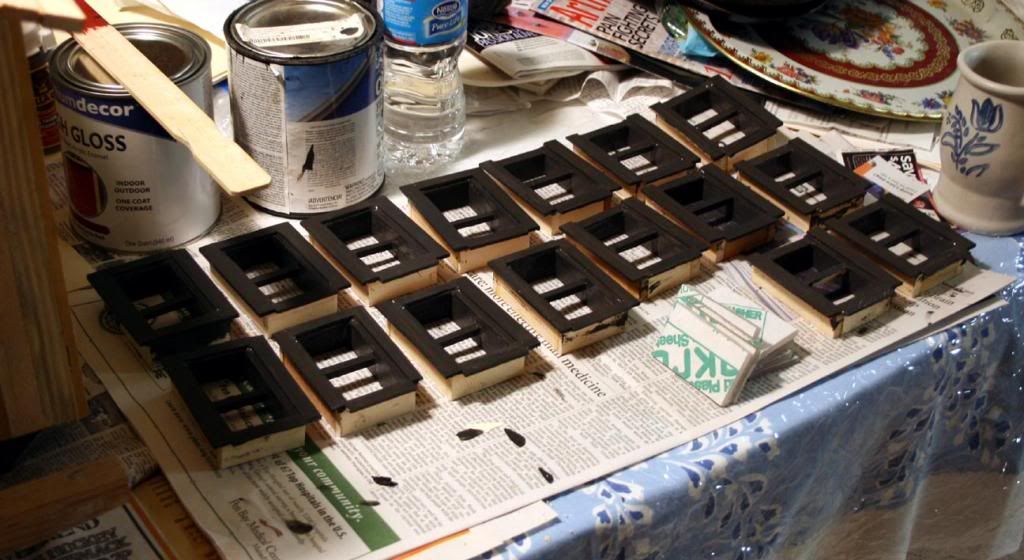
Window frames painted with acrylic paint.
click here
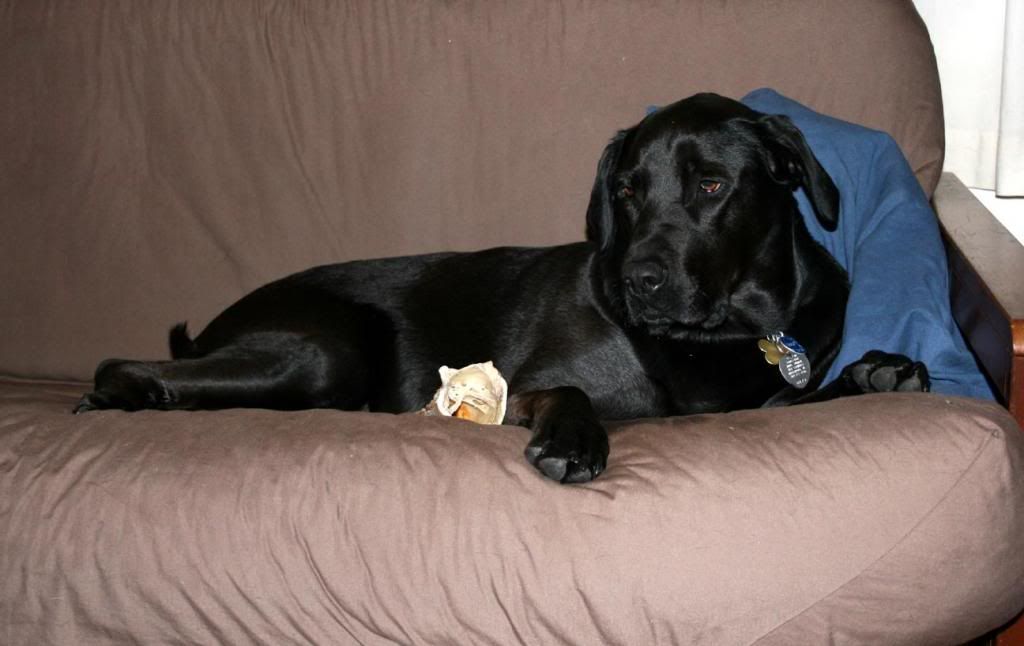
Aurora the Steam Dog shows how we wait out a blizzard on a Friday night in Maine. She's 4 years old, a chocolate and black Lab mix.
click here
I have not gone as far with this caboose as with the other due to frigid weather and only recently getting heat installed in my shop.
Similar construction, with strip wood for individual planking and the roof. This roof lifts of, something like a chest, so the inside could be modeled or used as a tool box. On the other caboose, only the cupola lifts off.
click here
The opposite side. Note the collection of windows on the roof. I had planned to use the aluminum cast windows, but finishing the inside flat areas was not worth the time. Each window has a rectangle of 1/4" lucite plexiglass to be inserted with Gorilla Glue. Once the car body is painted, I'll insert the finished window frames, again, using Gorilla Glue.
click here
Window frames painted with acrylic paint.
click here
Aurora the Steam Dog shows how we wait out a blizzard on a Friday night in Maine. She's 4 years old, a chocolate and black Lab mix.
"Always stopping my train, and risking my ankles, with American made, New Balance sneakers."
Re: Lehigh New England "bobber" caboose drawing?
Okay, here is the state of the cabeezles as of tonight.
Caboose #1 has had the larger windows inserted and glued in place. I will use some filler and touch up paint to cover the places where you see light spots. The smaller windows have to made made, but that's an afternoon's work. I added the wood platforms to the steel stair casings, and a single coupler is now in place.
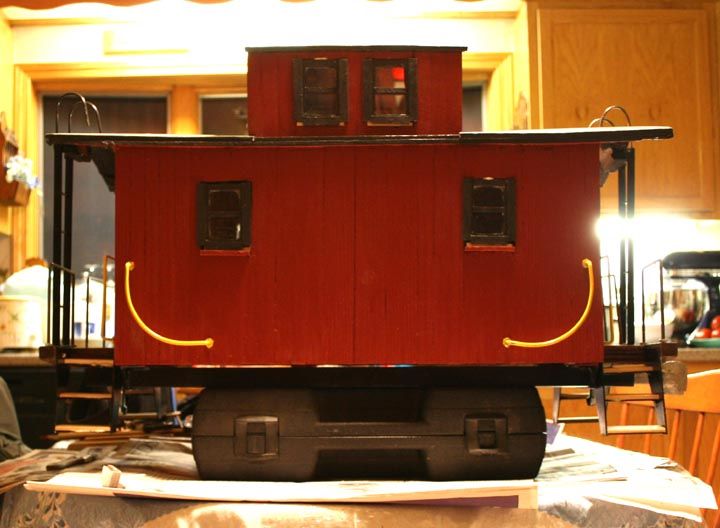
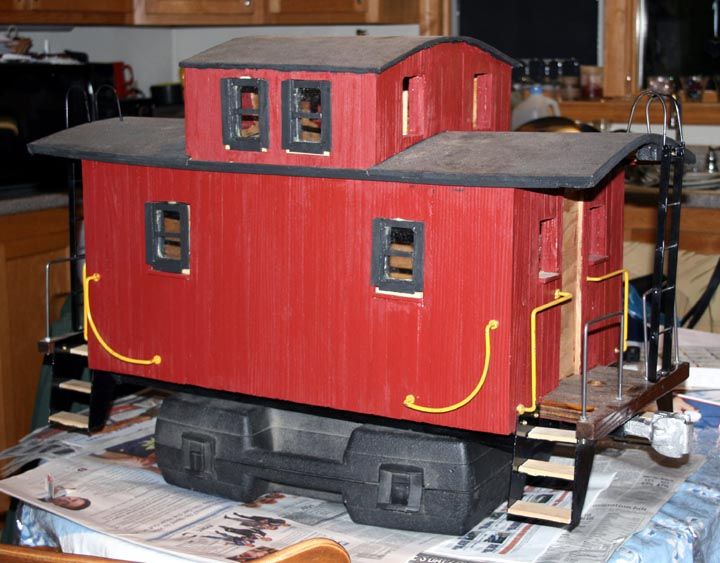
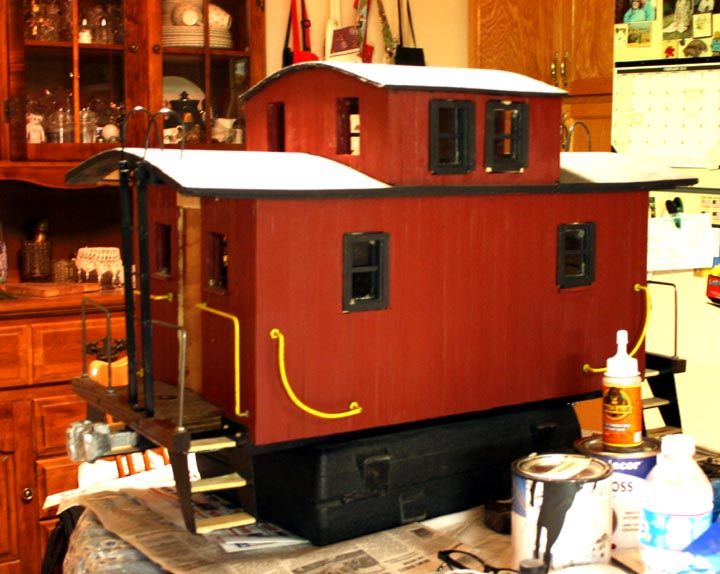
The second caboose still needs considerable staining and the roof needs the cloth stretch over it, and then waterproofing with paint. Note the change in color, as was practice with the LNE caboose fleet.
I will try to fabricate the roof catwalks, get them painted and installed as well. There is a fairly good chance we'll cast the journals and pedestals tomorrow, or at least this week, now that the weather has leveled off for few days. Those parts will be iron. I've just figured the measurements for marker lights, but those may be off for awhile.
Every time I look at the work, I see a hundred more things to be done, but by April, I hope to have them ready to sell.
Caboose #1 has had the larger windows inserted and glued in place. I will use some filler and touch up paint to cover the places where you see light spots. The smaller windows have to made made, but that's an afternoon's work. I added the wood platforms to the steel stair casings, and a single coupler is now in place.
The second caboose still needs considerable staining and the roof needs the cloth stretch over it, and then waterproofing with paint. Note the change in color, as was practice with the LNE caboose fleet.
I will try to fabricate the roof catwalks, get them painted and installed as well. There is a fairly good chance we'll cast the journals and pedestals tomorrow, or at least this week, now that the weather has leveled off for few days. Those parts will be iron. I've just figured the measurements for marker lights, but those may be off for awhile.
Every time I look at the work, I see a hundred more things to be done, but by April, I hope to have them ready to sell.
"Always stopping my train, and risking my ankles, with American made, New Balance sneakers."
Re: Lehigh New England "bobber" caboose drawing?
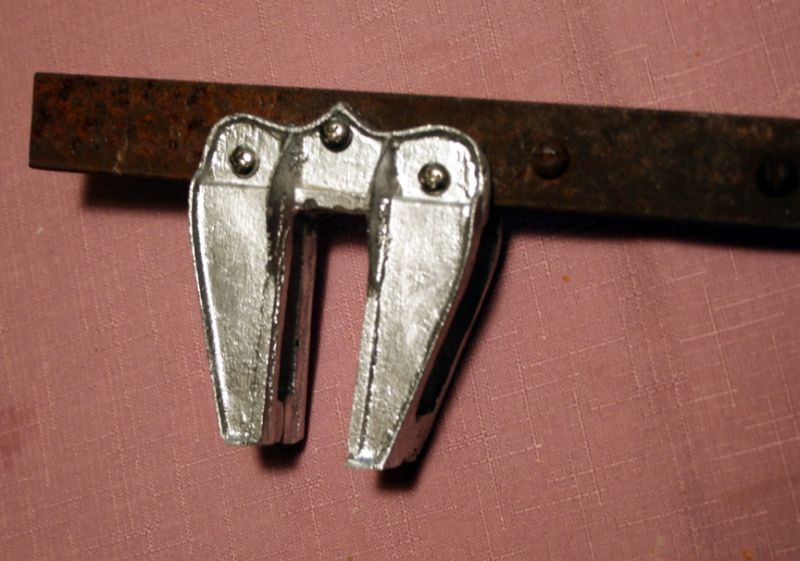
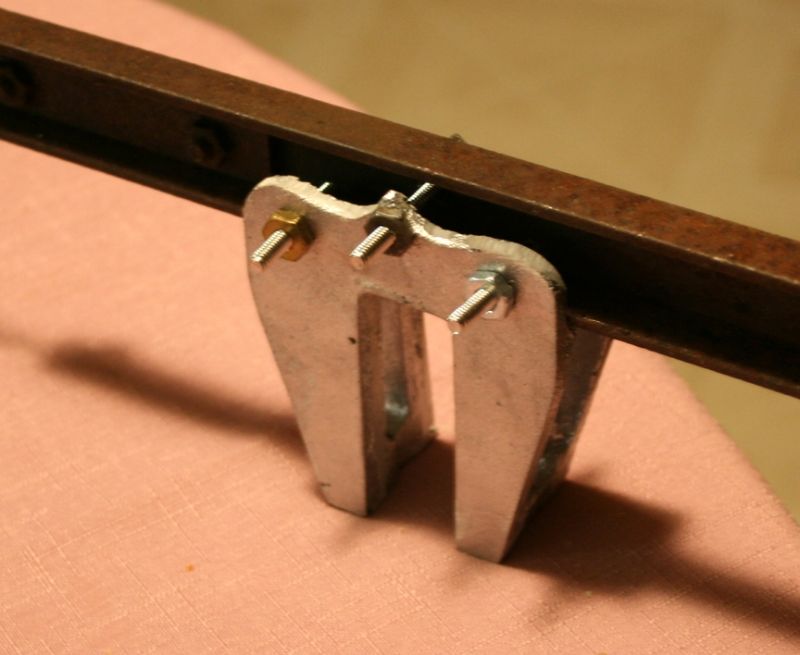
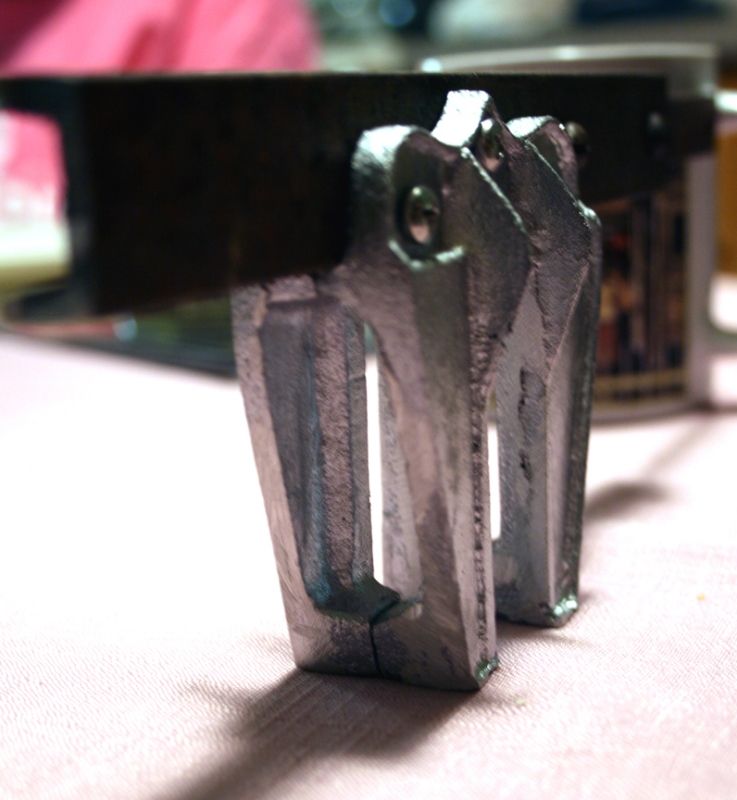
Here is a set of journal pedestals in a mock up. The actual pedestals will be iron, and three sets are already cast, while we get other work completed.
This one is aluminum and only finished with a file. The iron units will be milled clean and the journal boxes will ride in between the forks.

Roof cat walks are completed, but not yet painted. Windows are installed.
This one is aluminum and only finished with a file. The iron units will be milled clean and the journal boxes will ride in between the forks.
Roof cat walks are completed, but not yet painted. Windows are installed.
"Always stopping my train, and risking my ankles, with American made, New Balance sneakers."