4 Ton Plymouth build, 1:5 scale, 4.75" gauge, Leslie Salt #9

This forum is dedicated to Riding Scale Railroading with propulsion using other than steam (Hydraulics, diesel engines, gas engines, electric motors, hybrid etc.)

Moderator: Harold_V

Eric M.
Posts: 62
Joined: Fri May 27, 2011 10:45 pm

4 Ton Plymouth build, 1:5 scale, 4.75" gauge, Leslie Salt #9

Post by Eric M. »

A few years back I purchased a Maxitrak "Planet" locomotive. Essentially in stock form it is a simplistic model of a 2' gauge British 0-4-0 industrial gas mechanical locomotive. As far as a I know I am the only person here in the US who has one of these, making it the only 4.75" gauge Planet built to date. It was always my intention to customize it to be a little more North American in appearance. I did make one color change on the locomotive by painting the red/orange buffer plates black which was a step in the right direction, but I knew I could do better, and a few months back I started planning for a full rebuild of this engine into something truly American.

Image
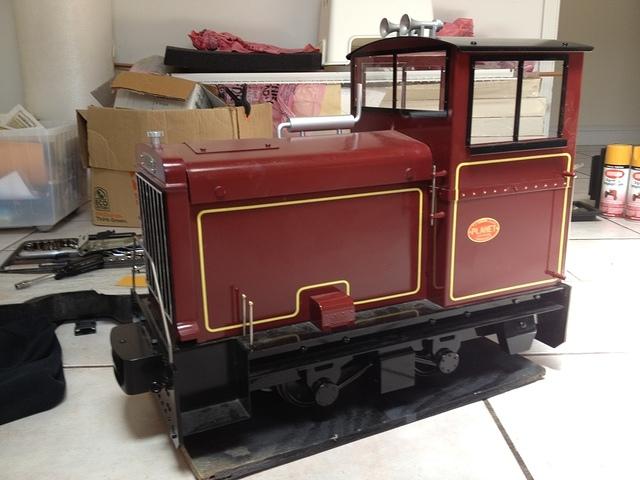
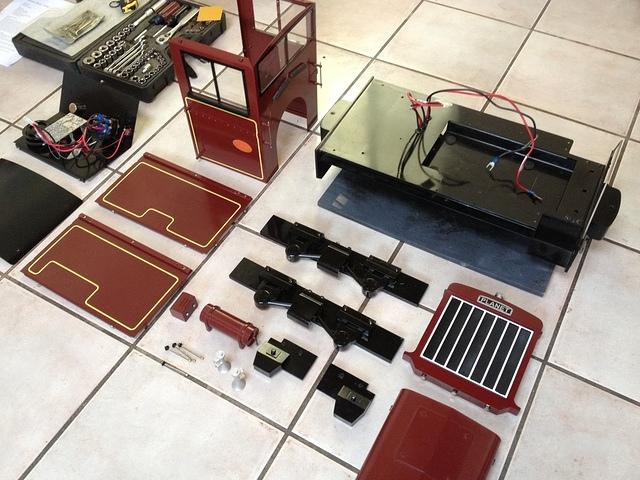
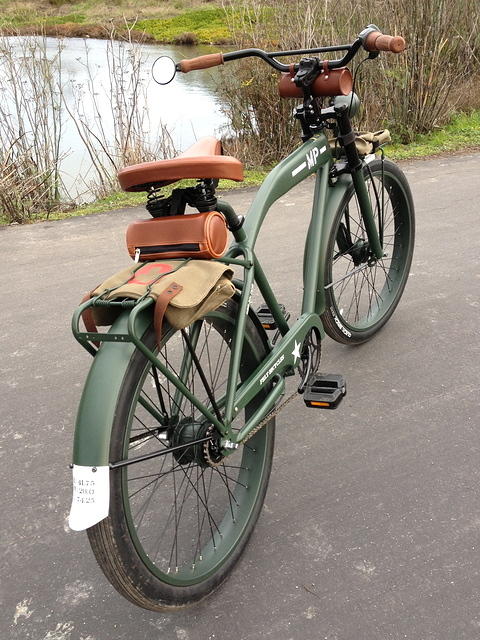
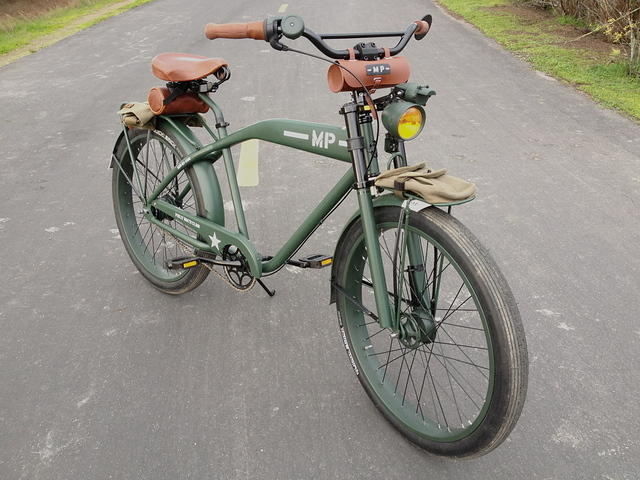
The stock locomotive is maroon with cream lining. It has some simple details. It is powered by a single 12v deep cycle battery. It has two motors, gear drive and spring suspension.

The inspiration for this kitbash comes from a few sources:

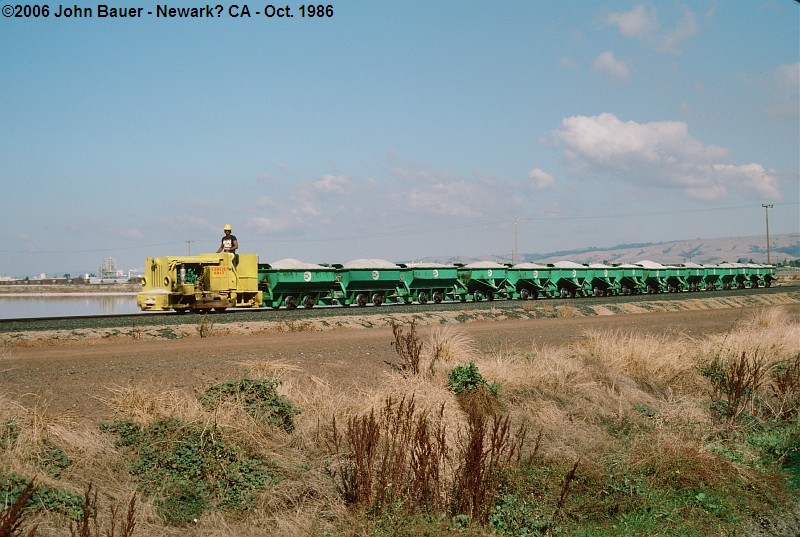
1: The Leslie Salt railroad which operated here in the San Francisco bay area until approximately 2002. This railroad operated on a couple different gauges of track. In the east bay, 24" gauge. On the SF peninsula side it was 30". Included in the roster of equipment was at least one Plymouth which was a 4 ton CL series model that was gasoline powered and had a mechanical friction drive. Photo here:
http://www.northeast.railfan.net/images/ls115.jpg

2. West Side Lumber Plymouth No. 1. While this locomotive was twice the tonnage of those used at Leslie Salt, over the years it developed some nice quirky character that gives it a really interesting look. Many appliances were added through the years, such as an externally mounted air compressor and tank and a starter motor and battery to replace the hand crank engine starter. I will be incorporating some of these details into my project. Photo here:
http://www.flickr.com/photos/53177163@N ... /lightbox/

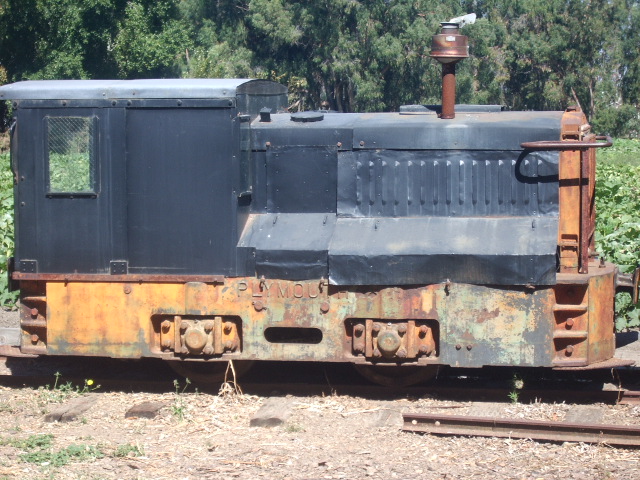
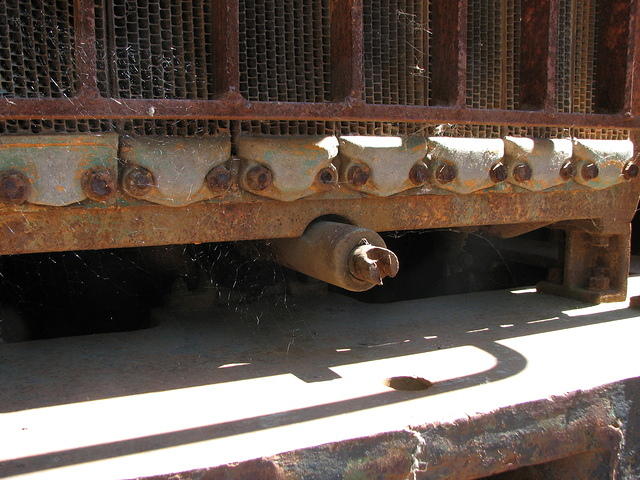
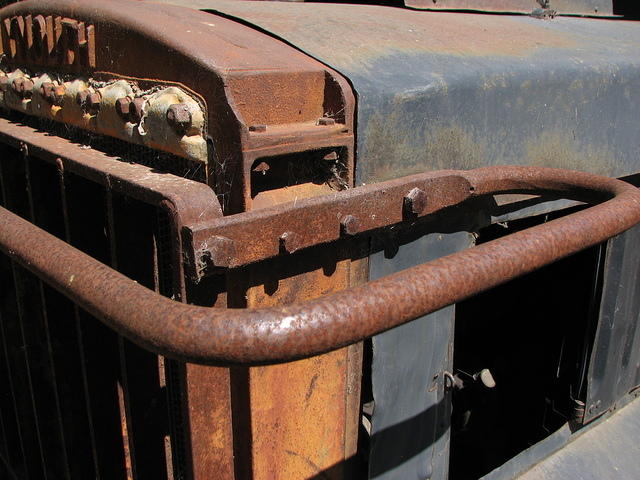
3. The low-cab "Mission Cement" Plymouth at Ardenwood Farm in Fremont CA. This locomotive is actually the same model category as the West Side Plymouth, it is also in relatively good condition, for a Plymouth of it's age (it was built in 1922.) Since it is close by, I was able visit it and take some useful reference photos. Photo:
Image

My goals for the project:
1. Incorporate a level of detail seldom seen on ride-on scale "internal combustion" locomotives.
2. Create a freelance model with inspiration drawn from various sources to give it real character as is often seen on industrial "critters"
3. Maintain or improve the reliable running characteristics of the Maxitrak mechanics.

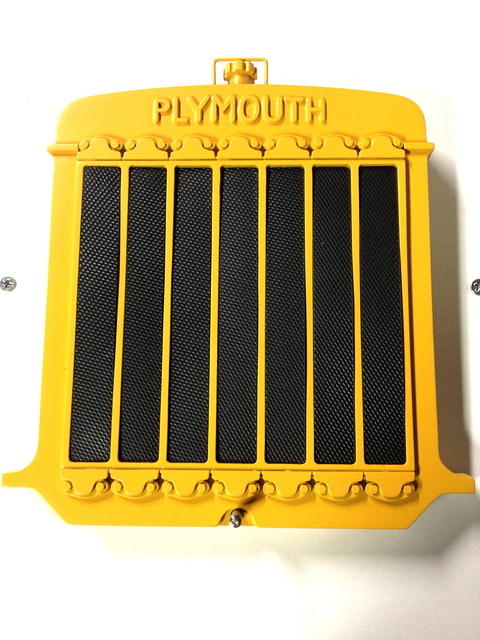
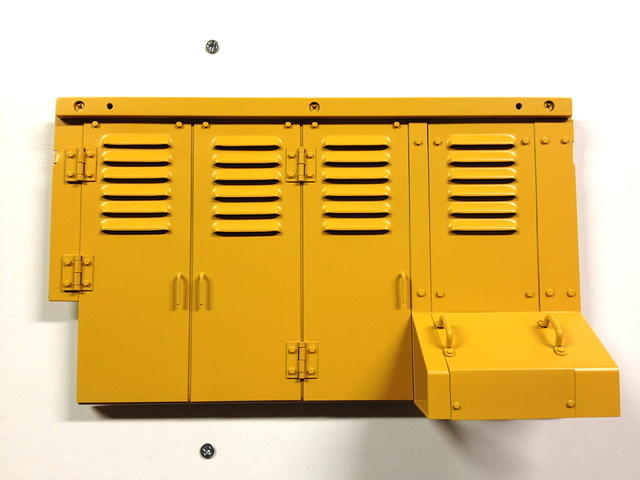
So, lets get started. The Maxtrak uses a combination of metal and plastic detail parts. I am not wild about the use of plastic in some cases, so for the most part, anything I am adding will be fabricated from metal. The radiator on the locomotive is however a large and heavy piece of solid plastic so for this particular component I am going to stick with that medium. The stock radiator has an etched brass name plate that says "Planet". In it's place I will be adding raised lettering that says "Plymouth". One of the real distinguishing characteristics of classic Plymouth locomotives are the Modine radiators which were built up from vertical cells bolted to upper and lower cast heads. The upper head had the Plymouth name cast in in raised lettering. To replicate the look of the Modine radiator I am using laser cut letters. I am also laser cutting the parts to detail out the upper and lower caps of the radiator cells.

Image
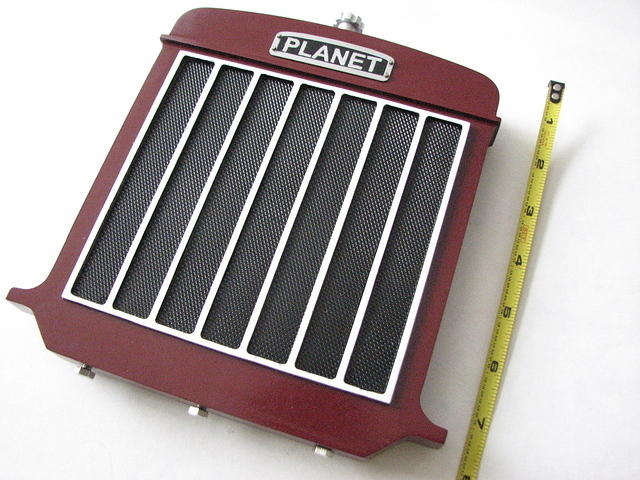
The stock Planet radiator.

Image
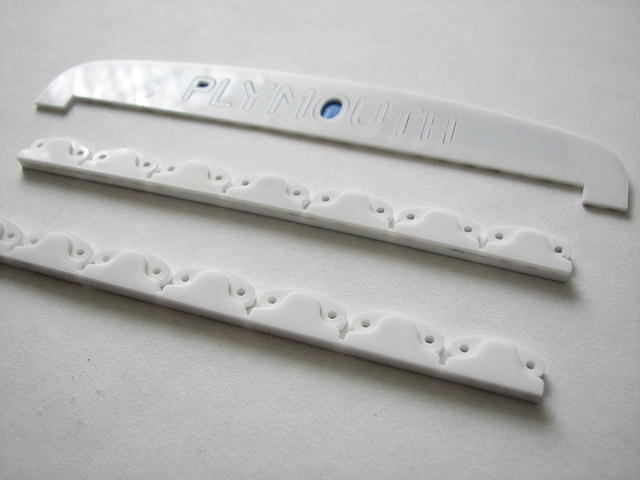
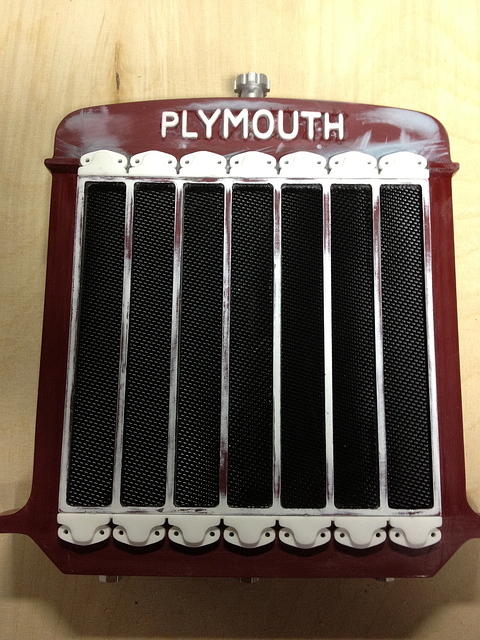
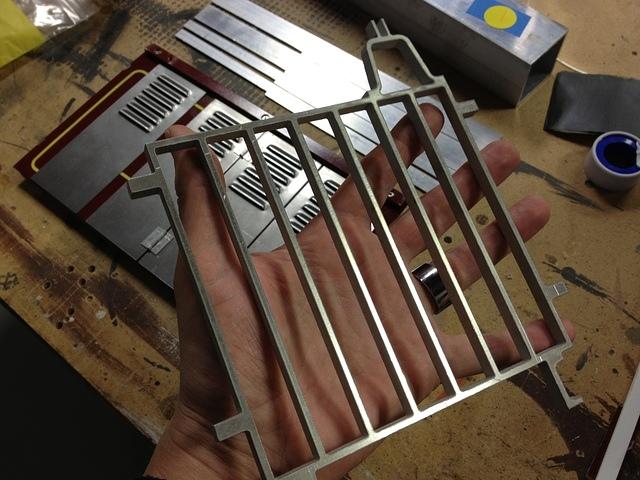
The laser cut Plymouth lettering still in place in the locating template and the Modine style caps. The material is white acrylic.

Image
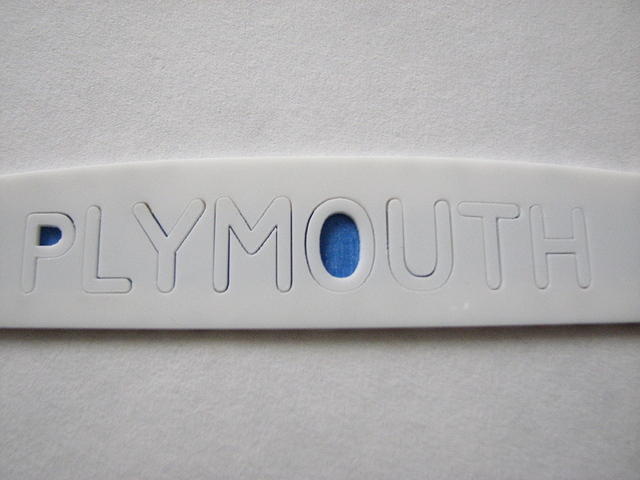
Detail shot of the Plymouth lettering. JB weld was carefully applied to back of each letter with a toothpick. The letters were then glued in place on the radiator head using the locating template to align them.

Image
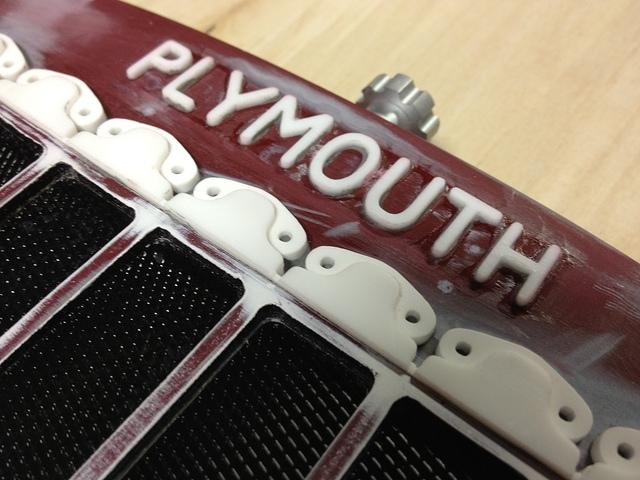
Here are the letters glued in place. I created a "fillet" around each letter with gap filling CA glue to provide the look of a casting.

Image
The little holes on the Modine style caps will be drilled and tapped and the 2-56 brass hex head screws will be installed.

Image
The prototype radiator at Ardenwood.

I have more progress to show so stay tuned.

Regards,
Eric Maschwitz
Head of Operations, Squirrel Mountain Mine
Former Whistle Punk,
Gunn Lake Land and Lumber, a subsidiary of East Devils Hill Lumber Co
Rwilliams
Posts: 1049
Joined: Thu Dec 22, 2005 2:45 pm
Location: Central California

Re: 4 Ton Plymouth build, 1:5 scale, 4.75" gauge, Leslie Sal

Post by Rwilliams »

Eric,

Nice job on the makeover of the 4 ton Plymouth.

During the construction of the first dam at Don Pedro on the Tuolumne River in CA during the early 1920's, the transition of light industrial railroads was in progress. There were several of the 4 ton Plymouth locomotives along with several well worn Porter steamers. Both types of motive power were pulling the Western Wheeled Scraper side dump cars or special concrete carrying cars from the batch plant to the dam.

Here is one of the well used Plymouth locomotives hooked to one of the side dump cars being loaded by an equally well used steam shovel of unknown origins. Photo was taken by one of the young men employed as an engineer on the narrow gauge construction railroad.

Robert
Attachments
Plymouth with Western Wheeled Scraper car.jpg
Eric M.
Posts: 62
Joined: Fri May 27, 2011 10:45 pm

Re: 4 Ton Plymouth build, 1:5 scale, 4.75" gauge, Leslie Sal

Post by Eric M. »

Hi Robert,

It is scenes like the one in your picture that made me want to do this project, that and the fact that these early gas mechanical locomotives have more in common with vintage construction equipment than they do with modern diesels. Actually many of the characteristics of the early critters resembled steam engines too. Some of the larger Plymouths had sand domes, bells and smoke stacks that resembled steamers. I have always loved the look of a small industrial critter pulling a string of dump cars. Here is a neat picture I found online of the Leslie salt operation in the mid 80's: http://www.trainweb.org/westernrails/ca ... _10-86.jpg

A short update:

Image
Obviously to work on the radiator I had to remove it from the locomotive. What I didn't mention earlier is that I just disassembled the whole thing.

Image
Her is a slightly blurry (sorry) photo of just some of the new parts that will be used to detail this project. In the back from left to right are a nice bronze bell, a 1:5 scale model of a vintage starter battery that I made, in front of the battery are some perforated tread plates that will be used on the frame and the black wire thing are the scale battery leads for the miniature starter battery. In the front you have the laser cut parts for the radiator and, on the right, some nice louvered steel locomotive doors from Precision Steel Car.

Image
Getting on to working on the hood, I wanted to mount the starter battery in a tray, just in front of the cab, on the engineers side. This replicates the configuration of West Side Lumber Plymouth No. 1. I had a hard time finding reference for the battery tray on the West Side engine but in photos you can see a tray bracketed to the side of the hood. The tray is open but there is a metal cover above the battery to protect it from the elements I guess. I created my own design based on this idea. It actually wound up being a fiddly little assembly of brackets and brass bolts. but it is sturdy and looks the part. You can see that I have started attaching the louvered access doors to the hood sides also.

Image
Here is the starter battery sitting in the tray with the cover in place. The cover is secured in place with small rare earth magnets. This will allow me to remove it so I can show people the detail of the battery. The cover can also act as a tool tray for some scale tools and clutter.

Next installment will be finishing up the details on the radiator, hood sides and the start of paint.

Regards,
Eric Maschwitz
Head of Operations, Squirrel Mountain Mine
Former Whistle Punk,
Gunn Lake Land and Lumber, a subsidiary of East Devils Hill Lumber Co
Eric M.
Posts: 62
Joined: Fri May 27, 2011 10:45 pm

Re: 4 Ton Plymouth build, 1:5 scale, 4.75" gauge, Leslie Sal

Post by Eric M. »

Happy holidays industrial railroaders! Moving ahead with progress on the Plymouth I have a major update today! One detail I had to incorporate was the hand crank starter. Early Plymouths, like early automobiles, had a small shaft coming from under the radiator to which a hand crank could attach. This, of course, was for starting the engine. Since the little industrial locos often had such long service lives they were often retrofitted in later years with electric starters. The crank start shaft was usually left in place. Why bother removing it right? This was the Case on West Side Lumber Plymouth No. 1.

Image
Here is the crank starter that I fabricated. I milled a little "mouse hole" in the lower radiator head casting for the crank shaft to poke out from.

Image
Here is the prototype crank shaft as seen on Mission Cement No. 4 at Ardenwood Park CA.

Astute viewers will notice in the picture above that the radiator is no longer the maroon color of the stock Maxitrak. I have decided on a suitably industrial color for this project that reflects the paint of many of the Leslie Salt locomotives. The color I am using is "Old Equipment Yellow" from Krylon's farm and implement line. It is a lacquer based spray paint of reasonable quality and the slightly dingy yellow color fits the part. I am knocking back the sheen a bit by giving it a spray of Krylon UV resistant matte clear coat as well.

Image
Here is the more-or-less completed radiator-- although the black grille inserts are not fixed in place yet, but you get the idea.

There is one critical detail for the radiator remaining. I wanted to represent the welded flat bar radiaitor gaurd that seemed to be standard equipment on these small Plymouths.

Image
This picture shows the guard mounted to the radiator on the prototype. In the case of Mission Cement 4 the brackets that fixed the guard to the radiator are integrated with a grab bar. I am omitting the grab bar because not all Plymouths had them in this location.

I contemplated various ways of fabricating the guard. I really wanted a stout metal guard that looked very much like the prototype. I decided the best way to do it would be to water jet cut the guard from solid aluminum plate. I did a full scale drawing which was then drawn up in Adobe Illustrator. I then sent this to the water jet cutter who imported it into their software which determines the cutting paths.

Image
Here is the freshly cut part. It turned out better than I hoped. The bell shaped bracket in the upper right is a headlight mount. I want to give a thank you to my colleague Jan Scardina who did the computer drawing and http://www.rustworks.com who did the water jet cutting.

You may have noticed in the above picture that I was progressing with adding the lovers and details to the hood sides. After adding the louvered doors from precision steel car, hinges, door latch handles and the starter battery tray that was shown earlier, it was time for paint.

Image
Firemans side hood panel. The notch in the lower left corner is for the air compressor belt.

Image
Engineers side hood panel with starter battery tray.

Now all the Plymouth historians out there will notice one detail on my version that deviates from "standard practice". The louvers on almost all small Plymouth hoods were oriented vertically. I decided against it because it was easier to fit the panels from Precision Steel Car with the louvers running horizontally. Since it was typical for the little locomotives to be modified by the user over the years I am subscribing to the "anything goes" mentality on this and executing a little artistic license.

One distinctive detail that was found on many Plymouths were the angled panels at the base of the hood. Often these panels were removed at some point in the service life but there were two heavy brackets that support the panels near the cab. I decided to fabricate the brackets and represent the panels as still being in place close to the cab. Adding this little detail I think gives it some distinctive Plymouth character.

Image
Here are the angled lower hood panels visible near the cab on the prototype. This portion shown near the front cab wall was supported by two heavy brackets. These brackets were always left in place even if the panels were removed on some locomotives

Image
On the model I fabricated the brackets from aluminum bar stock and the panel from galvanized steel. The grab handles were formed from aluminum wire.

Well that's it for now but I have already made additional progress so watch for another update soon. Next on the list are the exhaust stack and muffler, sander hatches, cab and chassis.

Regards,
Eric Maschwitz
Head of Operations, Squirrel Mountain Mine
Former Whistle Punk,
Gunn Lake Land and Lumber, a subsidiary of East Devils Hill Lumber Co
User avatar
VO4454
Posts: 199
Joined: Thu Sep 10, 2009 12:12 am
Location: NorCal

Re: 4 Ton Plymouth build, 1:5 scale, 4.75" gauge, Leslie Sal

Post by VO4454 »

Eric, The bash is looking good and you're making good progress. I'm looking forward to seeing it in person at the GGLS.

Vic
For Duty and Humanity
User avatar
Dick_Morris
Posts: 2845
Joined: Sat Jan 04, 2003 2:09 pm
Location: Anchorage, AK

Re: 4 Ton Plymouth build, 1:5 scale, 4.75" gauge, Leslie Sal

Post by Dick_Morris »

Looking good. I've never seen a battery modeled. Nice touch.
Rwilliams
Posts: 1049
Joined: Thu Dec 22, 2005 2:45 pm
Location: Central California

Re: 4 Ton Plymouth build, 1:5 scale, 4.75" gauge, Leslie Sal

Post by Rwilliams »

Eric,

The Plymouth is looking more like a Plymouth all the time. Does anyone have the correct Plymouth exhaust sounds to go with that size of Plymouth? A big displacement low RPM industrial engine sound would certainly be a nice touch.

Most of the engines of that size were usually equipped with electric starting or a small starting motor. The large amount of displacement would be more than most mortals would be capable of cranking especially on a cold day and low octane fuel. Many of the large industrial engines of the day were equipped with a crank option for engine maintenance, checking timing of the often times problematic magnetos and hand turning over of the engine after long periods of no service to insure oil in the system before starting. The massive cranks for the industrial engines were often 24 to 30 inches in length and certainly a match for even the most stout mechanic of the day. Just a look at the big crank for my 60 horsepower Cat diesel engine is enough to give a new meaning to the need for steroids.

If one is planning on a tool box full of details, a massive engine crank would be a great detail to include and relatively easy to model. One could even model the crank and shoot a few images of a scale mechanic doing battle with the crankshaft with the massive crank. There is a reason for the battery in real life. I will have to shoot an image of the industrial strength crank for my big Cat engine to give an idea of what the Plymouth crank may have look like. To just carry the big crank around gives a new meaning to going to the gym.

Robert
Eric M.
Posts: 62
Joined: Fri May 27, 2011 10:45 pm

Re: 4 Ton Plymouth build, 1:5 scale, 4.75" gauge, Leslie Sal

Post by Eric M. »

Thanks guys. Robert, I'm not sure if there are any recordings of these little locomotives out there. The vast majority of the small early Plymouths had gasoline engines instead of diesel so a small early gasoline engine from a truck or something like that may be appropriate. I could always see if I could record the locomotive at Ardenwood myself although that one is an 8 tonner and I am modeling a 4 ton prototype. I'll have to double check my sources for what sort of power plant these small Plymouths had. I know there were a few different engine options from the factory. Diesel was an option on some models but most were produced with gas engines (I think.) I have no doubt that turning over a diesel engine by hand would be quite a feat due to the higher compression required vs. a gas engine.

An interesting little factoid about Mission Cement No. 4 over at Ardenwood is that it still has it's original Buda gasoline engine. The overall good condition for a locomotive built in 1922 and the fact that it still has it's original engine make it an exceedingly rare example. The book "Critters, Dinkeys & Center Cabs" states that while the Buda engines were durable and long lasting, they were incredibly inefficient so they were almost always replaced at some point.

Image

Image

Regards,
Eric Maschwitz
Head of Operations, Squirrel Mountain Mine
Former Whistle Punk,
Gunn Lake Land and Lumber, a subsidiary of East Devils Hill Lumber Co
User avatar
SZuiderveen
Posts: 530
Joined: Sun Jan 05, 2003 12:03 am
Location: Baltimore

Re: 4 Ton Plymouth build, 1:5 scale, 4.75" gauge, Leslie Sal

Post by SZuiderveen »

Rwilliams wrote:Eric,

The Plymouth is looking more like a Plymouth all the time. Does anyone have the correct Plymouth exhaust sounds to go with that size of Plymouth? A big displacement low RPM industrial engine sound would certainly be a nice touch.

Robert
I have owned Chris Craft's 1929 Plymouth model DLC for about a year and a month and am quite close to starting the cosmetic restoration of it, to occasionally operate at the Buckley Old Engine show in Buckley, Michigan. it had the rings, bores, and babbits already done before I got it.

I have a one minute movie of it on my Facebook page, buried down deep. Now mind you, this is the Climax Trustworthy engine and not the Buda, but it is OEM 1929.

It needs a new cab rood and front windsheild, they received some horrendous scab welding replacement during its life, using 3/16" diamond deck plate. I believe the roof of the one at Ardenwood has been restored in recent times. It should be a combination wood and sheet metal roof.

I tried to figure out how to put it on Youtube.

http://youtu.be/FZ99p_rTdaY


Just a cell phone shot, but you will ge tthe idea.

I agree with the inefficient. It drinks gas RIGHT NOW!!

Steve
User avatar
makinsmoke
Posts: 2262
Joined: Thu Jul 10, 2003 12:56 pm
Location: Texas Hill Country

Re: 4 Ton Plymouth build, 1:5 scale, 4.75" gauge, Leslie Sal

Post by makinsmoke »

Phoenix does have a sound system for the Plymouth with peanut whistle....

http://www.phoenixsound.com/library/am_diesel.html
User avatar
hottshot65
Posts: 75
Joined: Sat Oct 23, 2010 6:25 pm
Location: Council Bluffs, IA

Re: 4 Ton Plymouth build, 1:5 scale, 4.75" gauge, Leslie Sal

Post by hottshot65 »

Anymore progress on this project? I'm really digging it and am looking forward to seeing some more updates!
Gerry
Council Bluffs, IA

0-4-2 Chloe
Burlington Northern 7188
Eric M.
Posts: 62
Joined: Fri May 27, 2011 10:45 pm

Re: 4 Ton Plymouth build, 1:5 scale, 4.75" gauge, Leslie Sal

Post by Eric M. »

Hi, yes. Sorry for the silence on my part. I have some progress but I have been slightly derailed recently by one of my other hobbies; fat tired bikes. This bike in particular has sucked up some of my time with modifications and such:

Image

Image

I promise I will get back to the Plymouth and get an update posted soon. I have been working on some really neat details and I have started modifying the chassis to be more accurate for a Plymouth. Stay tuned...

Regards,
Eric Maschwitz
Head of Operations, Squirrel Mountain Mine
Former Whistle Punk,
Gunn Lake Land and Lumber, a subsidiary of East Devils Hill Lumber Co
Post Reply