This forum is dedicated to Riding Scale Railroading with propulsion using other than steam (Hydraulics, diesel engines, gas engines, electric motors, hybrid etc.)
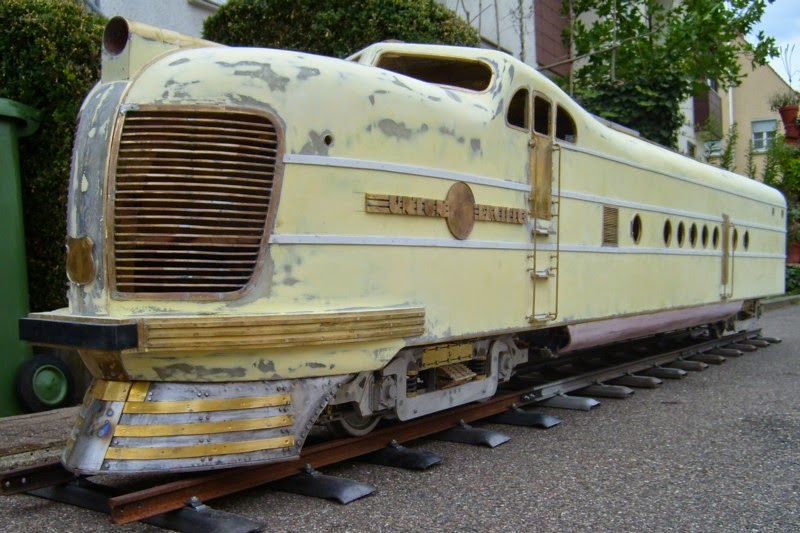
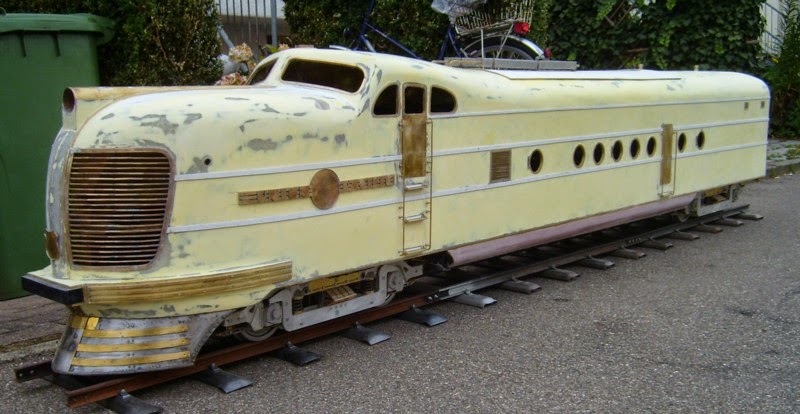
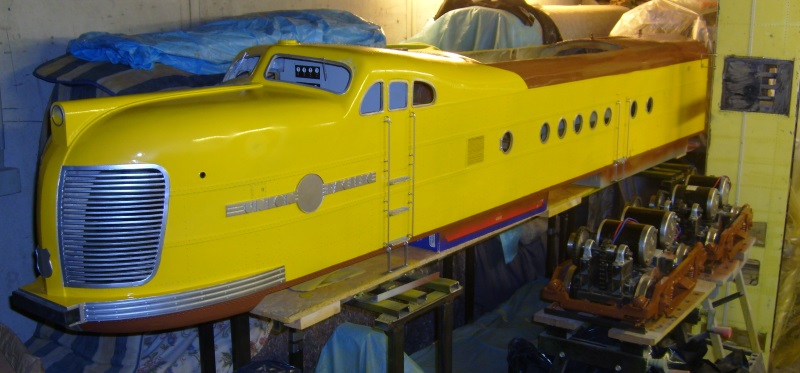
After rather 'invisible' optimizations on the shell's lower edges and much sanding I attached most of the details (steps, handrails, nose-herald, nose's side-logo, battens) to the A-unit:
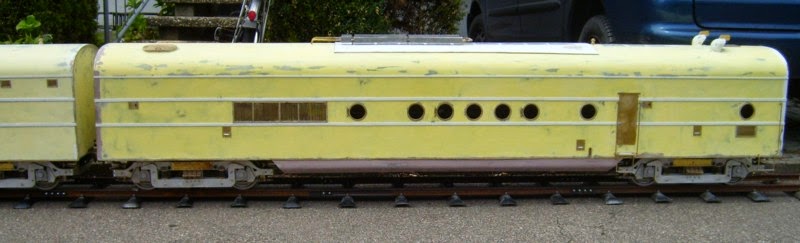
17.000 rivets / nails later and after setting up a two-controller solution for powering I finally started the paint job...of course too late in the year for having warm & dry conditions outside. Too much wind and the neighbour will be happy to have a new yellow car.
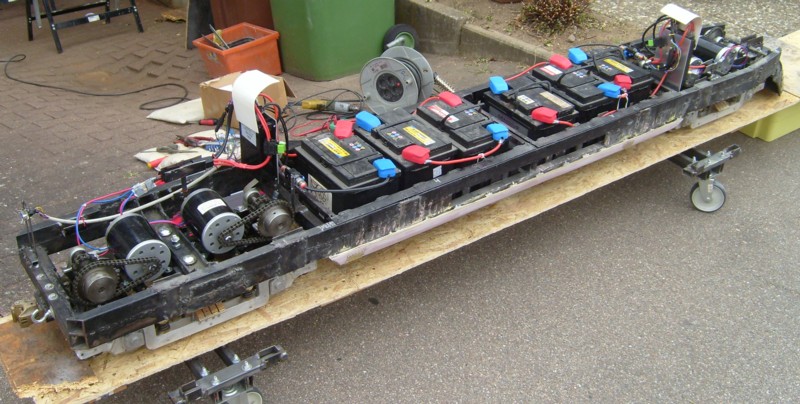
power set up: eack truck has its own battery packs (36V) and its own controller. The controllers are connected as a master-slave-system with the rear controller connected to the throttle box.
Took some time to have all wheels running in the same direction.
A fantastic job! Can you explain how you do and apply rivets? I assume they are decorative. I have been trying to develop a CNC rivet embossing machine for thin sheet metal.
Hi Mr. Ron,
Thanks for the nice comment.
However, applying the rivets (as you already guessed, for decorative purposes only) was 'old fashioned' (that is: tedious & time-consuming).
I looked for small nails (steel, nickel-plated, 1.2mm diameter, app. 2mm (5/64") head diameter), drilled holes in a slightly smaller diameter (1.1mm, cracking more than 100 drill bits) and pushing the nails into it.
App. 8.700 for the A-unit, 8.500 for the B-unit; baggage car app. 4.000 up to now. Since a bag of 250 nails was roughly $1.70, it was not too expensive. however, I emptied the tray in my DIY-market several times...and the till girls were not entirly happy to count the 30 to 40 bags i took off.
I used nails for rivet simulations at my Aerotrain-cars, too (app. 17.000 in total) - however, I made the fault using brass nails that were significantly more expensive.
Very Nice,
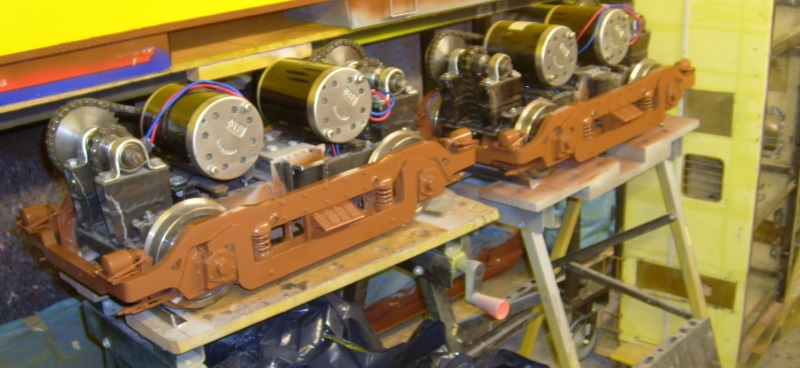
question on the trucks, what was the reason you decided to mount the motors that way?
and are these trucks your design or did you buy from a vendor?
Probably you looked for a prototypical motor-mounting system (nose suspended) - however, since I have to reduce the rpm by factor 4.x, the sprocket on the wheels axis would have had quite a big diameter. It would have been close to the wheel and to the rail's head - I'm afraid of damaging the sprocket in a derailment.
Additionally mounting the motor on the truck's frame one is not limited regarding axial length of the motor.
I used a similar mounting with an idler in my Aerotrain - it worked well, chain and sprockets are hardened and have dimensions used in motor-bikes; also one can make some 'adjustments' if one or the other parts is mounted in perfect precision (parallelism).
The truck is my own 'design' - basically a rectangular frame with a suspended bolster (metal-rubber-elements $ coils springs) in the center. The axes are fastened viasealed (ball)bearings positioned between the wheels making the side frames with its & leaf springs just a decorative element
Norman,
If I saw that Beauty coming along the track, I would quick flop on the ground and think I was seeing the Real thing go past.
Sure is a Winner!!
chooch
I always liked that first UP streamlined paint scheme with
the brown.
Sorry, it's too late to help but you can buy brass escutcheon pins in various sizes in large quantities from
McMaster Carr. I also bought hundreds of 2-56 screws and nuts for my stock car project. On stock cars the nuts went on the outside of bolted cars to prevent injuring the animals. They sell an undersized nut in 2-56 as well that looks pretty close to model screw nuts.
I bet that thing will pull the Queen Mary out of her berth!
Probably you looked for a prototypical motor-mounting system (nose suspended) - however, since I have to reduce the rpm by factor 4.x, the sprocket on the wheels axis would have had quite a big diameter. It would have been close to the wheel and to the rail's head - I'm afraid of damaging the sprocket in a derailment.
Additionally mounting the motor on the truck's frame one is not limited regarding axial length of the motor.
I used a similar mounting with an idler in my Aerotrain - it worked well, chain and sprockets are hardened and have dimensions used in motor-bikes; also one can make some 'adjustments' if one or the other parts is mounted in perfect precision (parallelism).
The truck is my own 'design' - basically a rectangular frame with a suspended bolster (metal-rubber-elements $ coils springs) in the center. The axes are fastened viasealed (ball)bearings positioned between the wheels making the side frames with its & leaf springs just a decorative element
Kind regards
Norman
Hi Norman,
Nice work,,, its always cool to see how others design work,
Here is my solution, i am running 4to1 reduction
i also successfully converted a Morris switcher over to the same drive system,
Hey Norman,
This is the first time I have seen your post and I have to say you have done a wonderful job on your engine. I was wondering where your located and when do you plan to run your train. I am sure everyone would love to see video of the finish product on the track. Keep up the great work.
Gary