Kozo A3 in 1.5" scale - new project
Moderator: Harold_V
-
singleshotman
- Posts: 21
- Joined: Fri Sep 18, 2009 10:42 am
- Location: CA
Re: Kozo A3 in 1.5" scale - new project
i built three live steam locomotives with loctite holding the drivers on and never had a problem, and i never used a press fit either.One of them was a d & rg c-16.After i put the wheels on i did drill and insert a round key to prevent movement, however.

Re: Kozo A3 in 1.5" scale - new project
The round key is a good idea and one that I have seen - a simpler way to key if one so desires.
Regarding loc-tite - good thing Bill Shields isn't about right now, or he'd launch into his speech about how all his engines have been loc-tited and one for many decades without budging unless he wants it to with a torch. He's right - it works great, if you set it up right. The loc-tite designed for concentric radial fits works well and is used on very large industrial machinery every day.
The drivers on my Chloe are loc-tited, and after a season of running they have not budged. However, when I machined the trucks for the tender car (tom bee) I decided to press them because we have a nice press at work. That also worked just fine. In this case, pick your poison but in both cases you have to do it right.
The advantage is that if the day comes when the wheel needs to come off, it will be easier, heat it up to the right temperature and the loc tite de-bonds. It's a little easier than pressing off the wheels. Some people may never run their engines enough to run the wheels off of them, others may need to do that in 10 - 20 years, especially in club use.
If you search on Chaski you can find numerous threads about loc-tite and what to use and how to use it, for drivers.
Regarding measurement and tolerances - For the hobby, the ability to machine accurately to .001 is as much as is needed. By using a measuring device that measures to tenths, you can be sure you are really measuring to .0005 or .001, but you're not actually needing the tenths range. That was more or less my point above. Dial calipers are great for quick measurements and for where it doesn't matter a whole lot, and if you've had a pair for a while you can get pretty good with them, but for very critical measurements for those few parts where it really counts, break out the micrometer.
85% of parts in Live Steam is 'git-r-done', but a few things, the parallelism and alignment and spacing of the cylinders, rods, crankpins etc. is the difference between having a swiss watch engine and an OK engine that loses power in binding and superfluous movement. The entire thing has some slack - just like the full sized item - it has to, to compensate for error buildup, but you want as little as reasonably possible. things out of parallel or out of concentricity cause premature wear and power loss. Don't kill yourself over it, but make sure it's reasonable.
I've had plenty of bad days machining wheels, then pressing them on and finding out all the surfaces aren't in round with each other, at which point I re-do one thing or the other or turn everything between centers after pressing to machine all the bearing surfaces in a single setup. Whee!
Live Steam Photography and more - gallery.mikemassee.com
Product Development and E-Commerce, Allen Models of Nevada
Product Development and E-Commerce, Allen Models of Nevada
-
Dick_Morris

- Posts: 2851
- Joined: Sat Jan 04, 2003 2:09 pm
- Location: Anchorage, AK
Re: Kozo A3 in 1.5" scale - new project
In my wannabe machinist days 40 years ago one of my jobs was to grind a form on the end of HSS pins for making the holes in rivets in a rivet factory. Within a few weeks of graduating from high school I was expected to hold some diameters to within a tenth. With a good micrometer and a bit of practice the measuring became easy. Getting them ground to the proper size was a bit more difficult.
Also remember that the spacing between the axles, spacing of the holes in the side rods, and the throw of the crank pins are as critical as the quartering. Also note that if one axle is at 89 degrees and the other at 91 degrees it will knock and bind. With both at 91 degrees no one will be the wiser, as long as all axles are the same.
Correct. But the traditional way (and my preference) is to accurately machine the keyways and the wheels to size with keyways and then rely on the keyways to give you the correct angle. My preference for the wheels is to bore and ream the axle and crank pin holes and then locate the keyway in the wheel from a dummy crank pin with an ear on the guide for the keyway broach.As I understand it, quartering the wheels accurately is critical, so it seems to me that pressing the wheels to the axle while maintaining an accurate 90-degree angle might be "tricky".
Also remember that the spacing between the axles, spacing of the holes in the side rods, and the throw of the crank pins are as critical as the quartering. Also note that if one axle is at 89 degrees and the other at 91 degrees it will knock and bind. With both at 91 degrees no one will be the wiser, as long as all axles are the same.

Re: Kozo A3 in 1.5" scale - new project
I wonder if you know how that sounds to someone that understands proper fits. Your comment is simply not true.Harlock wrote:Regarding measurement and tolerances - For the hobby, the ability to machine accurately to .001 is as much as is needed.
For example, if you can't work to less than a thou, there's no way in hell you can properly fit a bearing (except for blind luck). I would expect that there's more than a few bearing fits on any locomotive.
The average person can measure to less than .0005" with ease, using a micrometer marked only in thousandths (no tenth vernier). A half thou can spell the difference between a press fit and a (snug) slip fit.
Do not "caveman" close dimensions. Learn to work to them. It's not difficult, it just takes a little time to change the way you think and work.
When working to tight dimensions, three cuts are generally suggested, assuming you have .03" stock to remove. First cut is 1/3 of the remaining material, with the second cut an additional third. That loads the tool uniformly, so the last amount to be removed will be removed in accordance to the amount selected by the dial, which, hopefully, is the final third.
If, when roughing, there is more than .03" to be removed, I recommend that a fourth pass be added--that one to achieve the .03" oversize, from which you begin the finish cuts.
When doing external work, do not attempt to hit diameters in cold rolled steel, or other materials that respond poorly to light cuts. Instead, target a finish diameter .0005" greater than the finish diameter. Polish the remaining half thou. That improves surface finish and allows one to achieve a tight tolerance without fear of going undersize. Do not use a file. Ever. Files are very capable of cutting a part out of round, unlike using an abrasive strip. Be mindful of the temperature of the polished item. Heat develops rapidly by polishing and tends to yield undersized work after it has cooled.
Harold
Wise people talk because they have something to say. Fools talk because they have to say something.
Re: Kozo A3 in 1.5" scale - new project
One other suggestion when it comes to the drivers and axles as far as quartering. Make a jig that use a slip fit pin for the crank pin hole, then broach your keyways in all of the drivers. This will assure your keyways are identical. I then machined a block square and bored a hole a couple of thousands bigger than the axles and tapped a hole for a set screw to secure the axle in the block. I was then able to cut the keyways 90degrees apart. Using the keyway is a recomended way to assure that the axles dont spin at all while you are pressing them in the wheels.
www.chaski.com

Re: Kozo A3 in 1.5" scale - new project
No doubt, accept that, that very sentence is duplicated in nearly every book I've ever read on HSM or building a live steam locomotive including Nelson's tome which is pretty much the standard. But, I get your point.I wonder if you know how that sounds to someone that understands proper fits. Your comment is simply not true.
I don't disagree with you Harold, and I'm grateful for the description of how to machine to close fits as believe it or not nobody has ever told me how they do it, as if it's some big secret. I tend to ramble, and didn't make my point clear in the original post. You don't need to know what the dimensions are. Your micrometer or caliper could be telling you .502 when the shaft is actually .499 as long as YOU are able to ascertain what it takes to make the close fit then all is good.
Ken-
Re: Kozo A3 in 1.5" scale - new project
Please do not lose sight of the fact that many of the books you read are written by people that do not have credentials as machinists. What you read is their opinion, and often does not reflect good practice. Sort of like trusting everything you read on the internet.kenrinc wrote:No doubt, accept that, that very sentence is duplicated in nearly every book I've ever read on HSM or building a live steam locomotive including Nelson's tome which is pretty much the standard. But, I get your point.I wonder if you know how that sounds to someone that understands proper fits. Your comment is simply not true.
Anyone that promotes the idea that there is no need to work to anything under a thou is simply not well informed.
We have had some retired tool & die men join our forum recently. One of them displays his talent regularly through posted pictures. Read his comments and take note that he discusses tenths routinely. That's the real world-----where those that understand express themselves properly.
Harold
Wise people talk because they have something to say. Fools talk because they have to say something.
-
steamin10

- Posts: 6712
- Joined: Sun Jun 08, 2003 11:52 pm
- Location: NW Indiana. Close to Lake Michigan S. tip
Re: Kozo A3 in 1.5" scale - new project
Harold: Other than a Tricorn scraper cut on a file, are you saying that backing an emery or similar strip with a file for a couple of passes is bad practice? It is meant to keep the surfaces flat, rather than rounding over edges and getting a taper from over doing it. IMHO a file has little to do with finishes, except to break sharp corners. Why use a file, when you have a turning machine designed to remove material, parallel and square. My only issue is to get the surface finer, for a good finish, even on crappy material that does not finish well. Then we have a truer measurement, with finer surface, instead of just the tips of the micro-mountains. I hope I am expressing my self understandably here.
Big Dave, former Millwright, Electrician, Environmental conditioning, and back yard Fixxit guy. Now retired, persuing boats, trains, and broken relics.
We have enough youth, how about a fountain of Smart. My computer beat me at chess, but not kickboxing
It is not getting caught in the rain, its learning to dance in it. People saying good morning, should have to prove it.
We have enough youth, how about a fountain of Smart. My computer beat me at chess, but not kickboxing
It is not getting caught in the rain, its learning to dance in it. People saying good morning, should have to prove it.
Re: Kozo A3 in 1.5" scale - new project
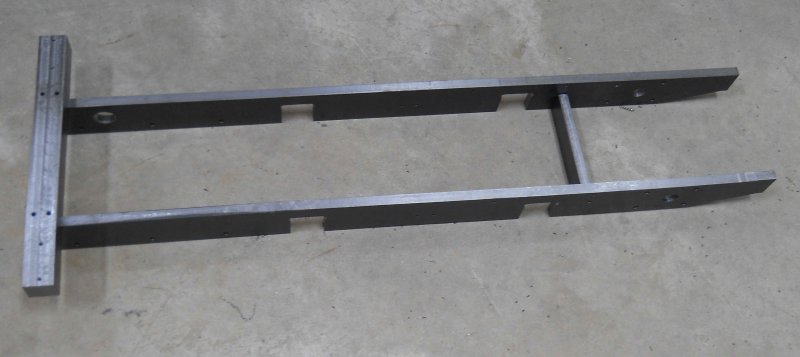
Here are some pics of my progress thus far:
I have made a start on the frame, which has 5 main pieces: 2 side rails, a front bumper, a rear footplate, and a crossmember. I didn't take any pics milling the side rails from 1/2x2.5" CRS, so here are a few more recent progress shots.
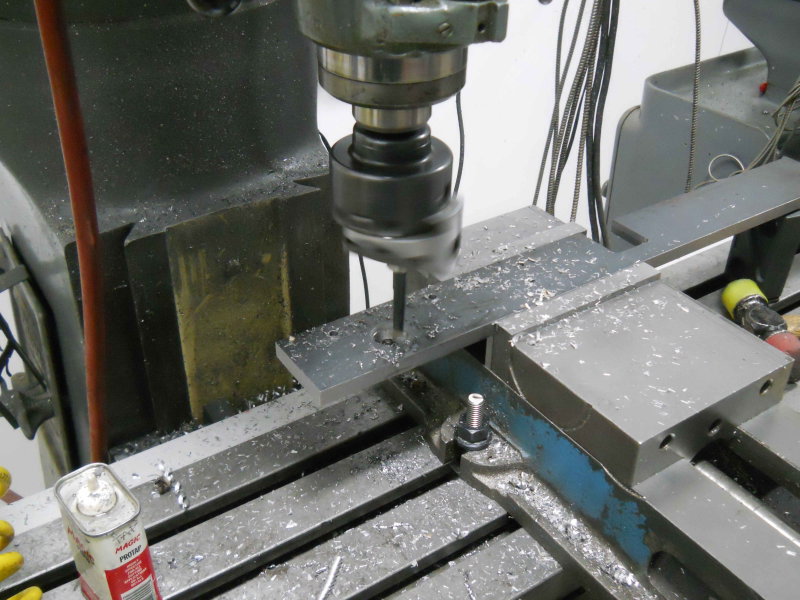
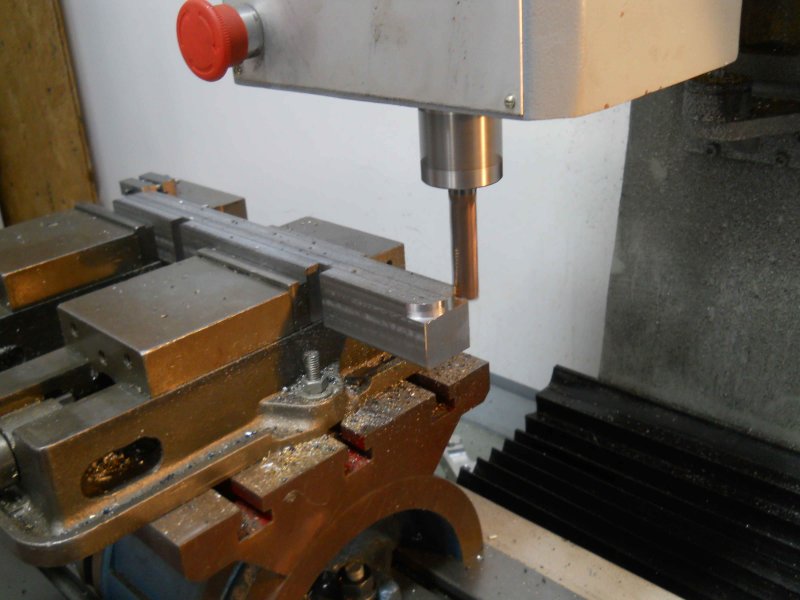
The left side rail needs a 1.125" hole for the blowdown valve. My largest drill is 15/16, so I bored it out:
Next, fabricated the rear footplate from 1.5" square CRS milled down to 1.25x1.25.
I used the footplate holes as a drilling template on the side rails:
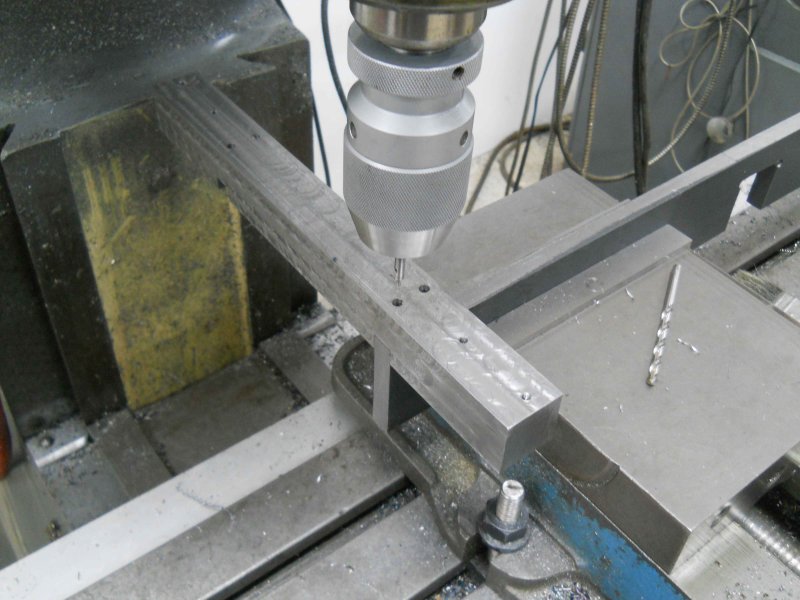
The frames are too big for my little tapping stand, so I used the mill spindle to start the 10-32 tap straight.
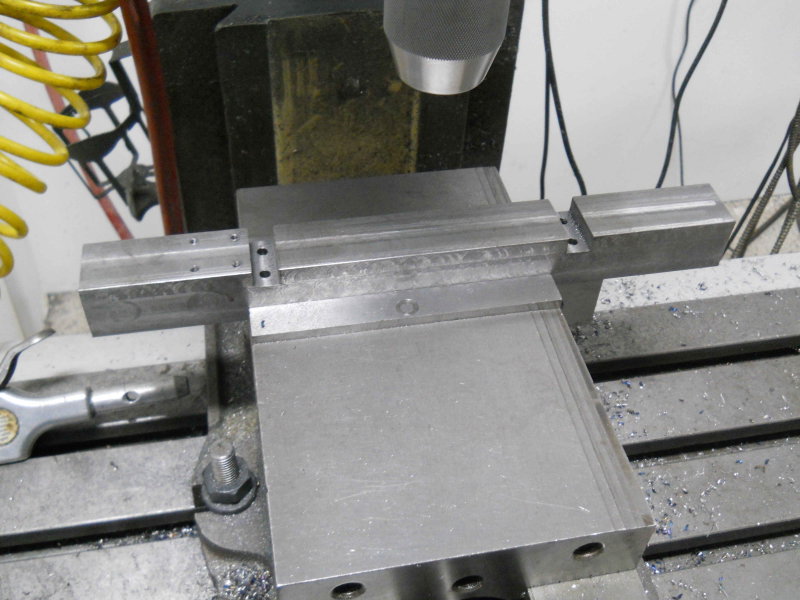
Here are the side rails, foot plate, and crossmember in "position". I'm waiting to get fasteners from Enco. The crossmember needs to be remade due to "operator error".
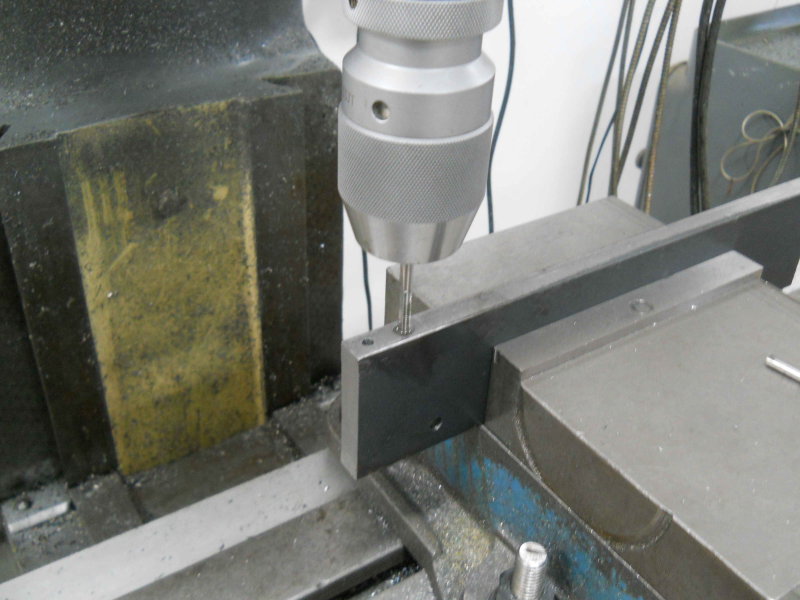
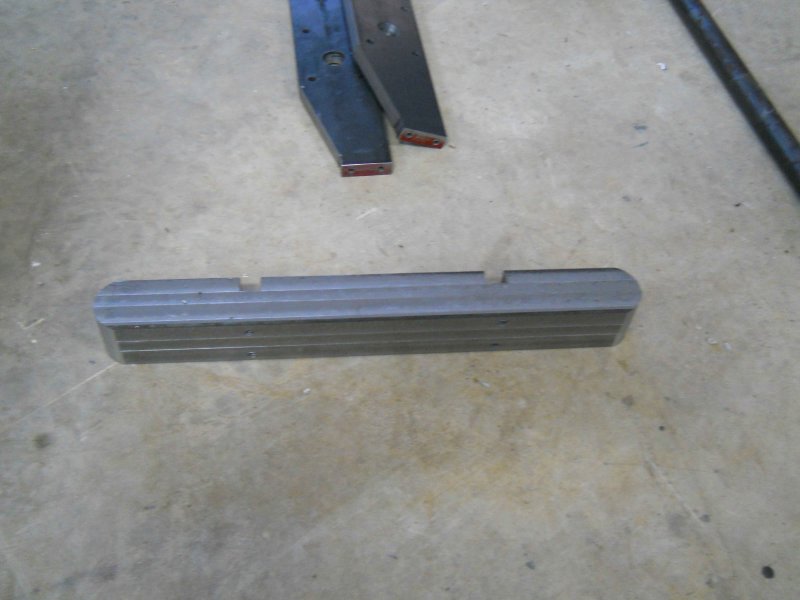
Next is the front bumper, made from 1.5x1.5x13.375 CRS. After milling and drilling the mounting slots, I used the CNC mill to round the ends:
The front bumper will get a lot more threaded holes, but I'll hold off until I make the parts to mount there.
The engine has a few hundred parts to make, but these are the largest sizewise. The side rails are 3' long, and are the largest pieces I have ever machined. Though the Bridgeport table is 9x42, the spindle X travel is about 24" max, so I needed to move the rails sideways a couple of times to mill and drill all the features. For alignment, I use a pair of ground rods that fit in the table slots. The pieces are pressed against these rods before clamping. I used parallels under the rails to clear the table.
I have ordered the driver castings from Friend's Models, and will start on those when they arrive.
I have a pretty good supply source for free CRS/12L14 steel cutoff pieces in various random sizes, so I will likely try to make parts in random order as I find drops that seem to fit them. I also ordered some SS bars from Enco that will be used to make the fire grate, so that's a likely nearterm job too.
No lack of things to do.
I have made a start on the frame, which has 5 main pieces: 2 side rails, a front bumper, a rear footplate, and a crossmember. I didn't take any pics milling the side rails from 1/2x2.5" CRS, so here are a few more recent progress shots.
The left side rail needs a 1.125" hole for the blowdown valve. My largest drill is 15/16, so I bored it out:
Next, fabricated the rear footplate from 1.5" square CRS milled down to 1.25x1.25.
I used the footplate holes as a drilling template on the side rails:
The frames are too big for my little tapping stand, so I used the mill spindle to start the 10-32 tap straight.
Here are the side rails, foot plate, and crossmember in "position". I'm waiting to get fasteners from Enco. The crossmember needs to be remade due to "operator error".
Next is the front bumper, made from 1.5x1.5x13.375 CRS. After milling and drilling the mounting slots, I used the CNC mill to round the ends:
The front bumper will get a lot more threaded holes, but I'll hold off until I make the parts to mount there.
The engine has a few hundred parts to make, but these are the largest sizewise. The side rails are 3' long, and are the largest pieces I have ever machined. Though the Bridgeport table is 9x42, the spindle X travel is about 24" max, so I needed to move the rails sideways a couple of times to mill and drill all the features. For alignment, I use a pair of ground rods that fit in the table slots. The pieces are pressed against these rods before clamping. I used parallels under the rails to clear the table.
I have ordered the driver castings from Friend's Models, and will start on those when they arrive.
I have a pretty good supply source for free CRS/12L14 steel cutoff pieces in various random sizes, so I will likely try to make parts in random order as I find drops that seem to fit them. I also ordered some SS bars from Enco that will be used to make the fire grate, so that's a likely nearterm job too.
No lack of things to do.
Re: Kozo A3 in 1.5" scale - new project
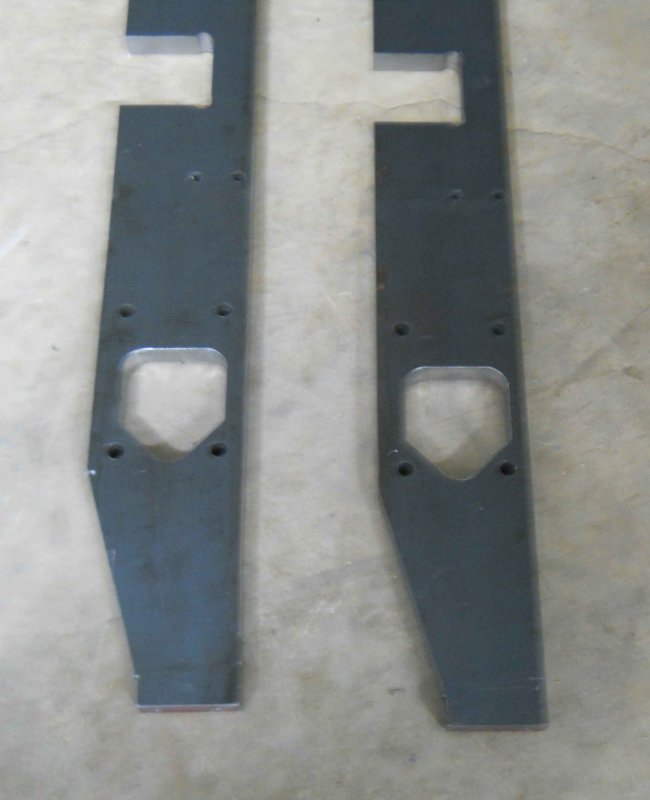
Managed a bit more progress by milling the opening for the tee in the side rails. First CNC op was a pocket using a .5" roughing endmill leaving .025" clearance:
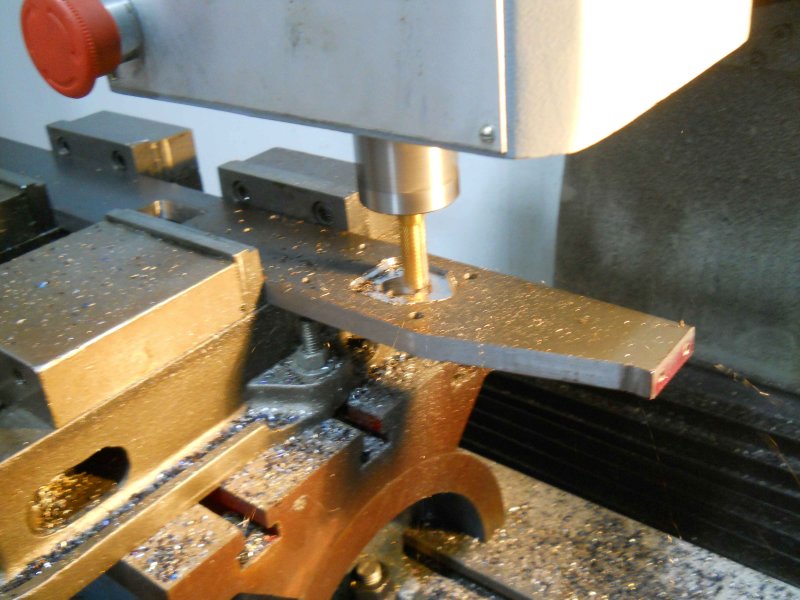
Then a finish profile cut with a .25" carbide endmill:
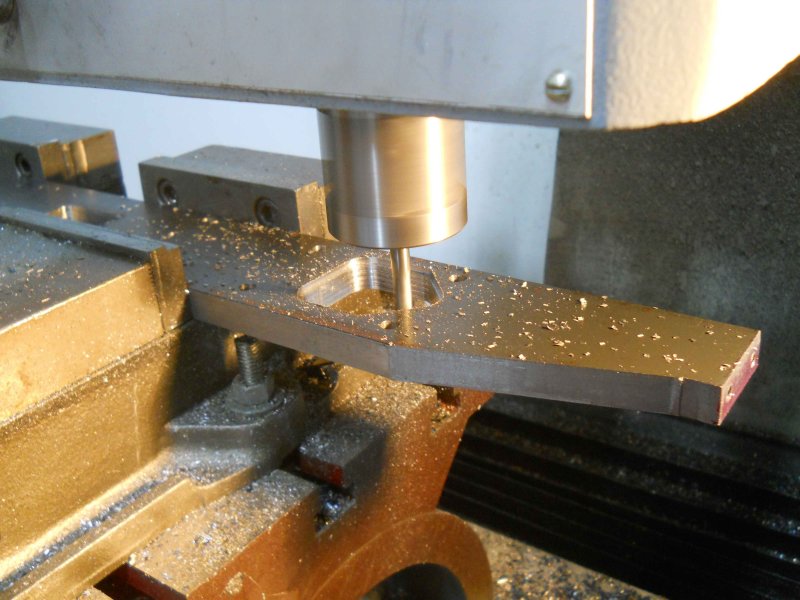
After deburring the edges:
Then a finish profile cut with a .25" carbide endmill:
After deburring the edges:
-
tailshaft56
- Posts: 885
- Joined: Sun Oct 12, 2003 10:12 pm
- Location: Miami Oklahoma (Palm trees not included)
Re: Kozo A3 in 1.5" scale - new project
Looking good!
Dennis
Thermal Arc 185-TS
Millermatic Challenger 172
Victor O/A
Atlas Craftsman 12 by 24 Lathe
Esab PCM-875
Wholesale Tool Mill-Drill
Thermal Arc 185-TS
Millermatic Challenger 172
Victor O/A
Atlas Craftsman 12 by 24 Lathe
Esab PCM-875
Wholesale Tool Mill-Drill
Re: Kozo A3 in 1.5" scale - new project
I would hesitate to say that using a file in the fashion you described would be bad practice, but I highly recommend files be kept away from fine surfaces that one hopes to improve, particularly if they have a tight tolerance. That's especially true if the file is very sharp. The problem is, they cut too fast and easy, so you can destroy with a single stroke, that which should have been a precision fit .steamin10 wrote:Harold: Other than a Tricorn scraper cut on a file, are you saying that backing an emery or similar strip with a file for a couple of passes is bad practice? It is meant to keep the surfaces flat, rather than rounding over edges and getting a taper from over doing it.
There used to be a reader on the board, now long gone, who loved to argue this point. It was his opinion that he could file well, and could hold tight tolerances. That still overlooks the fact that it borders on the impossible for one to file only on fixed degrees of angle, so a file is presented to the work and withdrawn, most generally with one side receiving more pressure than the other, and, virtually without fail, one portion of the circumference experiencing slightly more rotation against the file than the balance. Net result? An out-of-round and/or tapered condition.
Fatal?
Likely not---but why introduce any problems to what is already a difficult task?
By applying a strip of abrasive cloth, always slightly narrower than the width of the journal to be polished, you can avoid rounding the ends. All it takes is a little practice. One polishes then measures, to see where more attention is required. So long as you're using a strip, and applying even pressure, it's amazingly easy to keep a diameter straight.
Using any backing surface (such as a file) when polishing tends to prolong the amount of time required to achieve the goal. So little of the polishing cloth is in contact that very little cutting is performed. You can generally achieve 180° of surface coverage without much trouble by holding polishing cloth by both ends and bringing them parallel to one another. That tends to improve the surface finish and reduce polishing time.
Harold
Wise people talk because they have something to say. Fools talk because they have to say something.