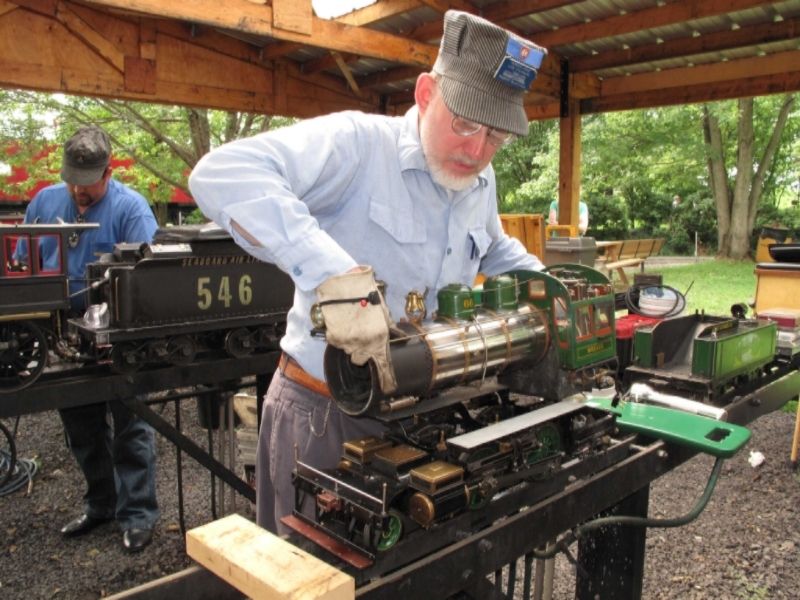
Hello all, Iam thinking about building a locomotive stand that allows me to rotate my steam engine 180 degrees, so the boiler is on the bottom and the undercarriage upside down, but upright- where I can work on it without climbing underneath and constantly dropping tools and dirt onto my face. Two seconds of thinking about gravity and bad design had me shuddering at the possibilities of attaching the loco to some kind of bearing and clamp, fore and aft, then having the loco roll over in the stand and never again return to its lawful upright position. Clearly there needs to be some serious ratcheting, gearing, or other method to control the rotation of the loco, once it is clamped in the stand.
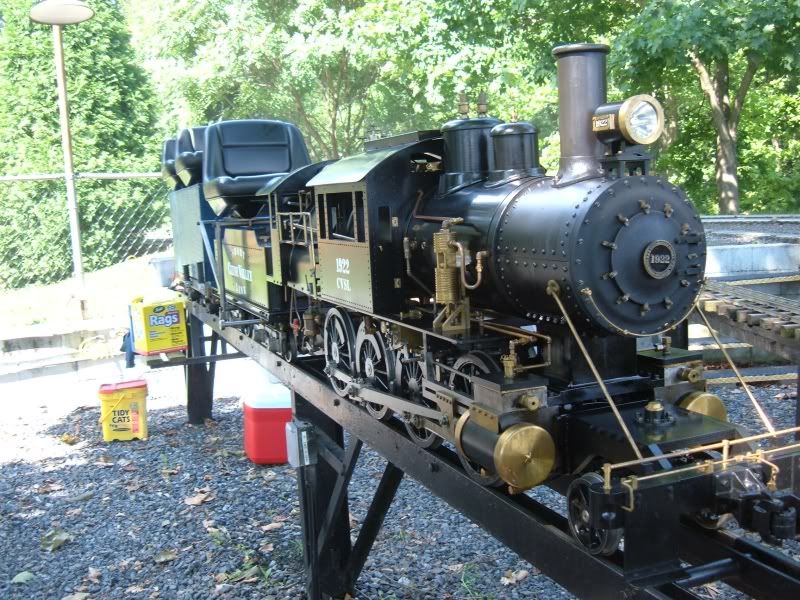
My heavist loco weighs 1800 #s max and is just shy of 7' x 24" x 40" tall.
Does anyone have a simple design for making such a stand, or any possible ideas for a mechanism to rotate the loco, they could share?
Thanks very much!
Glenn
Locomotive stand design
-
Glenn Brooks
- Posts: 2930
- Joined: Mon Nov 10, 2014 1:39 pm
- Location: Woodinville, Washington
Locomotive stand design
Moderator - Grand Scale Forum
Motive power : 1902 A.S.Campbell 4-4-0 American - 12 5/8" gauge, 1955 Ottaway 4-4-0 American 12" gauge
Ahaha, Retirement: the good life - drifting endlessly on a Sea of projects....
Motive power : 1902 A.S.Campbell 4-4-0 American - 12 5/8" gauge, 1955 Ottaway 4-4-0 American 12" gauge
Ahaha, Retirement: the good life - drifting endlessly on a Sea of projects....

Re: Locomotive stand design
This is really, REALLY dependent on how your locomotive is built and how the boiler is attached to the frame. You'll have to grab it and cradle it in just the right spots. With a big / long locomotive this could get really complicated. I suppose cradling the boiler with felt lined half-hoops is a start, then holding on to the chassis in all axis as well so it doesn't stress when going sideways. think about all the stuff on a loco that is intended only to be structural when upright.
Then you'll want to rotate it about its center of gravity as much as possible (to make it easier on you and the loco) so you are rotating it at a point above the track level.
Mine carts are frequently rotated 180 degrees to dump them at ore processing facilities, seen videos of it. Usually they have a large circular bearing surface on either end that sits on rollers. The car drives through the circles. Sometimes the center of rotation is set at the coupler height, and the couplers are designed to allow rotation of the car 180 degrees from the cars around it, so the cars drive through one by one, are rotated and then rotated back, then the train moves forward to the next car in a largely automated fashion. Can't find any videos of it right now.
Some food for thought anyway. An easier solution would be to make a stand that raises up very high so you can stand under it. this could be done using jack screw mechanisms, Bill Shields build something like that except shorter, for going from ground level to regular stand height. A friend nearby also has a nice example of a home-made vertical lift using a similar method.
Last edited by Harlock on Tue Mar 15, 2016 9:32 pm, edited 1 time in total.
Live Steam Photography and more - gallery.mikemassee.com
Product Development and E-Commerce, Allen Models of Nevada
Product Development and E-Commerce, Allen Models of Nevada

Re: Locomotive stand design
Some of the serious automotive guys have 'rotiseries' that they rotate entire cars in so they can work on them.
Pete
Pete
Just tryin'
-
Bill Shields

- Posts: 10589
- Joined: Fri Dec 21, 2007 4:57 am
- Location: 39.367, -75.765
- Contact:
Re: Locomotive stand design
if I turned my big loco upside down, the boiler would stay put but there are a lot of other things that would fall out - many related to springs / rigging / lubrication system, covers, etc: all stuff that relies on gravity to stay put.
little Tom Thumb spends 1/2 of its service live 'wheels up' but you sort of expect that with a vertical boiler loco and plan for it.
in all honesty, I am not sure how I would hold my big loco in places that would sane if planning to up-end it.
my design solution to this problem was to make the boiler easy to remove. It is not a 10 minute job, but in 1.5 hours, I can have it on the floor with the chassis open and ready for anything.
I also have a screw up / down jack that will put the loco all but on the floor to help with topside work but does not to higher than my 'maintenance stand' which puts the wheels at mid-chest height which I find comfortable to work underneath as needed.
I can supply pictures designs if you like.
Too many things going on to bother listing them.
-
Mike Walsh
- Posts: 957
- Joined: Sun May 06, 2007 10:14 pm
- Location: St. Louis, MO
Re: Locomotive stand design
Nice thing about the larger scales is that you can easily design for maintainability.
If you need to repipe it, pipe it such that NOTHING is attached to the frame of the locomotive.
If you are rebuilding it, design it so that the boiler is NOT attached to the cab. Design the cab such that it will come apart around the boiler (IE bolt together around everything in the cab). If you have to run pipes through a wall, NOTCH the wall, don't drill a hole... Unless you plan to have a connector on both sides.
If you design it in this manner, you should be able to unbolt the saddle, unbolt the boiler from the firebox end, and lift it straight up, leaving you with a boiler frame. An engine hoist/cherry picker will probably do the job for your small boilers. If you were doing hudsons and pacifics like us.... Would want something bigger (or two pickers)...
We are learning quickly about the design for manufacturability. The more thought we put into our modifications/designs now, the less time required later on to disassemble and get to what you need to get to.
The roof on our #928 comes off with the removal of four bolts. The cab sides come apart with removal six bolts per side. The throttle quadrant was welded to the boiler, so we don't have to remove that. We usually have to remove throttle rods in order to pull the cab front off, but that isn't too bad -- pull the clevis pins, unscrew clevis from one end, and remove.
I also recommend perhaps getting a motorcycle lift. Your engines are short enough that a motorcycle lift may work. Keep in mind the stability of the lift though. I wouldn't be rolling it around with your engine four feet in the air -- lower it to the lowest position, move, then raise again. We really like having the engines ~24" above the working area floor so we can sit on a bucket, instead of sitting on a floor. It makes work so much easier, especially when you're taking measurements -- it's much more difficult to read a pair of calipers from a specific angle when it's on the floor, with the dial facing the floor, than it is to lay down on the floor if needed, and read the dial from same angle if the calipers are 24" higher than the floor, so to speak.
Don't be afraid to remove the boiler from the frame if you need to do running gear work. May be difficult right now as you don't know how the boilers come off yet... But I'm sure you can figure out a way to remove the boiler mounting bolts. If you're lucky, there are brackets on the rear of the firebox. One of our engines has the mounting bolts for the boiler that are just above the front end of the delta trailing truck, and actually thread into the mud ring! I'm so thankful that they came out with ease. You can bet I'll be coating the new bolts with never seize!
I don't recommend flipping the boiler for a loco of this size. If you build a stand, make sure you can access through the rails. Perhaps a set of 2x2 square tube with stretchers every ~3 feet. This will allow you to reach in and do whatever work is needed from below.
-Mike
-
Glenn Brooks
- Posts: 2930
- Joined: Mon Nov 10, 2014 1:39 pm
- Location: Woodinville, Washington
Re: Locomotive stand design
Thanks all. I like the idea of removing the boiler. This will be a one time (50 year) major tear down anyway, not a daily, or even an annual Maintanance routine. Will take a look at how everything is constructed in a week or so, and may go that route by planning to just flipp the frame. I know I have some work to do replacing a set of clam shell ash pans that open and close manually. Iam thinking it Might be a lot easier with the fame upside down - my primary motivation for exploring the stand idea.
Actually with the boiler and cab off, now that I think about it, my engine hoist would turn the frame easy enuf... Probably just need to make up a decent fixed stand at a reasonable height to work on.
Gpb
Actually with the boiler and cab off, now that I think about it, my engine hoist would turn the frame easy enuf... Probably just need to make up a decent fixed stand at a reasonable height to work on.
Gpb
Moderator - Grand Scale Forum
Motive power : 1902 A.S.Campbell 4-4-0 American - 12 5/8" gauge, 1955 Ottaway 4-4-0 American 12" gauge
Ahaha, Retirement: the good life - drifting endlessly on a Sea of projects....
Motive power : 1902 A.S.Campbell 4-4-0 American - 12 5/8" gauge, 1955 Ottaway 4-4-0 American 12" gauge
Ahaha, Retirement: the good life - drifting endlessly on a Sea of projects....
-
Bill Shields
- Posts: 10589
- Joined: Fri Dec 21, 2007 4:57 am
- Location: 39.367, -75.765
- Contact:
Re: Locomotive stand design
this is how a friend did it 50 years ago.
4 bolts and EVERYTHING comes off - cab, piping, pump...designed to remove the boiler when finished running -> to make it easy to transport as 2 pieces each around 75# max
Getting the boiler off a bigger loco takes almost as much planning. I leave the smokebox in place, which is easy since it is only held on with permatex between the boiler and mounting ring.
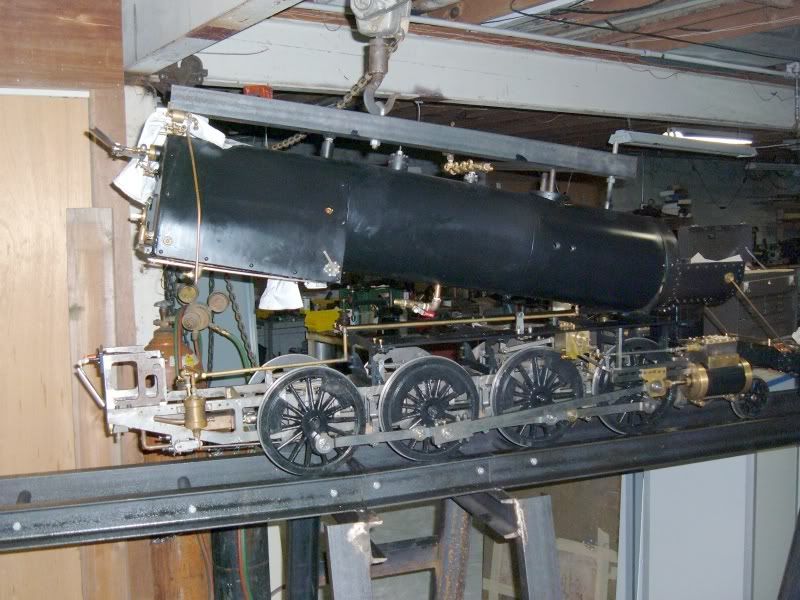
my center cab is mounted to the running boards.
the rear cab to the frame, but must be removed to get the boiler off (a lot easier to get at the piping).
all in all, it is about a 2 hour job start to 'hanging around'
not something you want to do every weekend, but when you have inside valve-gear -> something that you must plan on doing since it is not a question of 'IF' but when.
4 bolts and EVERYTHING comes off - cab, piping, pump...designed to remove the boiler when finished running -> to make it easy to transport as 2 pieces each around 75# max


Getting the boiler off a bigger loco takes almost as much planning. I leave the smokebox in place, which is easy since it is only held on with permatex between the boiler and mounting ring.


my center cab is mounted to the running boards.
the rear cab to the frame, but must be removed to get the boiler off (a lot easier to get at the piping).
all in all, it is about a 2 hour job start to 'hanging around'
not something you want to do every weekend, but when you have inside valve-gear -> something that you must plan on doing since it is not a question of 'IF' but when.
Too many things going on to bother listing them.
-
Bill Shields
- Posts: 10589
- Joined: Fri Dec 21, 2007 4:57 am
- Location: 39.367, -75.765
- Contact:
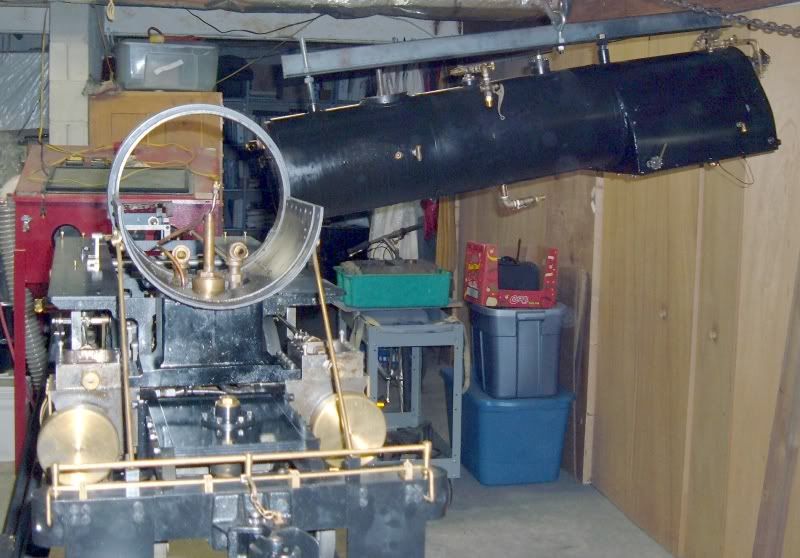
Re: Locomotive stand design
what it looks like all assembled

Too many things going on to bother listing them.
-
Bill Shields
- Posts: 10589
- Joined: Fri Dec 21, 2007 4:57 am
- Location: 39.367, -75.765
- Contact:
Re: Locomotive stand design
Ever seen a ROTARY DUMP?
If you WANT to turn something RAILROAD UPSIDE DOWN....this is how they unload coal trains.
https://www.youtube.com/watch?v=DbJl_Astx_w
yes...it does take special couplers....duh...
I built a few of these things for o-gauge electric models a few years ago and it is a LOT of work...
If you WANT to turn something RAILROAD UPSIDE DOWN....this is how they unload coal trains.
https://www.youtube.com/watch?v=DbJl_Astx_w
yes...it does take special couplers....duh...
I built a few of these things for o-gauge electric models a few years ago and it is a LOT of work...
Too many things going on to bother listing them.
Re: Locomotive stand design
...saw the following at the Nuremburg, Germany Museum of Transportation back in 1988. This display was designed so people can see the brake rigging, piping and other under loco/tender details.
Appeared to be something like a 1" scale model. Might not be practical in 1.5" scale or for something like a heavy overhaul project, but you get the idea. And yes...push a button, and watch the model rotate (without dumping). Neat display! Carl B.
Life is like a sewer...what you get out of it depends on what you put into it!
I don't walk on water...I just learned where some of the stepping stones are!
I love mankind...it's some of the people I can't stand!
I don't walk on water...I just learned where some of the stepping stones are!
I love mankind...it's some of the people I can't stand!
-
Bill Shields
- Posts: 10589
- Joined: Fri Dec 21, 2007 4:57 am
- Location: 39.367, -75.765
- Contact:
Re: Locomotive stand design
I found one of my rotary dumps on you tube.
look up CHI-TOWN ROTARY DUMP
https://www.youtube.com/watch?v=MDOmYdq1ssA
as you can see, balance is very important.
Finding / setting center of gravity so that you CAN rotate the load without it getting away from you is a real trick.
for a large loco, boiler included, the center of gravity is probably quite a bit above the centerline of the couplers.
a good solid modeling software package could calculate it for you before you built the rotating stand, but in the end, I really do not think it would be worth it.
Dealing with large heavy lumps of iron is one of the reasons that I am migrating back to 3/4 or small 1" scale locos...
Too many things going on to bother listing them.
-
makinsmoke

- Posts: 2265
- Joined: Thu Jul 10, 2003 12:56 pm
- Location: Texas Hill Country
Re: Locomotive stand design
Yup, the prototype coal cars have one end painted where the rotary coupler is. If you get two cars with that paint together...