Small wprld. Thought I had the only Storm of this model.
As it turns out, my tool holder assemble is complete but I have it torn apart because I broke the tool bit feed screw. It was frozen and pretty small and I forced it.
Anyway, since I had no immediate need for the boring bar, I put the tool holder in a container until I find some time to machine a replacement screw.
I'll take some pictures of the assembly this weekend for you along with the measurements you might need. You don't mention how much of the tool holder assembly you have on hand.
I'm working from memory right now. But I remember the tool holder is part of the end of the spindle and there is a flat plate with about 4 scews. Inside is a the tool holder which is tool carrier and a screw that pushes the too carrier out towards the cylinder wall. I think there is a screw that holds it in position. Getting ahead of myself!
Email you later.
Steve
Portable Boring Head
Re: Portable Boring Head
Jet vert Mill, Champion 12X30 lathe, Amer. Mach. Tool radial drill, 24X60 LeBlond lathe, Scharmann 3" Hrz Brg Mill, Steptoe 18" Shaper, S/B Shaper,B&S (No.4 36") Gear Cutting Mach., Verson 22.5T Press Brake, Enco 12" hrz. saw, McEnglevan foundry furnace, Rockwell 14X42 lathe, K&T 2H univ horz. mill,DoAll 16-2 Vrt. bandsaw,Canedy-Otto drill press,Buffalo Iron Worker
Re: Portable Boring Head
This is what I have of it
click here
And thank you, I have looked high and llow for tooling for this the dimensions and pics are much needed and should enable me to build my own bit holders
click here
And thank you, I have looked high and llow for tooling for this the dimensions and pics are much needed and should enable me to build my own bit holders
Re: Portable Boring Head
Forturately (for you) mine is torn apart at present, until I can make the small feed screw that I broke when disassembling it.
I have take a few picture and traced the parts that I think you might be missing.
I can see from your picture that you do have the bottom plate and that is good since it has some critcal dowel pins that keep things lined up on assemble. I can also see the feed screw in the picture and hope that it is still attached to the back piece that the tool holder latches into. If not, I have traced and measured it as well.
The tricky part will be the tool holder "tail end" since it will have to be free hand milled and finished to provide the radius and ball latch/release configuration. Nothing critical, just to keep the tool holder in place while it might be spinning outside the bore. Otherwise, the ball should release when you pull the tool holder out with your fingers or pliers for sharpening. (It is common to re-touch the tool between passes)
I hope this will help.
Steve
I have take a few picture and traced the parts that I think you might be missing.
I can see from your picture that you do have the bottom plate and that is good since it has some critcal dowel pins that keep things lined up on assemble. I can also see the feed screw in the picture and hope that it is still attached to the back piece that the tool holder latches into. If not, I have traced and measured it as well.
The tricky part will be the tool holder "tail end" since it will have to be free hand milled and finished to provide the radius and ball latch/release configuration. Nothing critical, just to keep the tool holder in place while it might be spinning outside the bore. Otherwise, the ball should release when you pull the tool holder out with your fingers or pliers for sharpening. (It is common to re-touch the tool between passes)
- Tool holder assembly on lower plate. Note detent retention ball engaged.
- Tool holder feed block, tool holder and tool feed screw, disassembled for clarity. Note retention detent ball.
- Side view of tool holder assembly
- measurements of tool holder parts.
Steve
Jet vert Mill, Champion 12X30 lathe, Amer. Mach. Tool radial drill, 24X60 LeBlond lathe, Scharmann 3" Hrz Brg Mill, Steptoe 18" Shaper, S/B Shaper,B&S (No.4 36") Gear Cutting Mach., Verson 22.5T Press Brake, Enco 12" hrz. saw, McEnglevan foundry furnace, Rockwell 14X42 lathe, K&T 2H univ horz. mill,DoAll 16-2 Vrt. bandsaw,Canedy-Otto drill press,Buffalo Iron Worker
-
tetramachine
- Posts: 236
- Joined: Sun Mar 19, 2006 6:27 pm
- Location: NJ
- Contact:
Re: Portable Boring Head
I have run both old Quick-way and Van Norman bars 40 years ago, so some things are not that clear. The holder assembly looks similar to the VN bars, there was a setting fixture, it looked like a tray the held the cutter assembly, and a micrometer head which contacted the cutting tip, graduated in .001" but showing the bore dimensions that would be cut. There were different cutter holders for larger bores but the same setting fixture. The Quick-way used a plug in type micrometer, and that does not appear to be the manner used on the Storm.
The manner of attaching the bar to the block was differend, they both used a shaft, with a toggle on the end which spanned the bottom bore of an ajacent cylinder, and was attached by a plate and nut on the VN and a tee slot rail on the QW.
There should be several sets of centering pins for the range of bores covered. I recall 1 inch for each range of centering pins. In practice you run the bar halfway down the cylinder, then expand the pins, lock down the cylinder bolt, then retract the pins, for boring. after boring, rotate the cutter head so the cutter is directly under the base, call it the 6:00 position where 12:00 is the open end of the machine, this reduces the scratch line from the cutter as the bar retracts. The Quick way has a alignment mark for this.
If there is a small flat wheel on the top of the machine that seems to do nothing, that is the lapping wheels for the cutter bits.
Good luck to find a manual.
My wheels don't slow me down
Re: Portable Boring Head
Thanks appreciate the pics and print it will come in handy, will try to scan in the old manual I have in the next few days, its tattered and worn but its all there
Re: Portable Boring Head
That would be great. Any manual for these old machines, big or small are always welcome. We maybe the only owners but until a week ago, I thought I had the only one. Who Knows, the had to have made more than two.
Post it here if you can so it will become part of this thread on the Storm Portable Boring Bar.
Always glad to help.
Steve
Post it here if you can so it will become part of this thread on the Storm Portable Boring Bar.
Always glad to help.
Steve
Jet vert Mill, Champion 12X30 lathe, Amer. Mach. Tool radial drill, 24X60 LeBlond lathe, Scharmann 3" Hrz Brg Mill, Steptoe 18" Shaper, S/B Shaper,B&S (No.4 36") Gear Cutting Mach., Verson 22.5T Press Brake, Enco 12" hrz. saw, McEnglevan foundry furnace, Rockwell 14X42 lathe, K&T 2H univ horz. mill,DoAll 16-2 Vrt. bandsaw,Canedy-Otto drill press,Buffalo Iron Worker
Re: Portable Boring Head
Just wanted you to know I havent forgotten you been having scanner issues, going to have to scan them in at work tommorrow, should have them up in the next day or two
Re: Portable Boring Head
Hello all,
I just purchased two storm NS boring bars 1 good and 1 for parts. If you ever had time to scan that manual I would really appreciate getting a copy.
Lance Alexander
I just purchased two storm NS boring bars 1 good and 1 for parts. If you ever had time to scan that manual I would really appreciate getting a copy.
Lance Alexander
Re: Portable Boring Head
I sent a spare Storm ns boring bar bit holder 2.6 to 4.5 off to Lacey M Williams. They are going to make me an inserted bit holder. I asked them to make a part number so anybody could order one.
Lance
Lance
-
sicivicdude
- Posts: 12
- Joined: Mon Oct 10, 2016 7:26 pm
- Location: Butner, NC
- Contact:
Re: Portable Boring Head
I know this is an old thread but I happen to have one of these wonderful machines. I got it from a co-worker who used it to punch out Harley cylinders. He gave me the torque plate when I picked it up. I bought it to use it on ATV/lawnmower engines (specifically, sleeving) but the first time I went to use it, I stripped out the primary drive gears (the larger was super brittle bakelite, ripped 5 or 6 teeth off) . Onward and upward, I went out and found an Ellis dividing head and cut a new set of spur gears to replace the factory gears.
After that fiasco, I tried it again on a different cylinder and was adjusting the tool bit depth at the bottom of the boring bar stroke and had the downfeed handle engaged and didn't catch it before I turned the motor on. In doing so, I stripped out the bevel gear that drives the downfeed. I was so disgusted with myself, I set the parts down and went back to working on other projects. Friend of mine got a wild hair to build a very special ATC (All Terrain Cycle, 3 wheeler) engine that needs a sleeve installed. I decided to go back after the boring bar to see if I could get something out of it.... I started punching out the sleeve but am now having issues holding the tool bit into the boring head.
These pics of the tool bit confirm the tool bit I have is not factory, not sure what I have on my hands, honestly. Going to go back after it tomorrow, I'll include pictures of what I have when I can.
Re: Portable Boring Head
Welcome to the board! I have an old Lempco ( original Rottler) but it is so different, I'm of no use now. These are great machines.
-
sicivicdude
- Posts: 12
- Joined: Mon Oct 10, 2016 7:26 pm
- Location: Butner, NC
- Contact:
Re: Portable Boring Head
Thanks, long time lurker.
Here's the monster, excuse the mess:
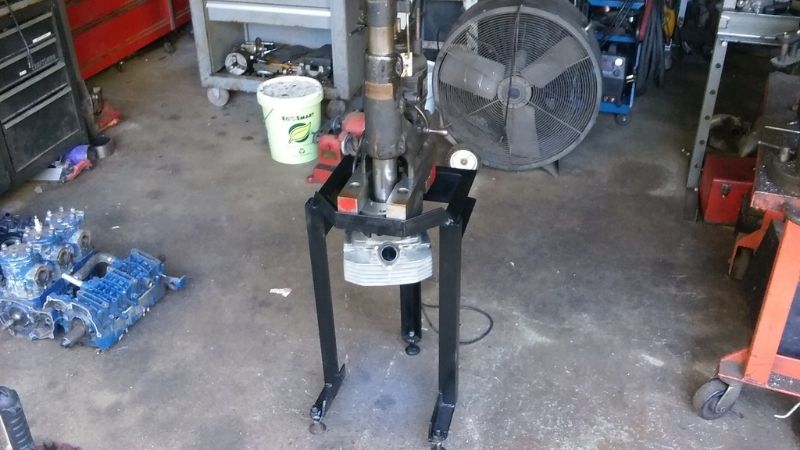
The tool bit holder I was given with the machine is on the left and (spoiler!) the new one is one the right.
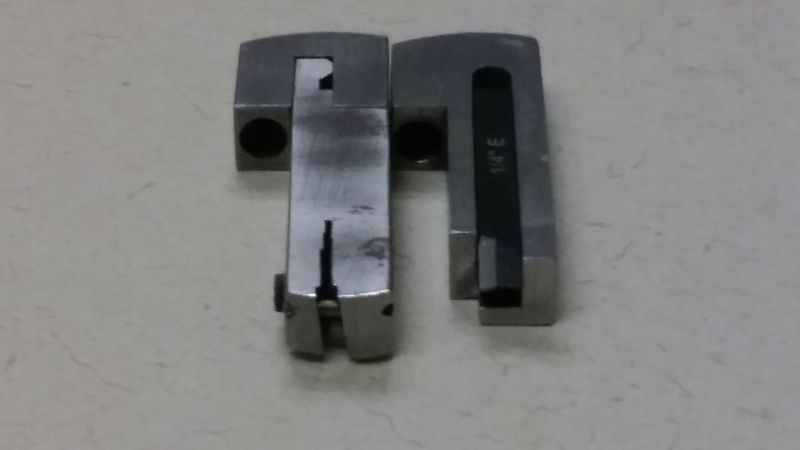
The old tool bit I was given was handmade for a carbide insert but it had a very strange upward pressure angle. When it got to an interrupted area (cutting a sleeve from a 2 stroke, ports and all) the column would unload and the bit would then try to remove too much material. After consulting with some machinists at work (I am not a machinist by trade specifically but know plenty) the suggestion was made that the rake of the tool bit was cut into the holder incorrectly. The only thing we could come up with was it was intended to be a negative rake insert holder but whoever made it cut the slot in incorrectly. Because he was using it to bore solid cast iron sleeves in Harley cylinders, no ill effects came of this.
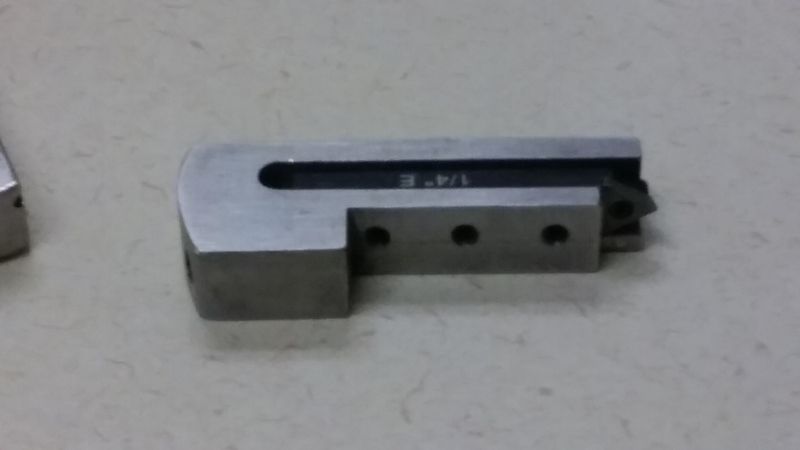
After doing a little homework on boring bar bits for other brand machines, it was decided that a zero rake insert with a back angle would work well. I decided to make the new holder one solid piece as well, to reduce the chance for chatter or unintended bit feeding. It uses a small universal insert holder (1/4") with an indexable bit for easy carbide change when needed.
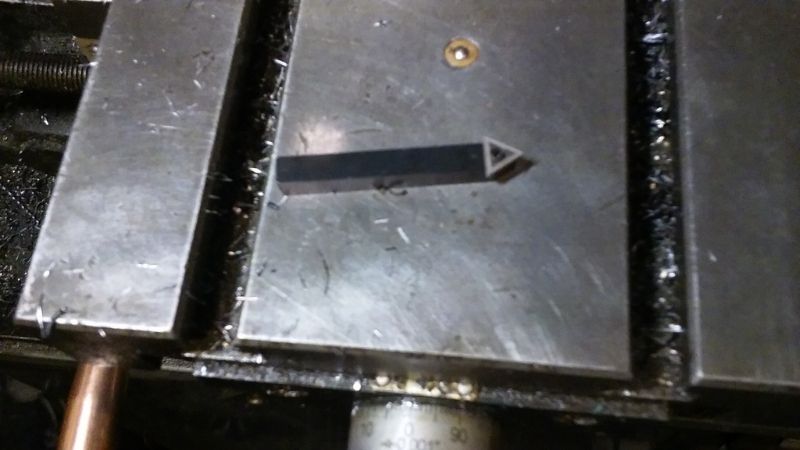
I made it so I could access the carbide with the 1/4" tool bit slid all the way into the holder but if a larger bore size is needed, I can extend the tool bit somewhat.
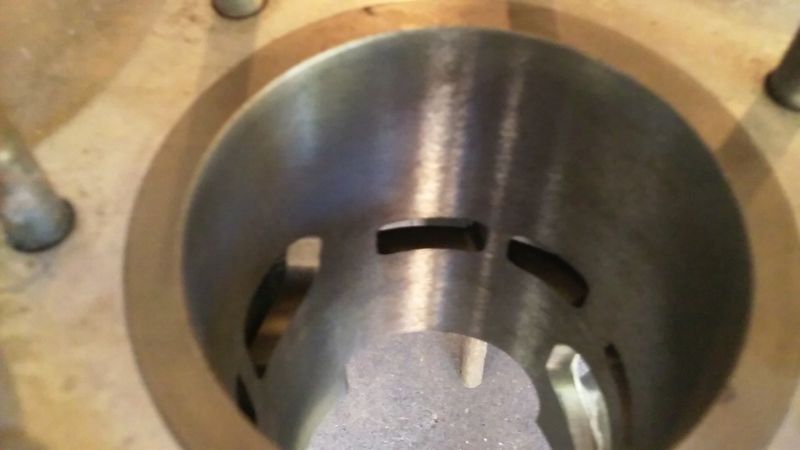
The original sleeve was a cast-in unit with a large locking ring made in around the port areas. Even after finishing to the size of the new sleeve, some of the original remains but the hole is a .003" press fit for the new sleeve:
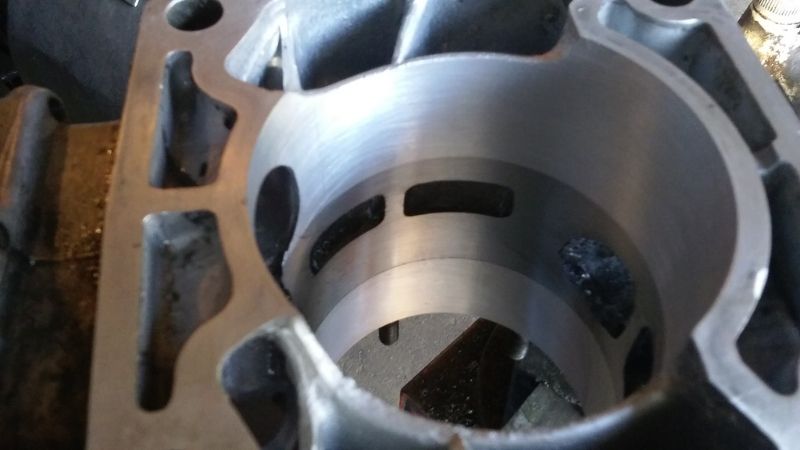
Afterwards, I made a counterbore for the stepped sleeve at the top, heated the cylinder to ~500°F, and dropped the new sleeve into the cylinder.
Here's the monster, excuse the mess:
The tool bit holder I was given with the machine is on the left and (spoiler!) the new one is one the right.
The old tool bit I was given was handmade for a carbide insert but it had a very strange upward pressure angle. When it got to an interrupted area (cutting a sleeve from a 2 stroke, ports and all) the column would unload and the bit would then try to remove too much material. After consulting with some machinists at work (I am not a machinist by trade specifically but know plenty) the suggestion was made that the rake of the tool bit was cut into the holder incorrectly. The only thing we could come up with was it was intended to be a negative rake insert holder but whoever made it cut the slot in incorrectly. Because he was using it to bore solid cast iron sleeves in Harley cylinders, no ill effects came of this.
After doing a little homework on boring bar bits for other brand machines, it was decided that a zero rake insert with a back angle would work well. I decided to make the new holder one solid piece as well, to reduce the chance for chatter or unintended bit feeding. It uses a small universal insert holder (1/4") with an indexable bit for easy carbide change when needed.
I made it so I could access the carbide with the 1/4" tool bit slid all the way into the holder but if a larger bore size is needed, I can extend the tool bit somewhat.
The original sleeve was a cast-in unit with a large locking ring made in around the port areas. Even after finishing to the size of the new sleeve, some of the original remains but the hole is a .003" press fit for the new sleeve:
Afterwards, I made a counterbore for the stepped sleeve at the top, heated the cylinder to ~500°F, and dropped the new sleeve into the cylinder.